
One of my favorite forms of animation found in various visual entertainment mediums, such as sci-fi films or games, is when a digital map expands to reveal its geographical routes or when the shape of the map is presented through a series of interconnected networks. This type of animation is often used to depict the spread of a virus, the relay of connections, or the advancements the allied forces must make—or the land the enemy has captured.
It can look a little something like this.

Image via Liu zishan
From point to point, these animations flow organically, resembling water flowing through a stream. This type of animation can be tedious due to the meticulous nature of animating each strand or route on the map in its direction. It’s not as simple as applying a linear wipe and being done with it. However, there is a new-ish After Effects plugin on the market called AutoFill, which helps us get such an effect.
Today, we’re going to take this image from Vjom.

And turn it into this.
This After Effects plugin is extremely user-friendly. In most cases, it’s as easy as adding the effect, selecting the source point, and hitting play. However, I have designed a specific task called ‘Returning home, a warning signal flares up, revealing the planet’s infected networks.’ This particular task requires me to utilize most of the plugin’s settings. Therefore, whether you plan to create a sci-fi map or seek tips on using the plugin, this should be helpful to you.
Step 1 – Growth Points
The plugin works with everything with an alpha channel; shapes, vectors, masks, TIFF files, and PNG files. It’s essential to format your map before importing it into After Effects. I’ve used the image from Vjom, and I’ve also pulled a select number of individual routes from the map as a separate PNG to act as the ‘infected network route.’
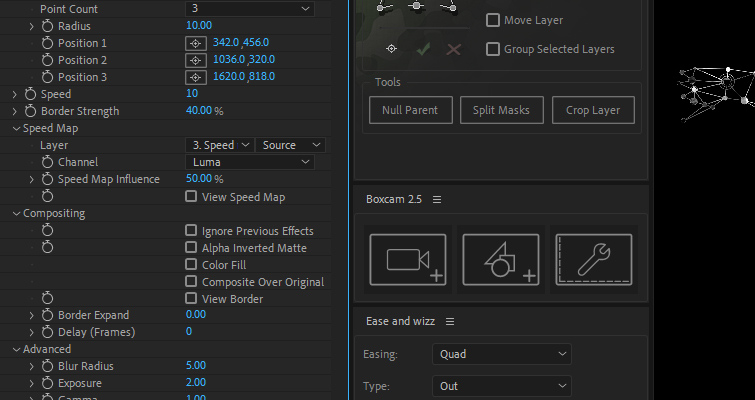
Create a new composition, add the PNG to the composition, and then add AutoFill.
The source of the growth will depend on your story, but for our example, we will simultaneously activate the network relay in California, France, and Australia. Therefore, I will position a source point near the relay in California and add two more by selecting the drop-down menu and changing the number of points to three. Then, I will position these two additional points near France and Australia.
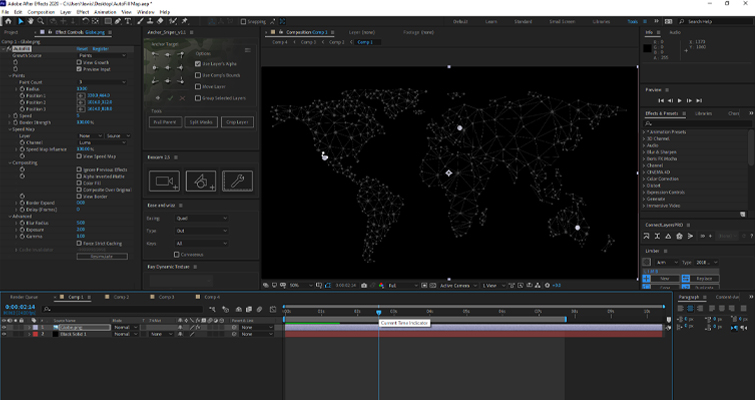
After hitting play, we already have this. This plugin is so simple and easy to use. We already have a nice-looking map reveal, and we’ve only added the effect to the file. Can we even call this a tutorial?

If you find that the AutoFill isn’t reaching individual connections or routes of your map, decrease the border strength to a setting that starts to fill the desired areas, but make sure you don’t make the setting weak enough that it connects visually disconnected paths.
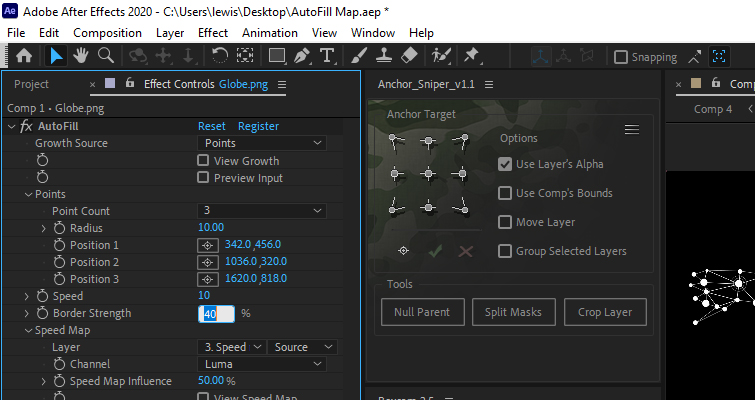
Step 2 – Speed
While I find the animation cool, the speed is too slow, and the way it spreads, although organic, is too uniform. Therefore, we will increase the speed and create a speed map to disrupt the fluidity of the spread.
To do this, duplicate the map PNG and remove the AutoFill effect. Then, add CC fractal noise and adjust the properties until you have a contrast of dark and light areas on your map.
The settings for the map will vary for each individual, but I discovered that using the Block noise type and increasing the contrast to 250 helped to create a sporadic combination of darker and lighter areas.
If you missed my initial overview, I mentioned that you could utilize a speed map to control the animation’s speed in different regions. The lighter areas will result in a faster animation, while the darker areas will cause the animation to fill more slowly.

With the speed map complete, we will turn off this layer (hide it if you must), return to our map layer with the AutoFill, select the layer with the fractal noise, and change the influence by 50%.
Step 3 – Compositing Settings
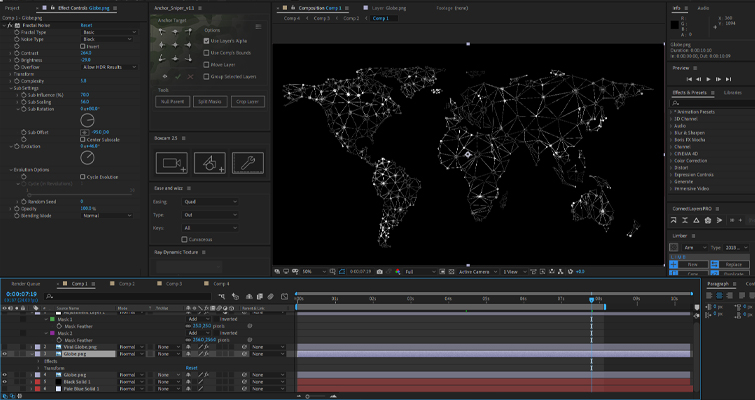
To conclude the use of AutoFill, we will add our selected routes PNG to the composition and copy the autofill effect from the map PNG.
We will leave all of the AutoFill settings as is and will only activate the color fill under the compositing settings and then change the color to a bright red. This will be our network virus indicator.
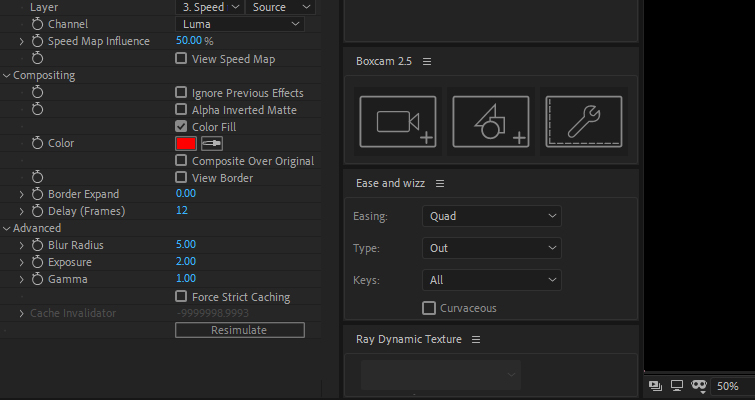
We will then delay the process by 12 frames to give the map reveal a slight head start. The individual links, especially the route from Europe to Africa, improve the auto-filling animation. As you can see, each link naturally progresses.
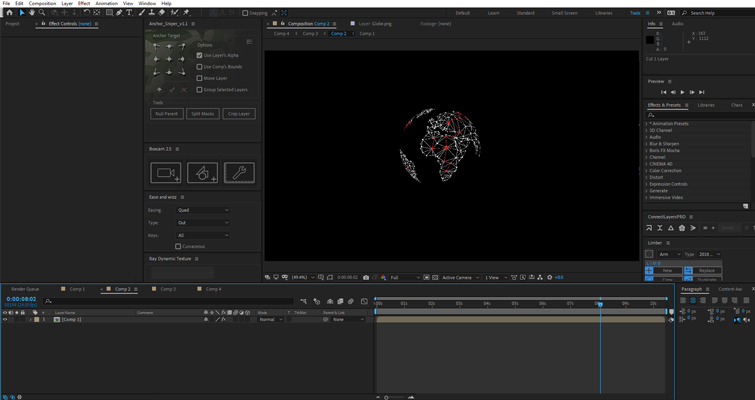
From PNG to Spherical Projection
Okay, so with the information provided above, we have covered the extensive properties of AutoFill, which was the main focus of this tutorial. However, to demonstrate its practical application, let’s apply it to a hypothetical assignment, and I’ll explain how to transform this map into a digital globe.
First, add the initial composition to a new composition with the same settings. We will then apply the CC Sphere effect and set all shading properties to 0, except for ambient, which we will increase to 200. Additionally, I will add a Sharpen effect with a value of 20 to enhance the map’s clarity, as multiple effects can sometimes result in a loss of detail.
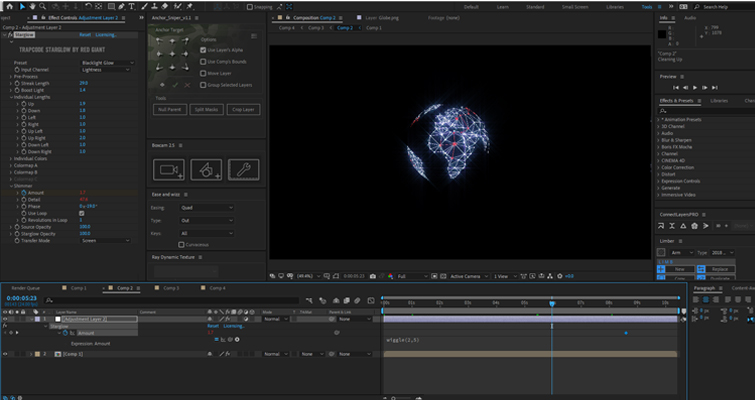
Next, add an adjustment layer to apply a glow effect. In my case, I have used Trapcode Starglow, which is a paid plugin. However, you can also use the built-in glow effect. The crucial part is to apply a wiggle expression to the glow intensity (a value of 2 and 50 would suffice). This will create the illusion of a flickering projection, as even though these characters have spaceships, the hologram technology is still unreliable!
Next, pre-compose this composition along with the adjustment layer (or bring this composition into a new composition). Now, the location of your sci-fi scene will depend on your story. This graphic could appear on a computer screen, be part of a heads-up display (HUD) like in Iron Man, or be a projected hologram. It’s a projected hologram in my sequence, so we’ll need to create the projector light.

To achieve this, we’ll use a built-in lens flare and position it just outside the frame at the bottom of the composition. The light falloff from the flare resembles that of a projector, and the flare also introduces various lens artifacts that enhance the scene. Similar to the globe, we’ll apply a wiggle expression to the opacity of the lens flare to create a flickering effect. Additionally, I’ve adjusted the curves and increased the intensity of the blue color channel to match the glow of the globe.

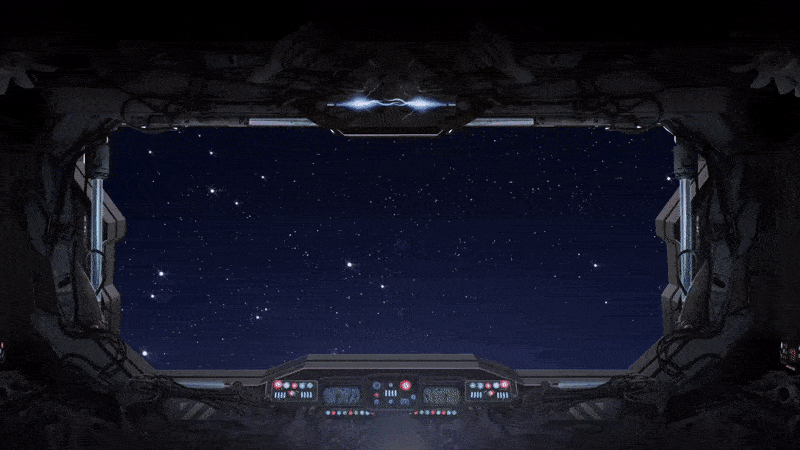
To cement the effect, I will add a slight camera push and a small degree of rotation to the planet. The background was taken from sdecoret, and was simply pushed out of focus with a Gaussian blur when the map appeared.
I’m still at the start of my relationship with AutoFill. If I discover any
more cool techniques, they will be shared on this blog.
For more on After Effects, check out the articles below: