Sound is as important as visuals when creating a truly immersive film experience. One way to achieve this is by creating rich and dynamic soundscapes that transport the audience to the world of the film.
Transporting your audience away from reality to the visual story world can be achieved by beautifully shot imagery and soundscapes. In this article, we will explore how to create an immersive soundscape using one of the leading DAWs in the audio industry, Ableton Live 11. Whether you are a seasoned sound designer or just getting started, these tips will help you take your films to the next level.
What is a Soundscape?
A Soundscape is a combination of sounds that create a sensation of the individual experiencing a particular environment. We hear soundscapes in our everyday lives, from the sound of birds, waves of the sea, or street ambience. The creative medium of film creates a sense of place and space for the viewer to help transport them to this curated world and give the impression of the viewer being present, whatever the location.
Soundscapes come in different variations. One of the most recognisable soundscapes is ambience. This is the presence of natural sounds in the environment, such as birdsong, the rustling of trees and the movement of water to create a sense of a natural atmosphere. Musical soundscapes are made from the music, which takes the form of the film score. This evokes emotional impact and provides a sense of continuity between scenes. Soundscapes can be enhanced with Foley and other sound effects (SFX) for a more realistic soundscape.
Films such as Bladerunner 2049 (2019) have awe-inspiring sound designs. It transports you to their fictional world by creating convincing soundscapes. The video below from the sound crew of Bladrunner 2049 discusses the minimal use of music, but instead honing in on the use of silence, sound effects and dialogue to almost act as the film score. The brooding musical textures blur the line between what is part of the score (non-diegetic) and the sound of the visual world (diegetic sound), resulting in a much more mesmerising listening experience.
The Sound of Bladerunner 2049
Why Ableton Live 11?
Ableton is one of the most renowned DAWs in the audio industry. It’s mainly used for electronic music production. However, it has versatile features that can be used in many other genres, such as electroacoustic music or musique concrète (using recorded sounds as the raw material). Compared to its competitors, such as Logic Pro X and FL Studio, which are better for pop music production, Ableton has a much better workflow for long-form ambient/musical soundscapes. Whether you are a seasoned Ableton user wanting to dive into curating soundscapes for film, Ableton will still be able to provide you with everything that you need and more.
Ableton offers some great tools to map out your soundscape in both a linear and non-linear workflow, efficient methods to tidy up your audio recordings, and a plethora of audio effects such as reverb and delay to create a sense of space. Furthermore, we will explore panning techniques to maximise the use of the stereo field, the importance of automation and resampling audio in Ableton to elevate the sound world.
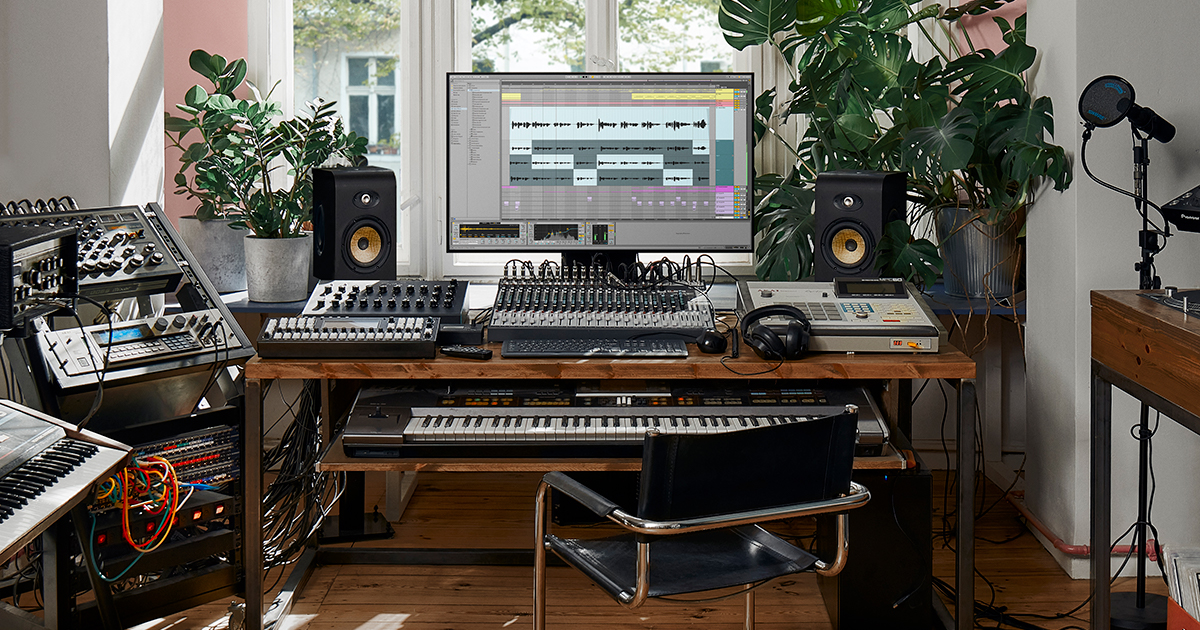
Getting started in Ableton Live
For anyone new to Ableton, here’s a little breakdown of what to expect when curating your soundscapes.
Ableton has two types of views: Session View and Arrangement View.
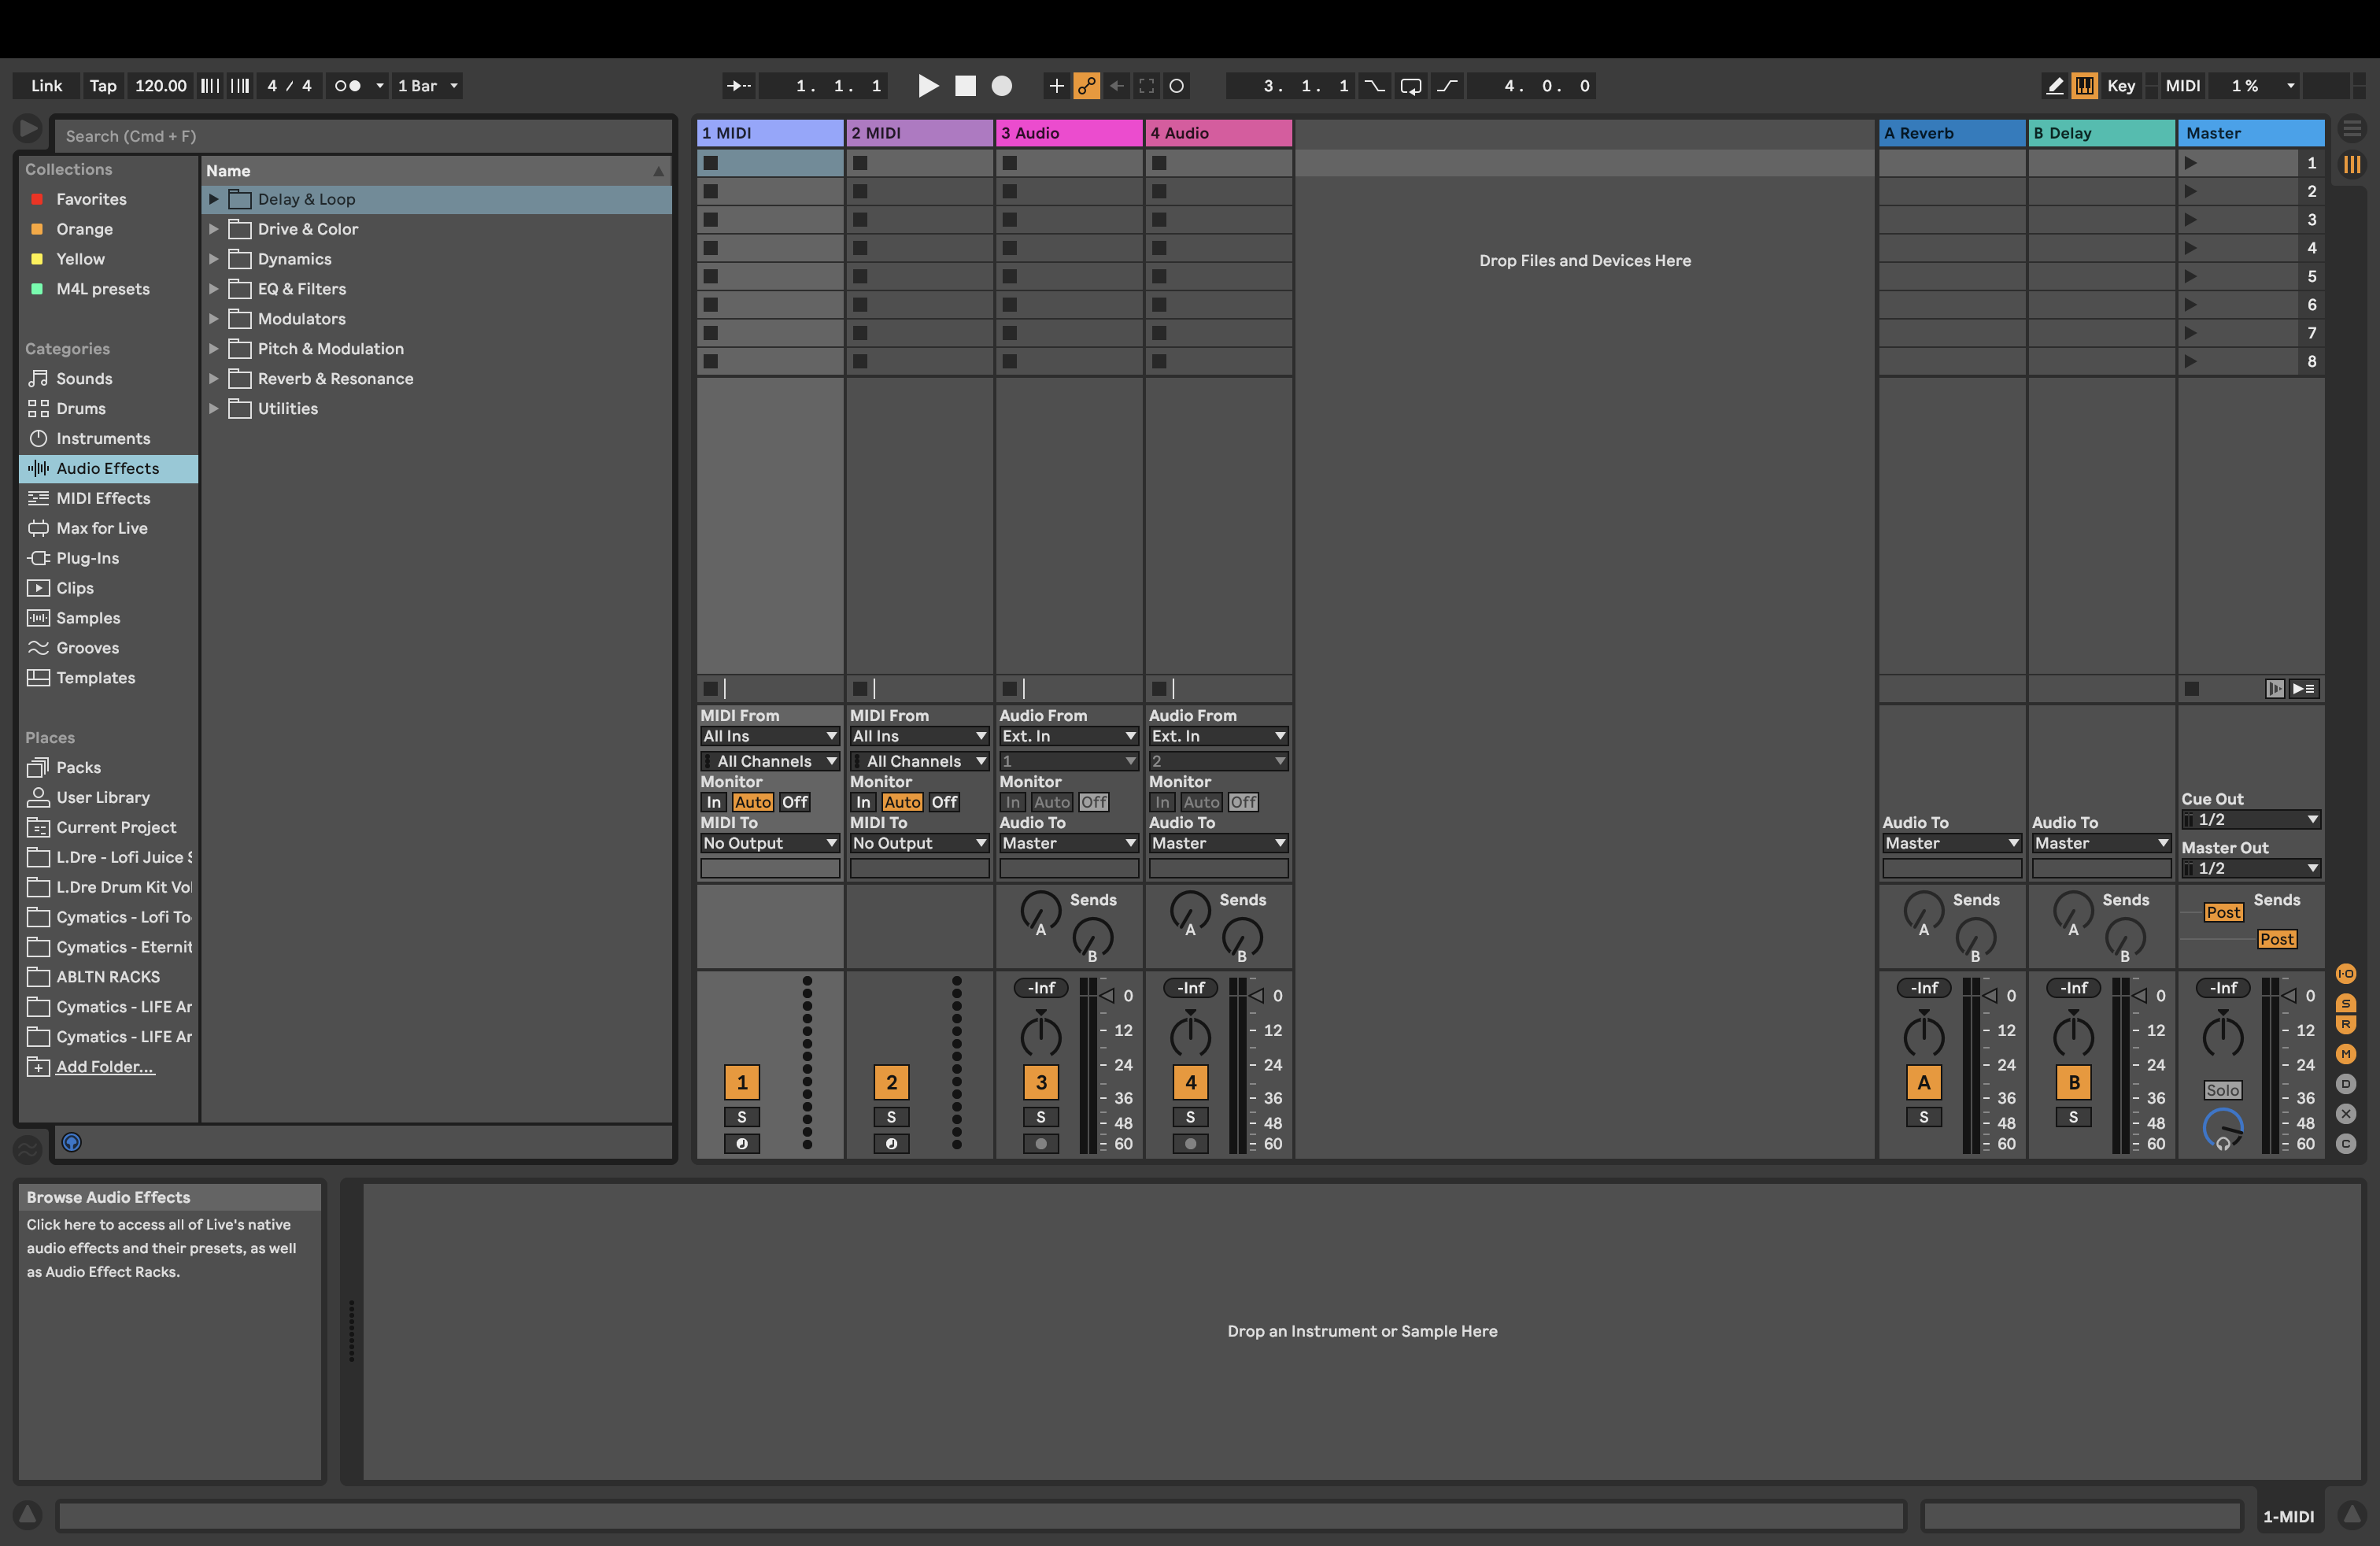
Session View is great for non-linear workflow because the layout is based on Clips. This allows you to drag and drop any audio, whether a field recording, a specific chordal progression or sound effects, into those clips. This will enable you to trigger and arrange your soundscape in real-time, but also a great starting place to through ideas onto a canvas to experiment with different combinations of sounds and harmonies before committing to a timeline, which is found in the Arrangement View.
Arrangement View is more linear, providing you with a fixed timeline. Using the arrangement view will benefit those who would like structure from the start. Furthermore, it makes audio editing more precise and allows you to use automation. It’s important to use automation as this provides the soundscape with movement. Examples could be adjusting the volume to create more depth in your soundscape, panning sounds from left to right (or vice versa) for more sonic immersion and dialling in EQ parameters that you may want to change over time.
Audio Editing in Ableton Live
Ableton Live have plentiful audio effects to manipulate and morph your audio into something unique and captivating. Sometimes if your audio isn’t up to scratch in terms of quality, Ableton offers a distinctive EQ tool that can thoroughly fine-tune any recordings or samples you’ve captured. Furthermore, Ableton Live have effects such as reverb and Delay, with numerous presets for you to choose from, which can be adjusted to your needs.
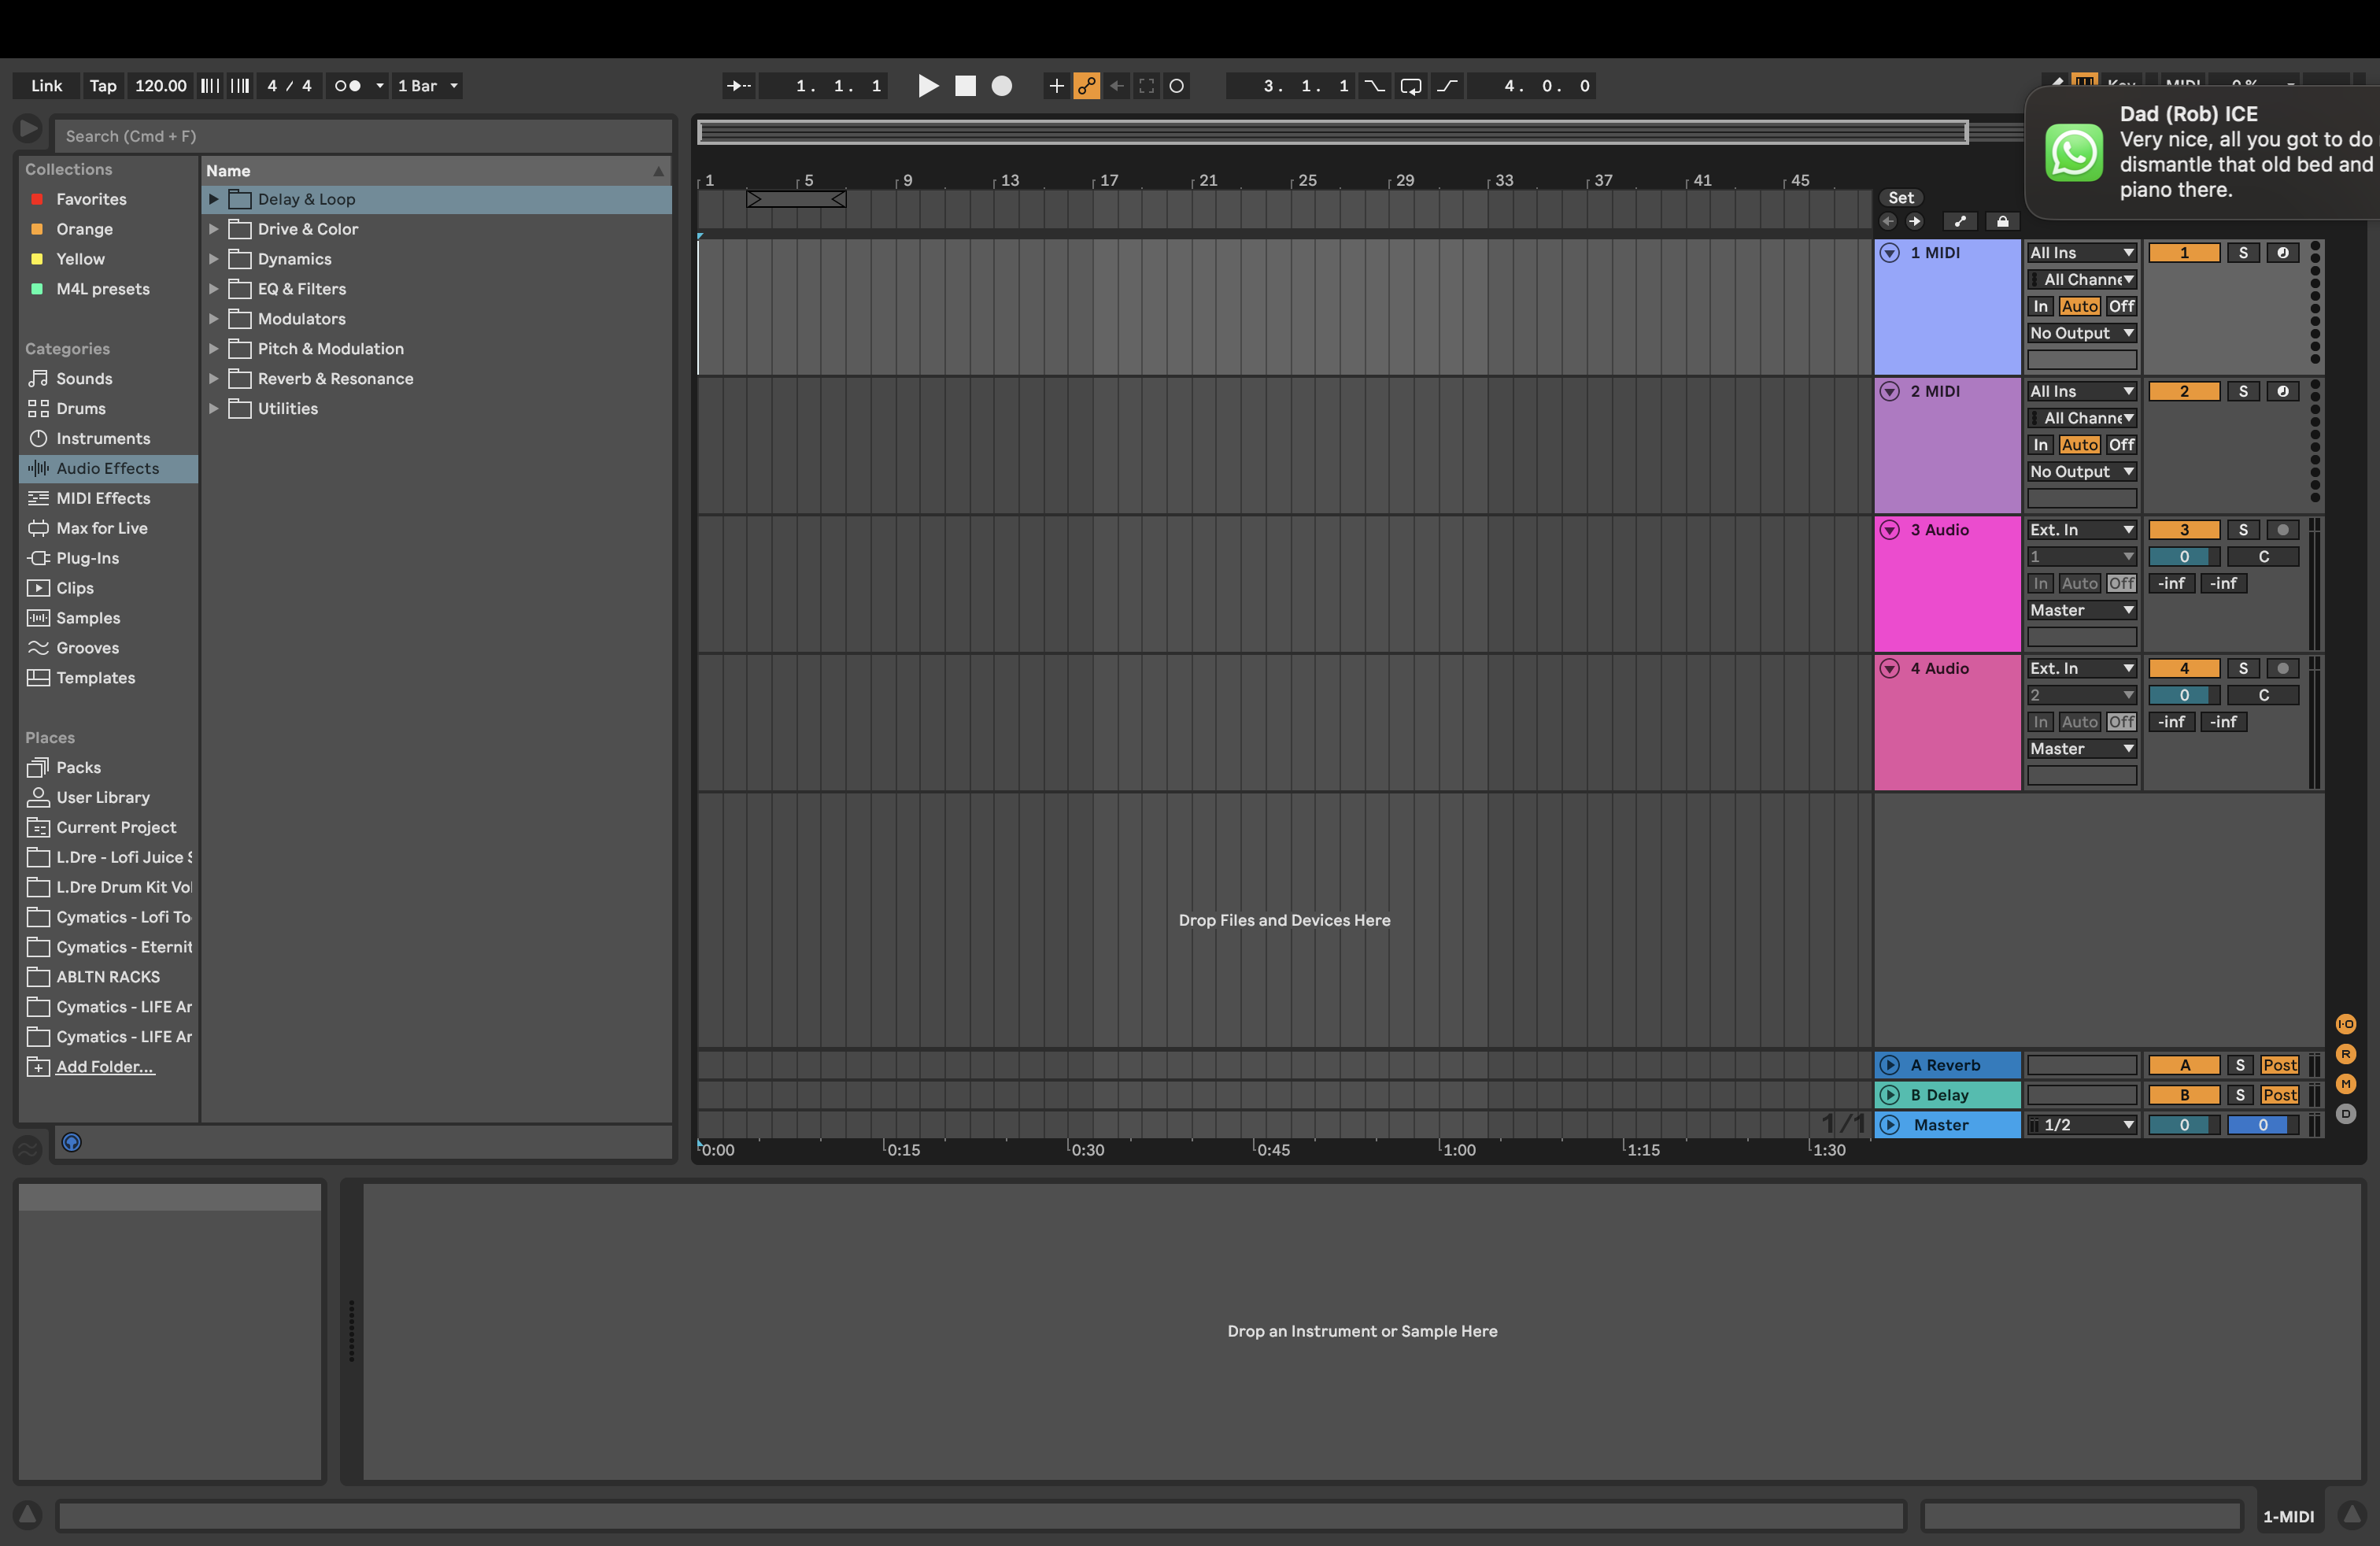
Audio Effects: Equaliser (EQ)
Let’s look into using the Equaliser. There will be occasions when your recordings or samples have some muddy frequencies that hinder the clarity of your soundscape. This will mostly be from the low-end rumble. Using an equaliser (EQ) will help fix this problem in no time. To do this in Ableton, under the Audio Effects on the left-hand side, select EQ and Filters, and select EQ Eight. This is the best EQ tool that Ableton offers, with up to eight nodes to play with. This gives you more control over adjusting the entire frequency spectrum.
To eliminate any low-end rumble, select the first node, and select the high-pass curve, which will cut off the lower frequencies. Then with the other nodes, you can choose a higher Q value and notch up to the node to scan through any unwanted frequencies. Once you’ve found them, drag the notch down and voila!
Audio Effects: Reverb and Delay
The two most popular audio effects used in audio and music production are Reverb and Delay. These essential effects create a sense of space that is individual to the visuals you are working with, whether small or large. For instance, if you have a scene filmed in a large cathedral and are working with sound effects, adding reverb and delay can emulate this space.
In Ableton, there are a couple of ways to go about this. The easiest is to apply the effects directly onto the track. You can do this by going to the Audio Effects tab on the left-hand side, where you will find your reverb and delay effects. Each effect has numerous parameters that allow you to create exciting results.
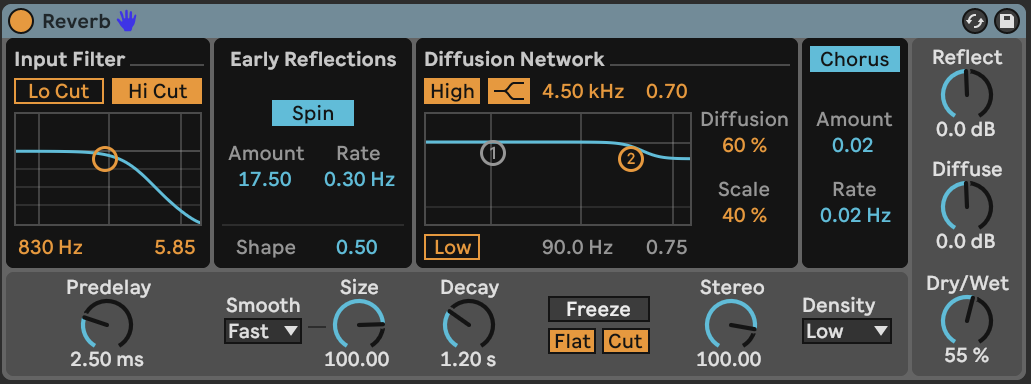
The reverb effect has an input filter, options to adjust early reflections, a diffusion network, and the option of adding chorus. Ableton also has a freeze option to freeze the reverb tail, which can be helpful for resampling.
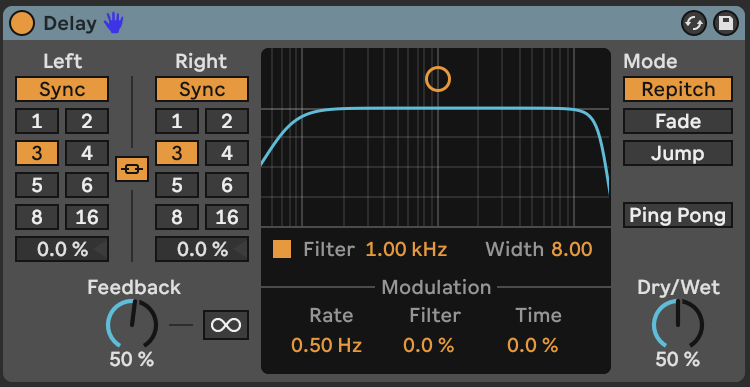
The delay can adjust the delay mode from either time-beat divisions or time-based. You can change how much delay you want on one side and differentiate this from the other for more movement. Another great feature is the Ping Pong effect which bounces the delays from the left to right channels, as well as filter options to sculpt the sound further.
The other way of doing this is using Ableton’s Return Tracks. This parallel processing method allows you to route multiple tracks into one audio effect track. Ableton has two default return tracks: a standard reverb and a delay.
Using this can save processing power and reduce CPU load on your computer. With that, having individual effects on each track can result in a loss of clarity in your overall soundscape. Instead of running the impact on each track, you can apply it once on the return track and use the send levels to adjust the effect applied to each channel. This can be particularly useful when working with extensive sessions that contain many tracks and effects. To send some of your track signals to the return tracks, on the right-hand side, there will be two boxes called “inf”: the first being return track A (default is Reverb) and the second being return track B (default is Delay). Clicking and dragging upwards increases the dry signal into these returns tracks.
While getting excited about the numerous possibilities of editing your audio is easy, it’s important to note that you don’t overdo your processing. While it can add clarity and bring your internal ideas to life, over-processing can lead to alienation, thus not sounding authentic to the space you are trying to create and losing that connection with the visuals. This is vital when working with natural environmental sounds.
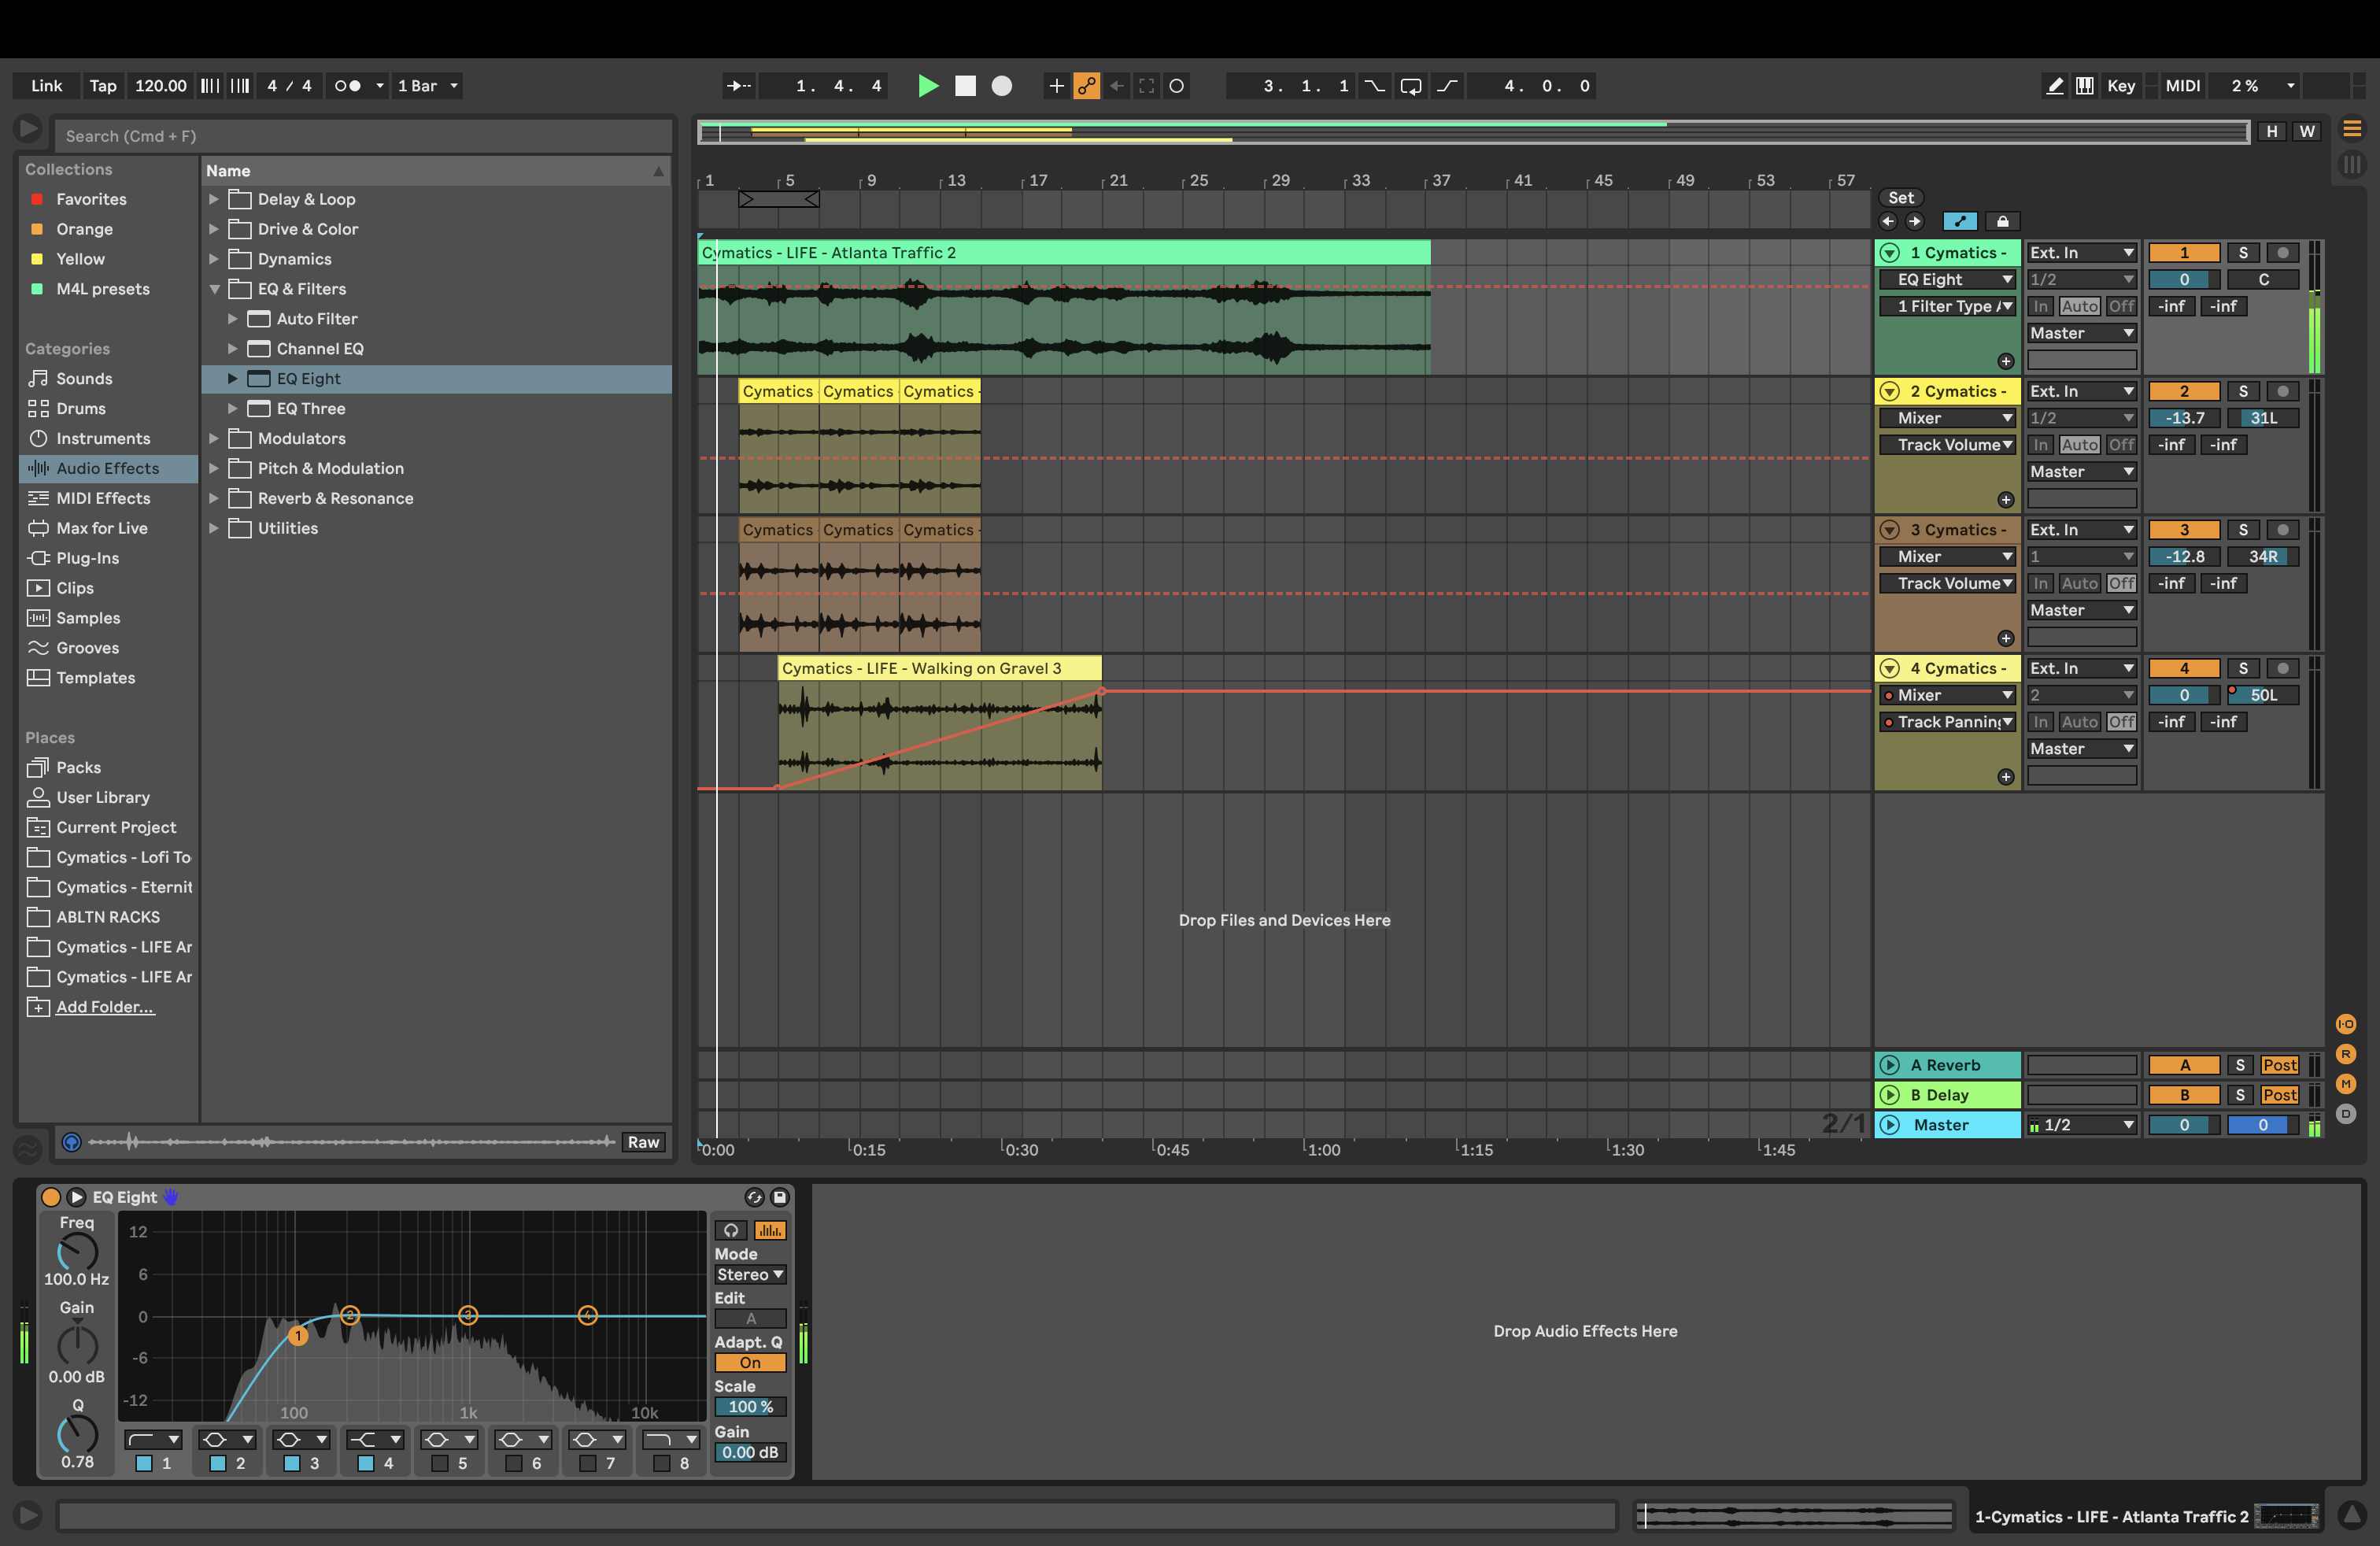
Panning and Automation
To ensure an immersive soundscape, take advantage of the stereo space. This widens the listener’s sonic experience, creating a more believable listening space. Having sound from the centre and from either side can make all the difference. If you are working with a more immersive set-up like 5.1 or an ambisonic configuration, there are many more directions where your sound can go, which you should use to its full advantage.
For stereo mixing, you may have smaller and more distinct sound effects, such as birds singing, which you can pan left or right. Additionally, you can have two separate birdsongs and hard pan them left and right to create the sense of the sounds on each side of you. To create more movement, automating these parameters can bring your sounds to life.
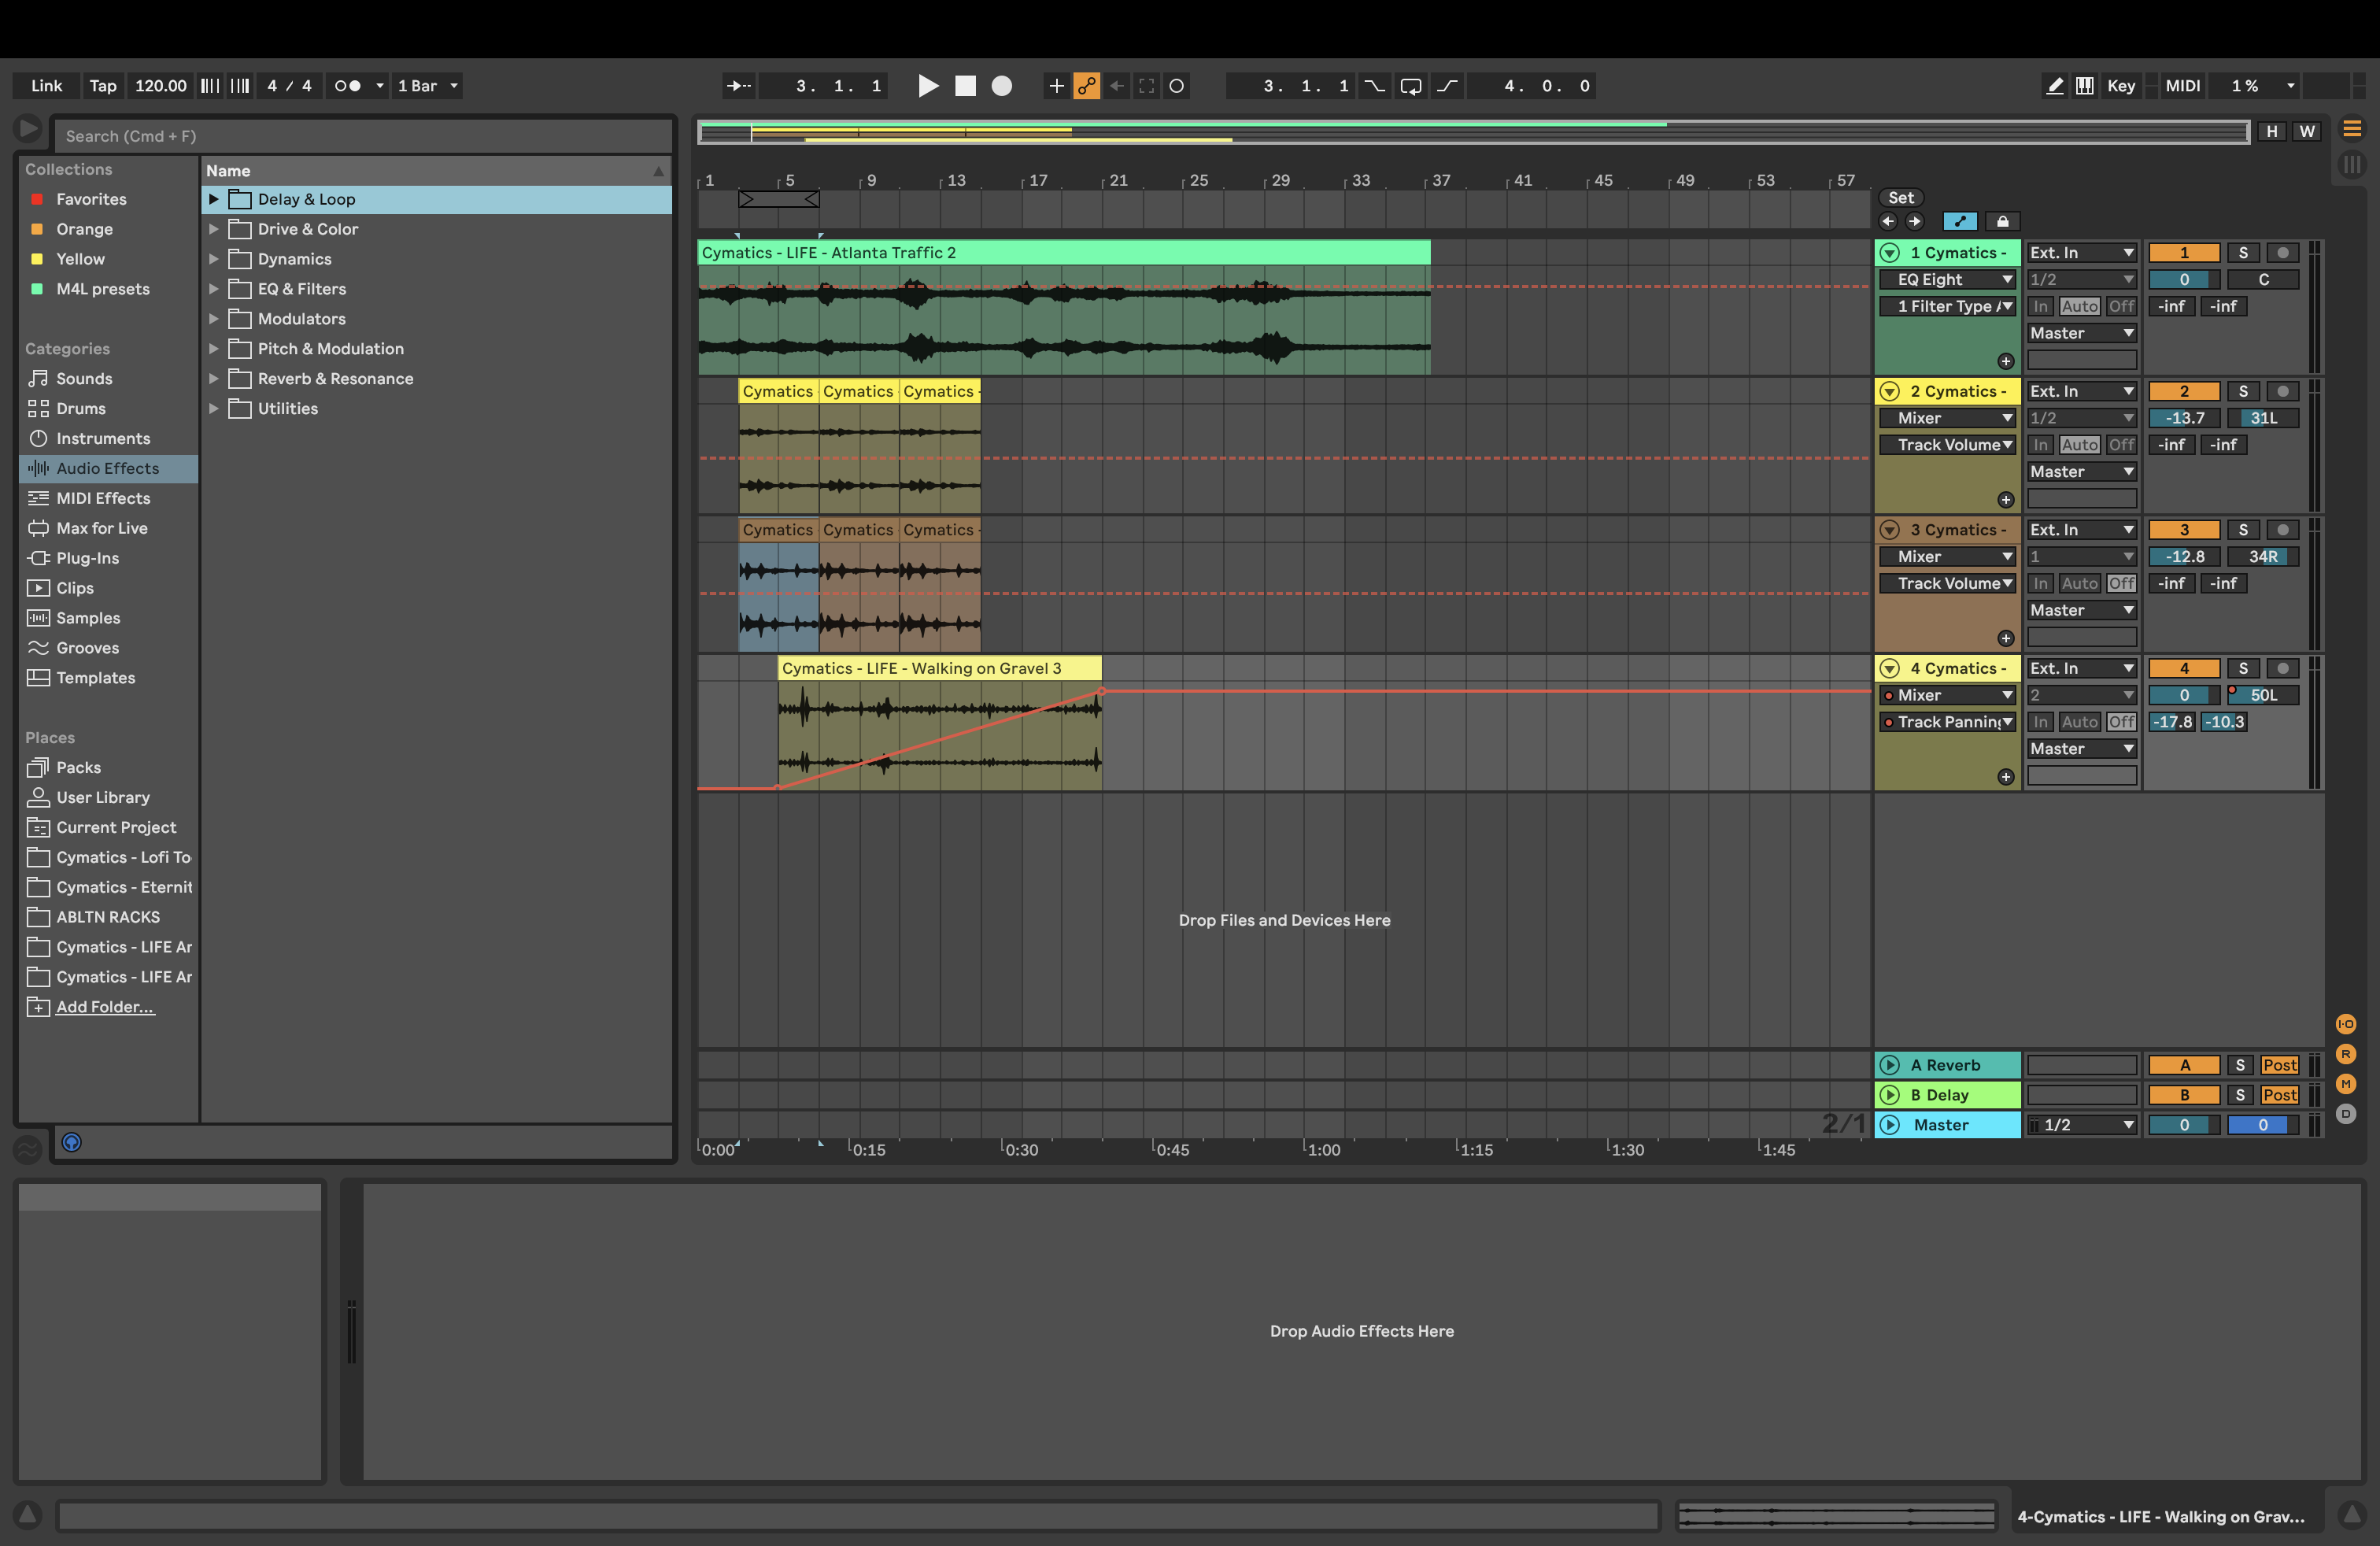
To use automation, you need to activate it by pressing A on your keyboard. This will show automation options in the tracks on the right-hand side.
Let’s look at the automation of panning. To do this, there will be a drop-down box on the right-hand side of the track that usually says “none”. Select “mixer” from the drop-down options, then select “panning” from the next drop-down box. You can then dial in how you want the sound to move. The red line will be in the center at first, but clicking on it will create a small dot you can move around. Moving it all the way down will put the sound to the left, and vice versa with the right.
Automation can be used not only for panning but for volume, EQ, pitch shifting, and virtually anything! Have an experiment with your sounds and effects and see what’s available.
Using Ableton Instruments
Depending on what version you have installed, Ableton has a range of instruments and devices you can use to create your unique sounds. Furthermore, Ableton has various presets for each instrument, giving you a much more straightforward approach to sound design.
As this is a vast topic, let’s explore drone creation methods. Generally, in soundscape creation, drones provide the majority of the atmospheric and ambient feel but are also the foundation of the soundscape. Using drones falls within the cusp of not only sound that we hear but sound we can feel as it isn’t susceptible to rhythmic movement when the more distinct elements, such as sound effects, or a melody, we notice these fluctuations much more. This can be a great advantage when wanting to achieve natural soundscapes.
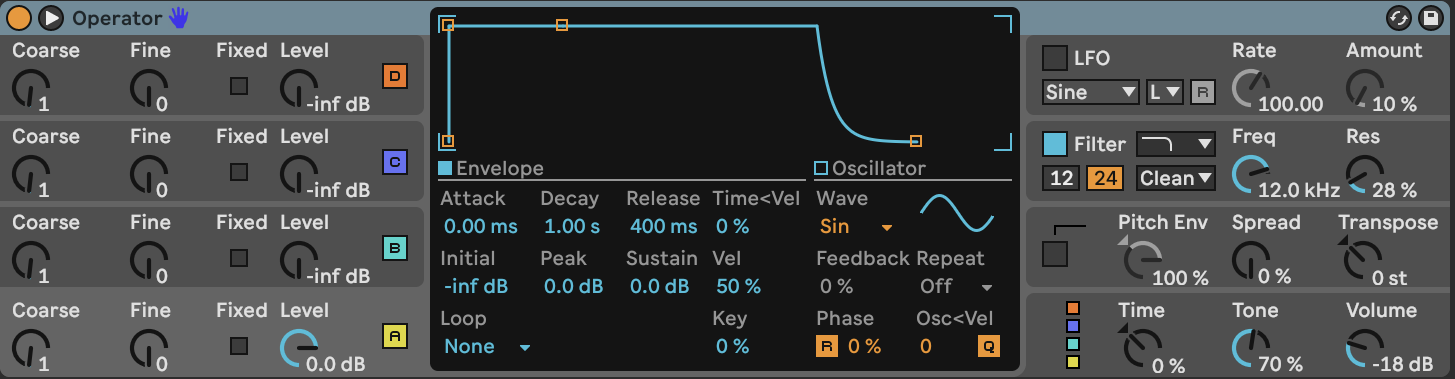
One way of creating drones is using one of Ableton’s instruments. Operator and Wavetable are great synthesisers to start with due to the incredible functions they have to offer. Using synths can be perfect for creating any supernatural drone, and you can play around with the parameters and oscillators to create your own sound.
You will need Ableton Live Suite to find these specific instruments, or you can purchase them separately from Ableton’s website if you don’t need the complete upgrade. Once you have them, you can find them in the Instruments tab on the left and drag them onto a new track.

Here’s a video example from Ableton Tips where Ableton instructor Borys shows how to create an Alien sounding drone using the Operator Synth. Do check out their other videos for more detailed tutorials on Ableton Instruments!
Drone Sound Design in Operator – Alien Sound | Ableton Live Tutorial
Resampling in Ableton
Another method of creating drones is using and resampling your own sound recordings. Applying large amounts of reverb is an efficient and easy way of doing this. Cranking up the decay time will give you a long reverb tail which can be used as a drone.
Free To Use Sounds made a tutorial on making a drone from a drying rack. It shows that you can make sustained and haunting drones from virtually any sound! He does a walkthrough on Ableton, using a free plug-in called Valhalla Supermassive and other effects to create a drone.
You can add a resonator to create specific tones within your sound to further elevate your soundscape. This is more for those looking for a musical soundscape but want to use sounds of the natural environment.
Here’s a video from TAETRO, who creates a beautiful drone with resonators from the sound of rain.
Ambient Drone in Ableton Live from Rain Tutorial
Conclusion
While the points discussed above are great starting points for developing a well-constructed soundscape, it requires a lot of experimentation and patience. Ableton Live offers many options in terms of audio editing. Whether you are a beginner or a seasoned Ableton user, it’s important to keep your soundscape in line with the visuals you are working with. However, curating a soundscape that isn’t attached to a moving image is slightly different.
Learning the basics of Ableton Live can make it much easier to create soundscapes. There is no right or wrong way to create soundscapes, but what you do with the effects can significantly affect the result. Ensuring you don’t get carried away with audio processing, allowing your material to breathe, and using the stereo field instead of keeping everything in the centre will result in a solid foundation for your immersive soundscape. From here, it’s up to your creativity and discoveries among Ableton’s plethora of tools to craft something unique and individual to you as an artist.
Cover image via Abelton
For more on audio, check out these articles: