Interested in recording your own Foley sounds for a film project, but you are an Ableton user? If you want to dive into the art of Foley, here are a few tips and tricks on creating your Foley sounds using this excellent DAW.
The art of Foley has shaped and developed the creative process behind the realistic sound world of a film. With specialist Foley artists responsible for creating those familiar footsteps, door handle sounds, and much more, how about trying some of your Foley at home? To further enhance your sound design practice, trying out Foley in the renowned DAW Ableton Live will inspire you for future projects or allow you to take that leap and commit to the foley world. It has everything you need and more for Foley. Here’s a guide on how to get started.
A Brief Intro to Ableton Live
Ableton Live is well-known for its extensive tools made for music production and sound design. While it is primarily used for music production, Ableton can also be used to produce sound effects and even Foley. As someone wanting to expand their knowledge of sound design further, there is no need to purchase a specialist DAW used by Foley experts, but simply the one you already have.
For anyone who is thinking of upgrading to Ableton, here are a few reasons why:
Ableton is incredibly versatile for any means of music and sound production. It has well-designed tools that are highly customisable to your individual preferences. With a great selection of Instruments, sampler opportunities and versatile audio effects, with Ableton, you can create with virtually no limits. While Ableton Live can look daunting to beginners, the basic learning process is worth it and opens doors to a new creative perspective.
Setting up Foley recording in Ableton
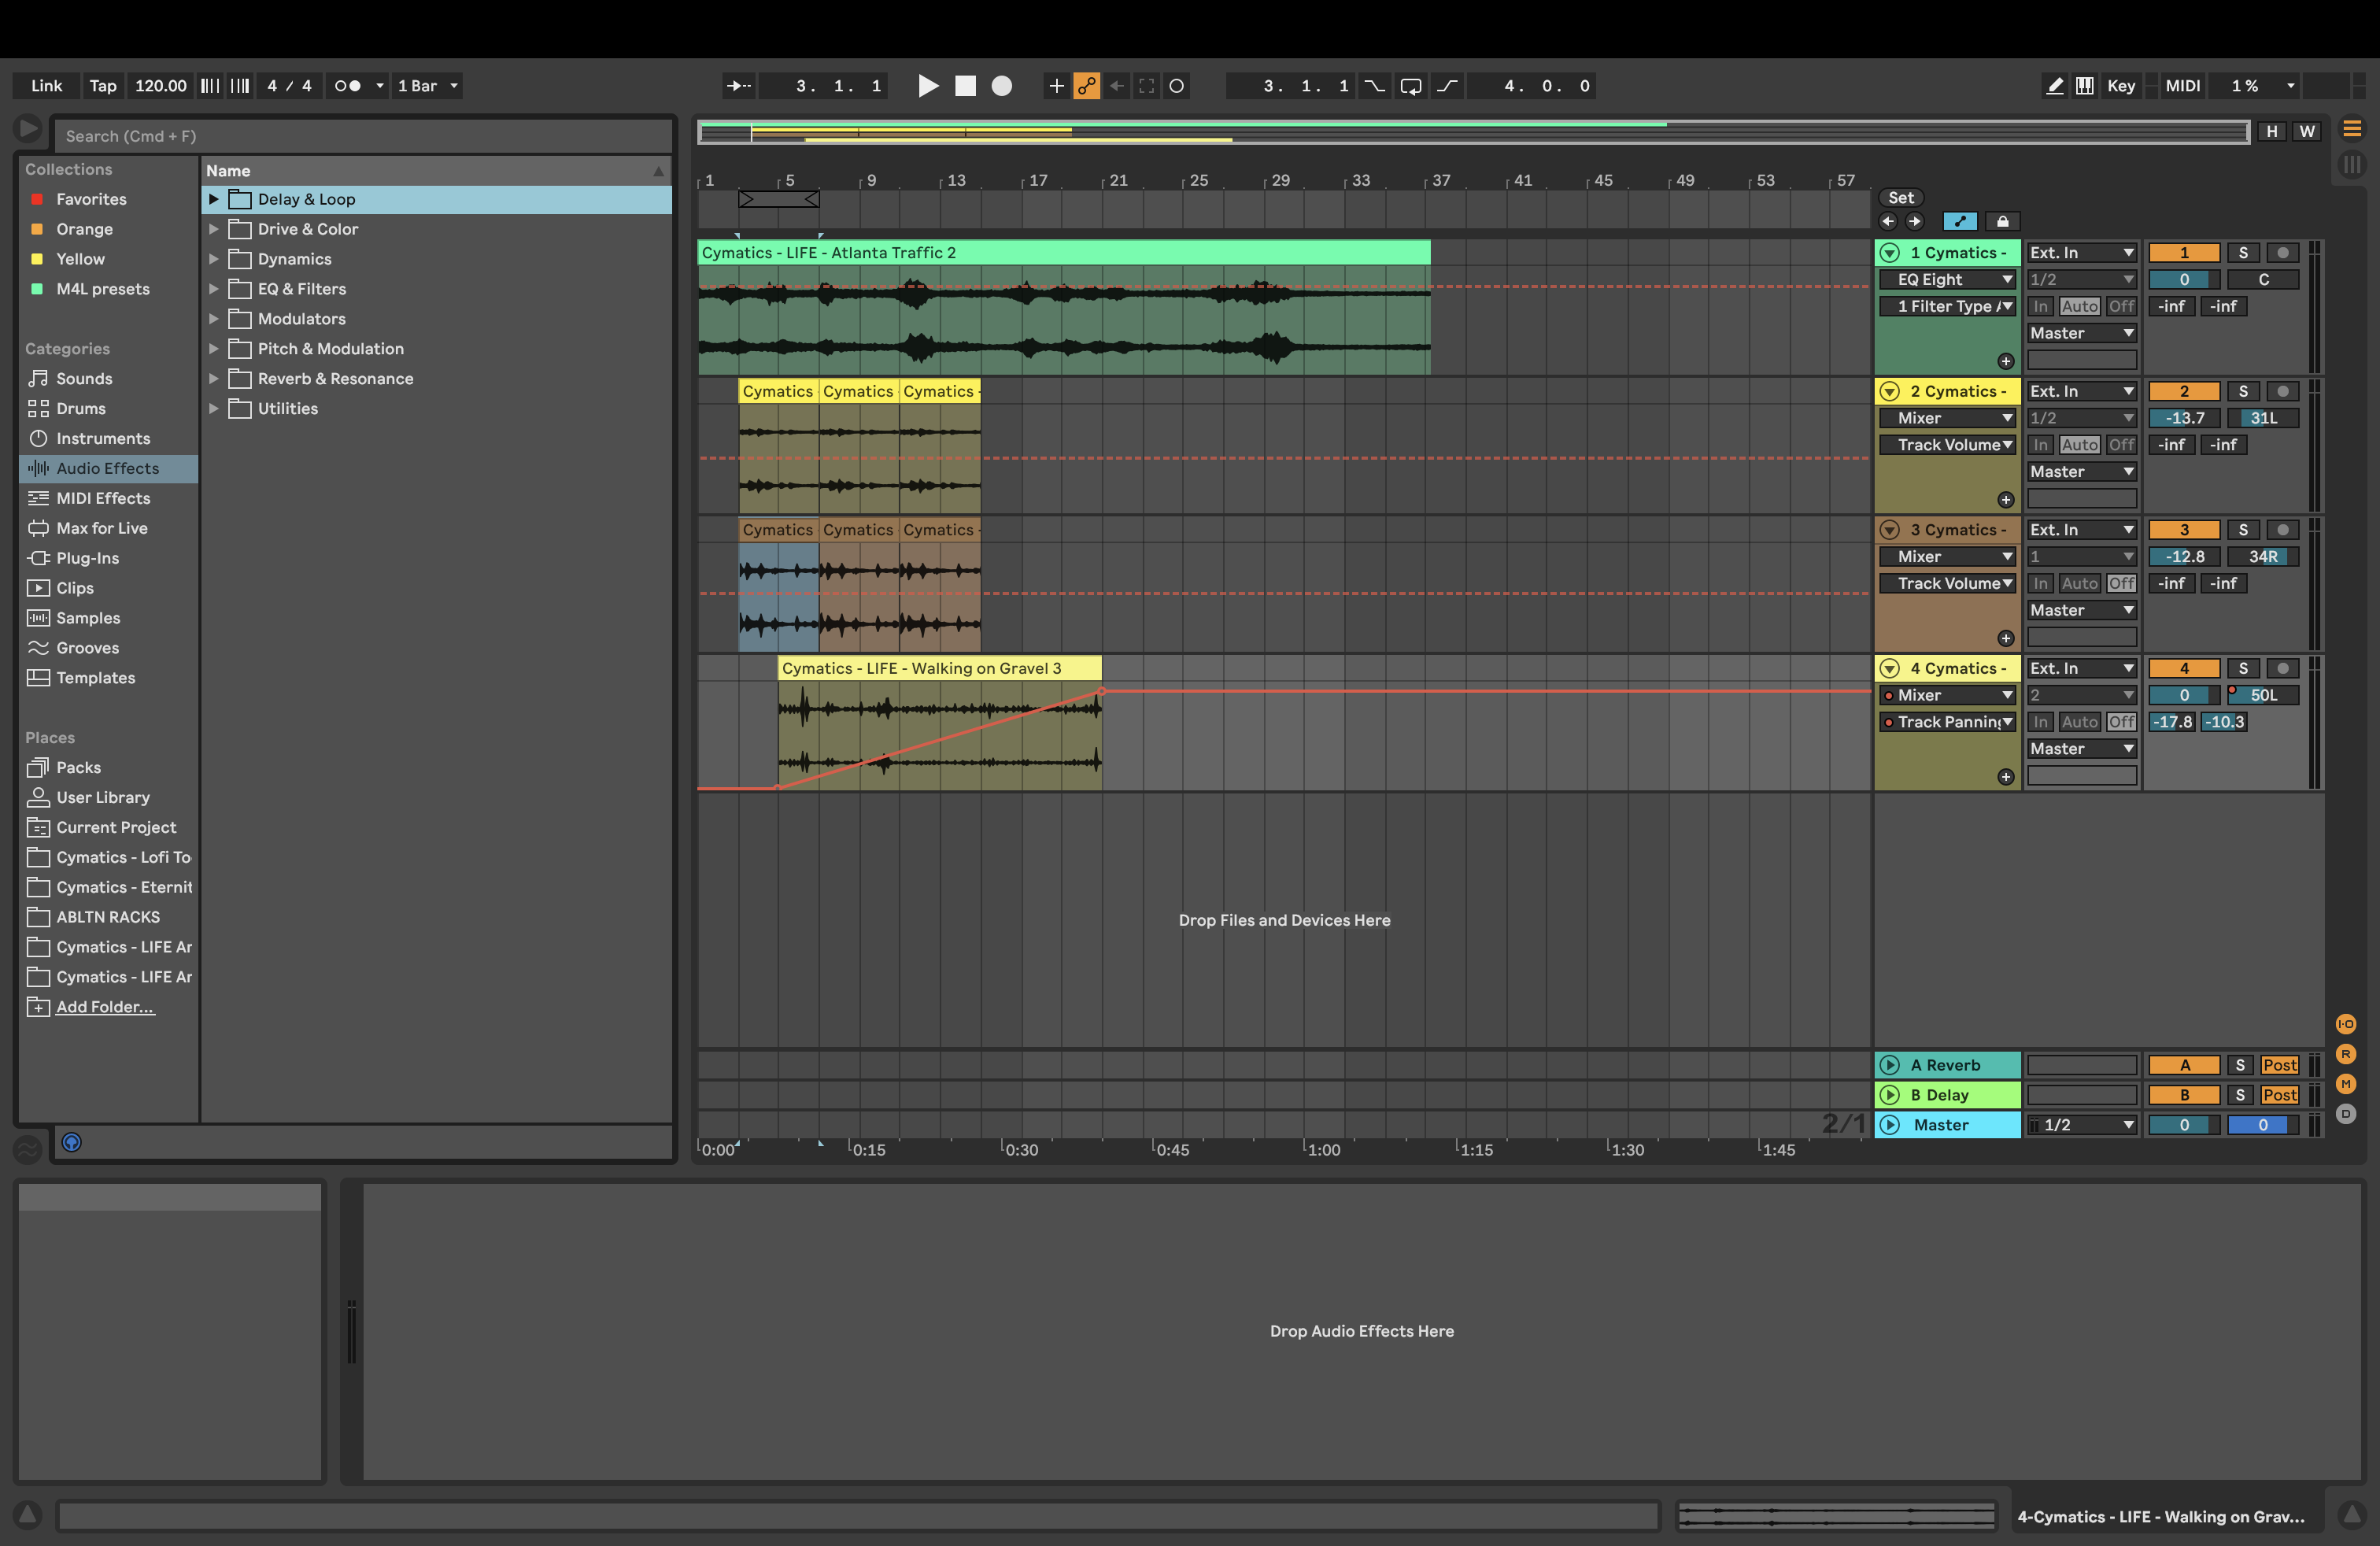
Upon opening Ableton Live, you’ll be greeted with the Session View. This is an excellent view for throwing ideas onto a canvas. However, the disadvantage is that it’s non-linear. Foley will need a fixed timeline, especially for those looking to design alongside a video. To switch to Ableton’s Arrangement view, press TAB on your keyboard, and voila!
If you are working with video, fortunately, Ableton supports having video footage! Once you have received the video project, you can easily import this into Ableton. On the left side of your window is a section entitled Places. You can add folders to access your project’s video footage or sounds quickly. Locate where your folder is; drag it into the arrangement view, and your video will show up, as well as the audio shown in the audio track lane. This is also a helpful trick for film composers within the Ableton ecosystem!
As mentioned previously, for Foley, it’s recommended to use the Arrangement view to have a timeline, plus the option to input automation lanes for any necessary audio effects.
Recording Foley Sounds
Those specialising in Foley will most likely record the sound effects in real time with props. One of the essential elements before doing this is setting appropriate levels for recording. Having unwanted sounds like hiss or clipping can result in ruined audio that may not be salvageable in post-editing.
The general rule with input signal levels is to keep them between -12dB and -6dB. This will provide a better signal-to-noise ratio and enough headroom to avoid clipping. In Ableton, keep an eye on the level meter on the track, ensuring that it doesn’t go red. It’s best not to adjust the levels on Ableton but rather from your audio interface (or your field recorder if capturing outdoor sounds), as tampering with the level meter can confuse things further down the processing line.
Ensure the microphone isn’t too close to the sound source when recording. This can cause clipping and other unwanted sounds that may ruin the overall effect. It’s also best to remember the type of room you are recording in; the quieter, the better! Be sure that in Ableton, when recording, you arm the track by pressing the small record button located on the right of the audio track. It will highlight red when you press it, indicating it’s armed and ready to go.
Here’s a tutorial on how to set up recording audio with a microphone in Ableton.
Now that we know the general rules for input levels, it’s an excellent time to start experimenting. Identify the sounds required for your project and get creative. Foley artists are renowned for using a wide range of props to create many sounds. In Ableton, when capturing sounds, for organisation purposes, have an audio track for each different sound. You can do as many takes as you like in each track lane, then select the good takes and delete the bad ones. To further aid the process, label these tracks. To do so, select the track, press Ctrl+R (Cmd+R), and name them accordingly.
Editing Foley Recordings in Ableton
Once you have the recordings you are happy with, the next step is to edit them to fit into the film’s overall audio. But first, we must discuss some tips to keep you organised.
It’s easy to record a whole bunch of takes, and in Foley, especially, you will be working with a lot of sounds. To avoid hindrances in workflow, ensure you have a dedicated folder ready for the audio to be exported. From here, you can add this folder to the sidebar on Ableton so that when you do come to placing these sounds in correlation to the video, everything is easily accessible.
To do so, create the folder first on your computer. Then, go back to Ableton and on the left-hand side; you will see a section titled “Places”. There will be an option at the bottom to “Add Folder”. Select your Foley folder, which will appear on the sidebar.
Equalizer (EQ)
Let’s get into the fun part of audio editing Foley in Ableton Live. Ableton offers a substantial amount of stock audio plug-ins with reputable editing tools and parameters to craft your sound to your standards. Essential audio effects include EQ, Compression, Reverb, Delay, and many more! What’s excellent about Ableton is that they have a variety of presets within each audio effect, which can aid the editing process.
One of Ableton’s best EQs is EQ Eight. This provides up to 8 nodes to work with across the frequency range, giving you more control when adjusting the frequencies. Furthermore, EQ Eight offers three modes when using EQ: Stereo, L/R, and M/S. So, what do these all mean?
Stereo is the most common mode and represents both stereo input channels using a single curve. L/R (Left/Right) provides independent control over each side of the stereo input, which may be helpful in Foley. Finally, there is M/S (Mid-Side) that is useful if you want to isolate frequency ranges that sit at the centre of the sides of your recording. As this mode focuses on the mid-low-end, this can be useful for removing muddiness, which can free up space on the sides. Having these extra modes can further enhance your Foley editing.
LNA Does Audio Stuff does a great deep dive into EQ Eight; check it out!
Compression
Compression is a valuable tool when it comes to Foley editing. Compression reduces the dynamic range, narrowing the difference between your mix’s loudest and quietest parts for more consistency. Any sounds with prominent transients, like doors slamming, would nearly always need a dose of compression.
Ableton has both a standard compressor as well as a Glue Compressor. What’s unique about the Glue Compressor is that it emulates a stereo compressor found on vintage analogue boards that ” glue” the mix together. This can be useful if you combine more than one sound effect for a more seamless result.
Here’s a video from Beat Lab explaining Ableton’s Compressor stock plug-in.
Reverb and Delay
Adding some reverb and delay can create a specific space for your Foley sounds. In Ableton, the Reverb stock plug-in is very powerful and has numerous parameters to achieve a believable space for any particular sound to exist.
The same goes for Delay, with extensive parameters to adjust and having a stock plug-in called Filter Delay for more control over the EQs on the delay feedback. Reverb and Delay are also available in Ableton as Return Tracks, allowing you to send audio signals from multiple audio tracks to the same effect. This saves time having to copy and paste the same parameters on the effect and keeping your CPU happy!
Here’s a great video from LNA Does Audio Stuff explaining the ins and outs of Ableton’s Reverb:
Be mindful when using reverb and delay, as you don’t want to overkill these effects. This can result in your Foley sounds sounding unrealistic and too heavily processed. Remember, you want them to sound as natural as possible.
Utility, Audio Effect Chains, and Automation
As an often-overlooked effect, Ableton’s Utility plug-in is highly useful in any of your recordings. If you want to mono your sounds, mono your bass frequencies, or increase/reduce the gain, Utility can do just that. It’s a handy plug-in to have in your audio effect chain.
Now that we have mentioned audio effect chains, this is another essential factor. In Ableton, this is the section at the bottom of the screen, and the effects chain goes from left to right. Ensuring your audio effect chain is in an efficient order can make all the difference when you want to achieve a natural and seamless Foley mix. Some recommend different orders than others. Some argue that effects like EQ and Compressors go at the front of your chain, then the reverb and delay after. However, this is bendable as it’s what sounds good to you. But starting with an EQ, compressor, reverb, and delay will be a good starting point if you are a beginner.
Be sure not to forget about automation on your effects if needed. This is the process of adding movement and location to your sounds. This could be from panning sounds from each side of the stereo field to match what’s on-screen or placing a sound within the stereo field and panning it strategically to check the location on film. Furthermore, automating EQ, for example, can do this if you want to add depth to your sounds. To activate automation lanes in Ableton, press A on your keyboard.
Here’s a tutorial from Negativist showing an EQ and Reverb automation in Ableton. Be sure to check out his videos, as he has a plethora of Ableton-focused material.
Conclusion
The creation of Foley remains an integral part of the audio industry, whether for film or for adding flavour to music tracks. Learning to create Foley using Ableton can enhance your audio editing skills, especially if you are an avid Ableton user. Foley adds a layer of realism to films that would otherwise sound flat. This is because on-set microphones primarily focused on capturing dialogue cannot pick up subtle sound effects. Therefore, the art of Foley is still highly regarded in the industry.
Ableton Live offers a variety of tools that can help you create a seamless Foley sound bank or timeline, especially when combined with scene shots in your workflow. Ableton’s vast collection of audio effect plug-ins can significantly improve your Foley effects.
To ensure that your Foley recordings are of high quality, it’s important to record them in a quiet room. This precaution can save you time during the editing process and prevent any hindrance to the overall sound quality in Ableton. But most of all, trust your ears and what sounds good. Working with video is incredibly helpful as it gives you the visual element to compare to, therefore placing your ears in that specific location. Experiment with the audio effects, and go with what sounds good to you.
For more on audio, check out these articles
Creating Immersive Film Soundscapes in Ableton Live 11