Whether you are a newbie or a seasoned professional, having some workflow tips is always beneficial. Ableton Live is a mammoth DAW, and its vast capabilities can appear daunting to some. There may be moments when navigating the interface feels overwhelming. To help, here are some essential workflow tips for Ableton Live.
1. Ungroup Audio Effects
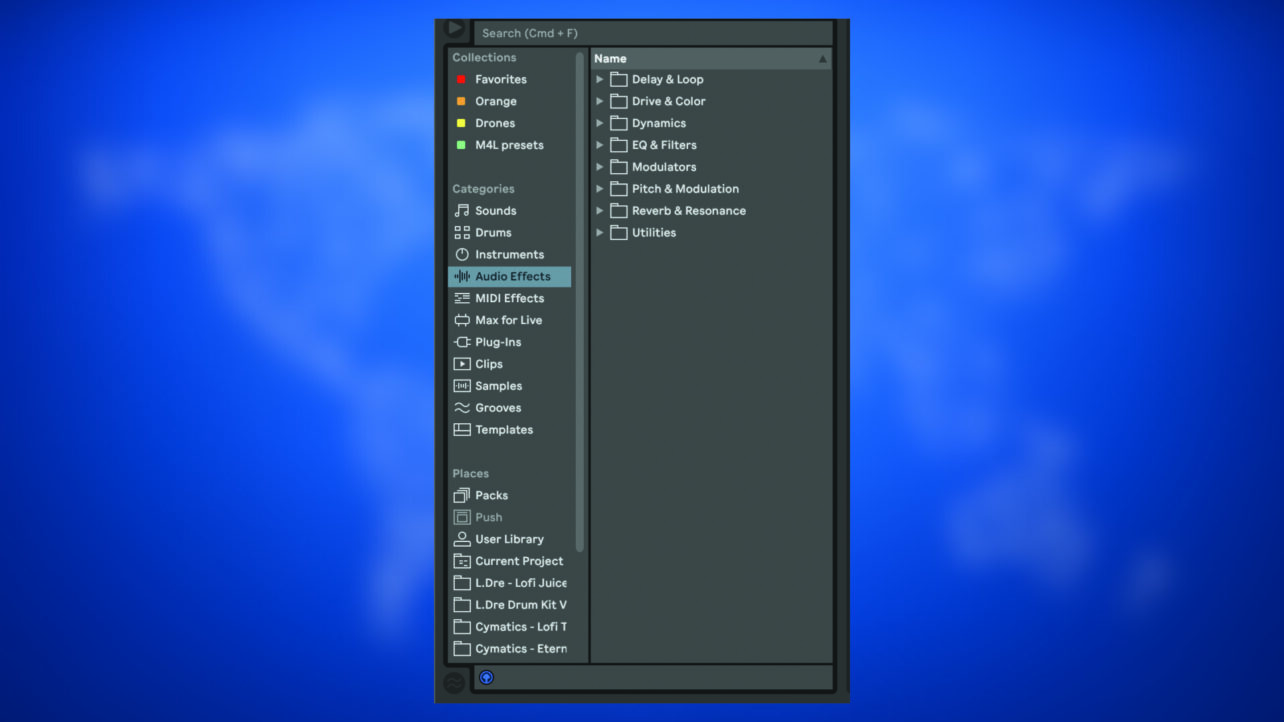
Using audio effects in your workflow is a given. You’ll often find yourself adding effects, from reverb to a touch of compression. By default, Ableton Live organizes its stock audio effects in groups. It might look something like this:
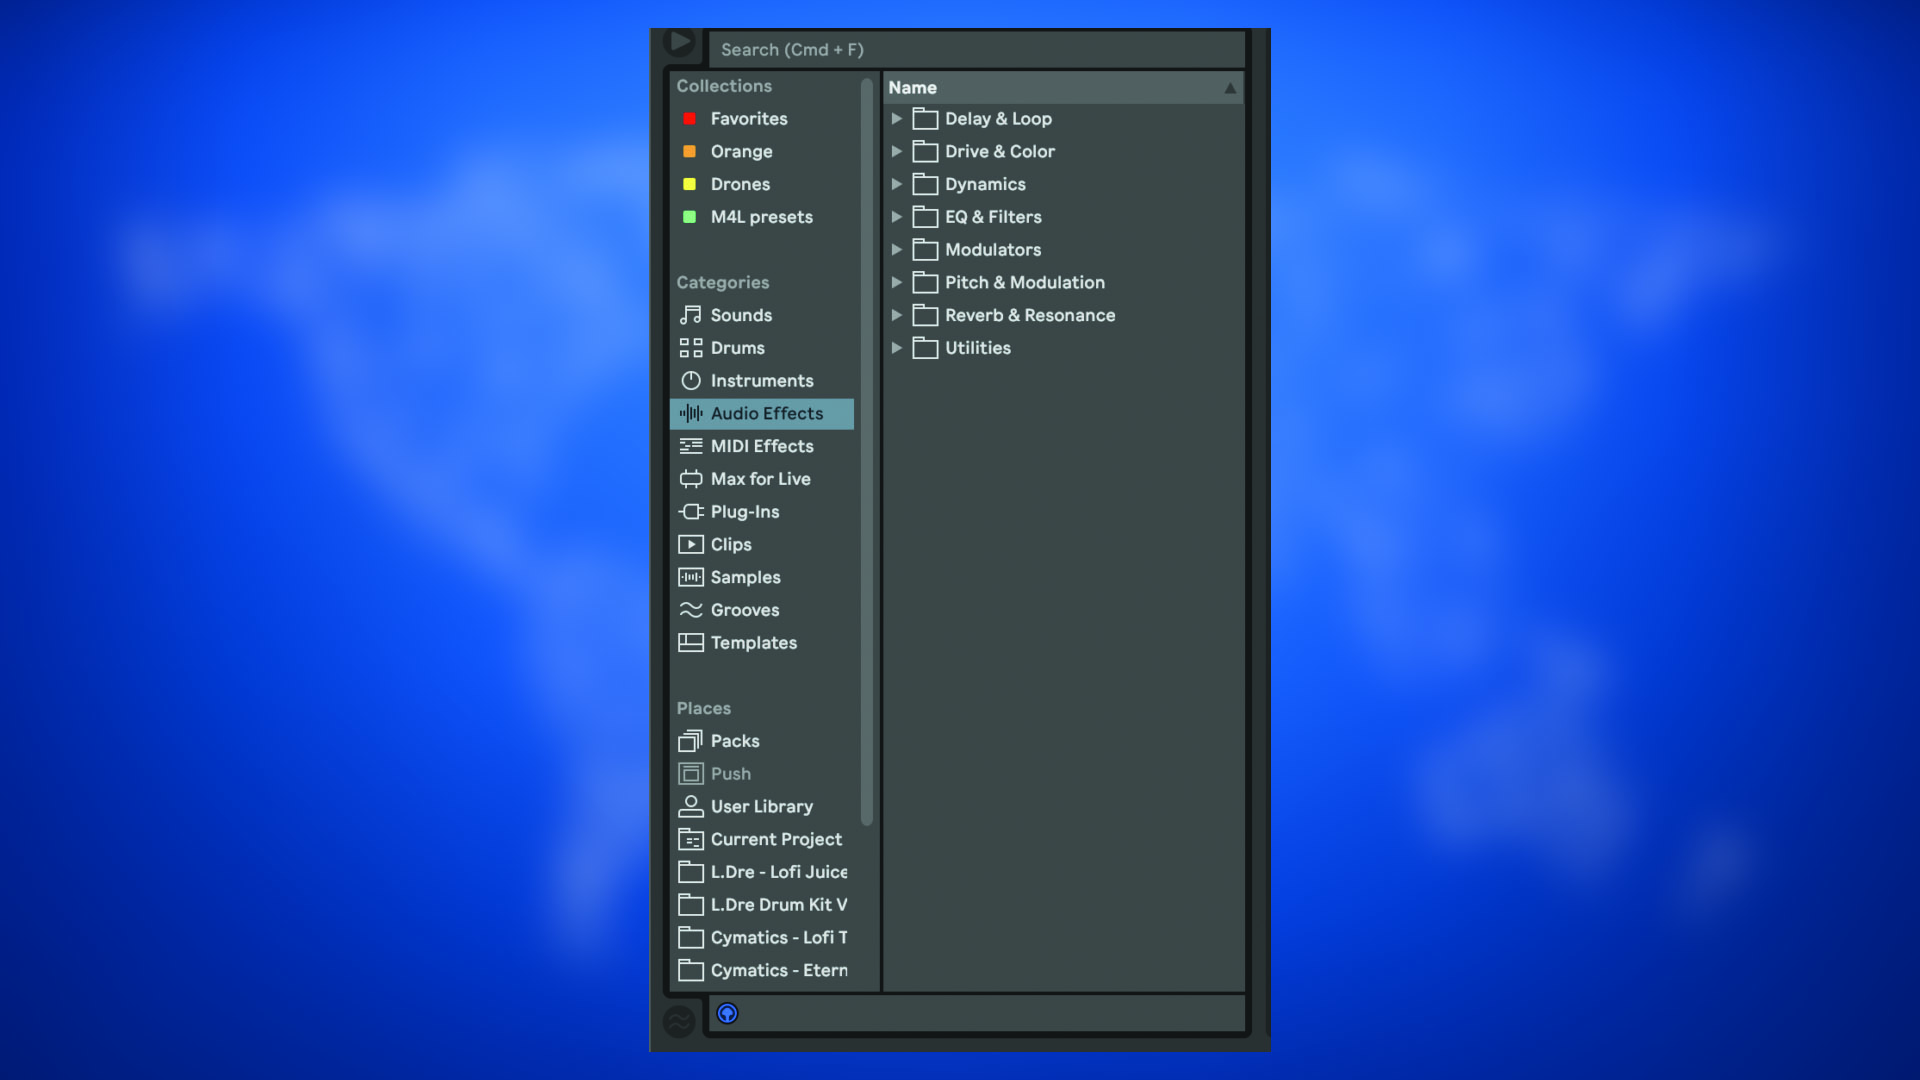
However, this grouping can become cumbersome when searching for a specific audio effect. To make things more accessible, consider ungrouping them. Right-click on one of the folders and deselect “Group in Folder.” All individual audio effects will be in plain sight, making navigation through the effects plug-ins much simpler.
2. Freeze/Flatten
This feature in Ableton Live is often underrated but can be a lifesaver for your CPU. Executing the freeze command on a track temporarily converts it into an audio file. While this process conserves CPU usage, it means effect plug-ins on the frozen track can’t be adjusted. However, if you need to modify an effect, simply unfreeze the track.
When the track has been flattened (this is done after freezing the track), enables those effect plug-ins to become permanent. You will be left with a track with all the effects in the chain recorded. This is an excellent way of committing to an idea, as well as reducing CPU.
3. Grouping Tracks Together
Ableton has a very simple-to-use Grouping feature that can be incredibly useful when audio editing.
This function is handy for bulk-edit instrument groups in your track. For instance, consider the drum section of your way. Grouping these instruments simplifies applying the same plug-in to all of them. Compression is often used to drum groups, ensuring the same setting is utilized across all individual tracks to maintain internal balance.
4. Mono Function in Utility
During the mixing stages of production, checking your track in mono is a good practice. This helps identify parts of the mix that might need emphasis or subtle toning down. In some instances, a particular sound might be too “wide,” causing it to become less distinguishable when played through a mono setup.
Bass frequencies can sometimes dominate during mono playback. Addressing this involves shaving off excessive low frequencies in individual tracks or, even better, employing the bass mono function in Utility. Activating this ensures that frequencies below a specific threshold remain mono, leading to a more centralized bass that doesn’t interfere with the stereo field.
5. Using the Collections Feature
Found a stock plug-in or instrument that resonates with you? Ableton Live offers a “Collections” feature to store instruments and effects in dedicated folders. This can accelerate your workflow and help keep all your favorite sounds neatly organized.
You can create multiple collection groups, each of which can be renamed and color-coded. When you discover an effect or plug-in that appeals to you, right-click and choose the collection you wish to add.
6. Personalized Audio Effects Rack
Another effective way to enhance your workflow in Ableton Live is by setting up personalized audio effects racks.
Audio Effects Racks are incredibly versatile. They allow you to consolidate the device chain, bringing all crucial controls together. These racks are potent tools for fueling your creativity in sound design. They let you craft unique effects, save them, and employ them in subsequent projects.
Racks come equipped with Macro controls, which can be mapped to MIDI devices. This provides a more user-friendly way to manage effects automation.
7. Useful Shortcuts
In any DAW, mastering keyboard shortcuts is invaluable. They can streamline your workflow more than you might expect.
Here are some handy ones, especially beneficial for beginner Ableton users:
cmd+D: Duplicatecmd+E: Split trackR: Reverse clipTab: Switch between Session and Arrangement Viewcmd+Shift+M: Insert new MIDI clipA: Automationcmd+L: Select LoopShift+↑(orShift+↓): Transpose Up or Down an Octavecmd+S: Save (Always remember to save!)cmd+Z: Undocmd+J: Consolidate/join clips togethercmd+G: Group Trackscmd+U: Quantize
There are many shortcuts to discover, but these offer a solid foundation for those new to Ableton Live.
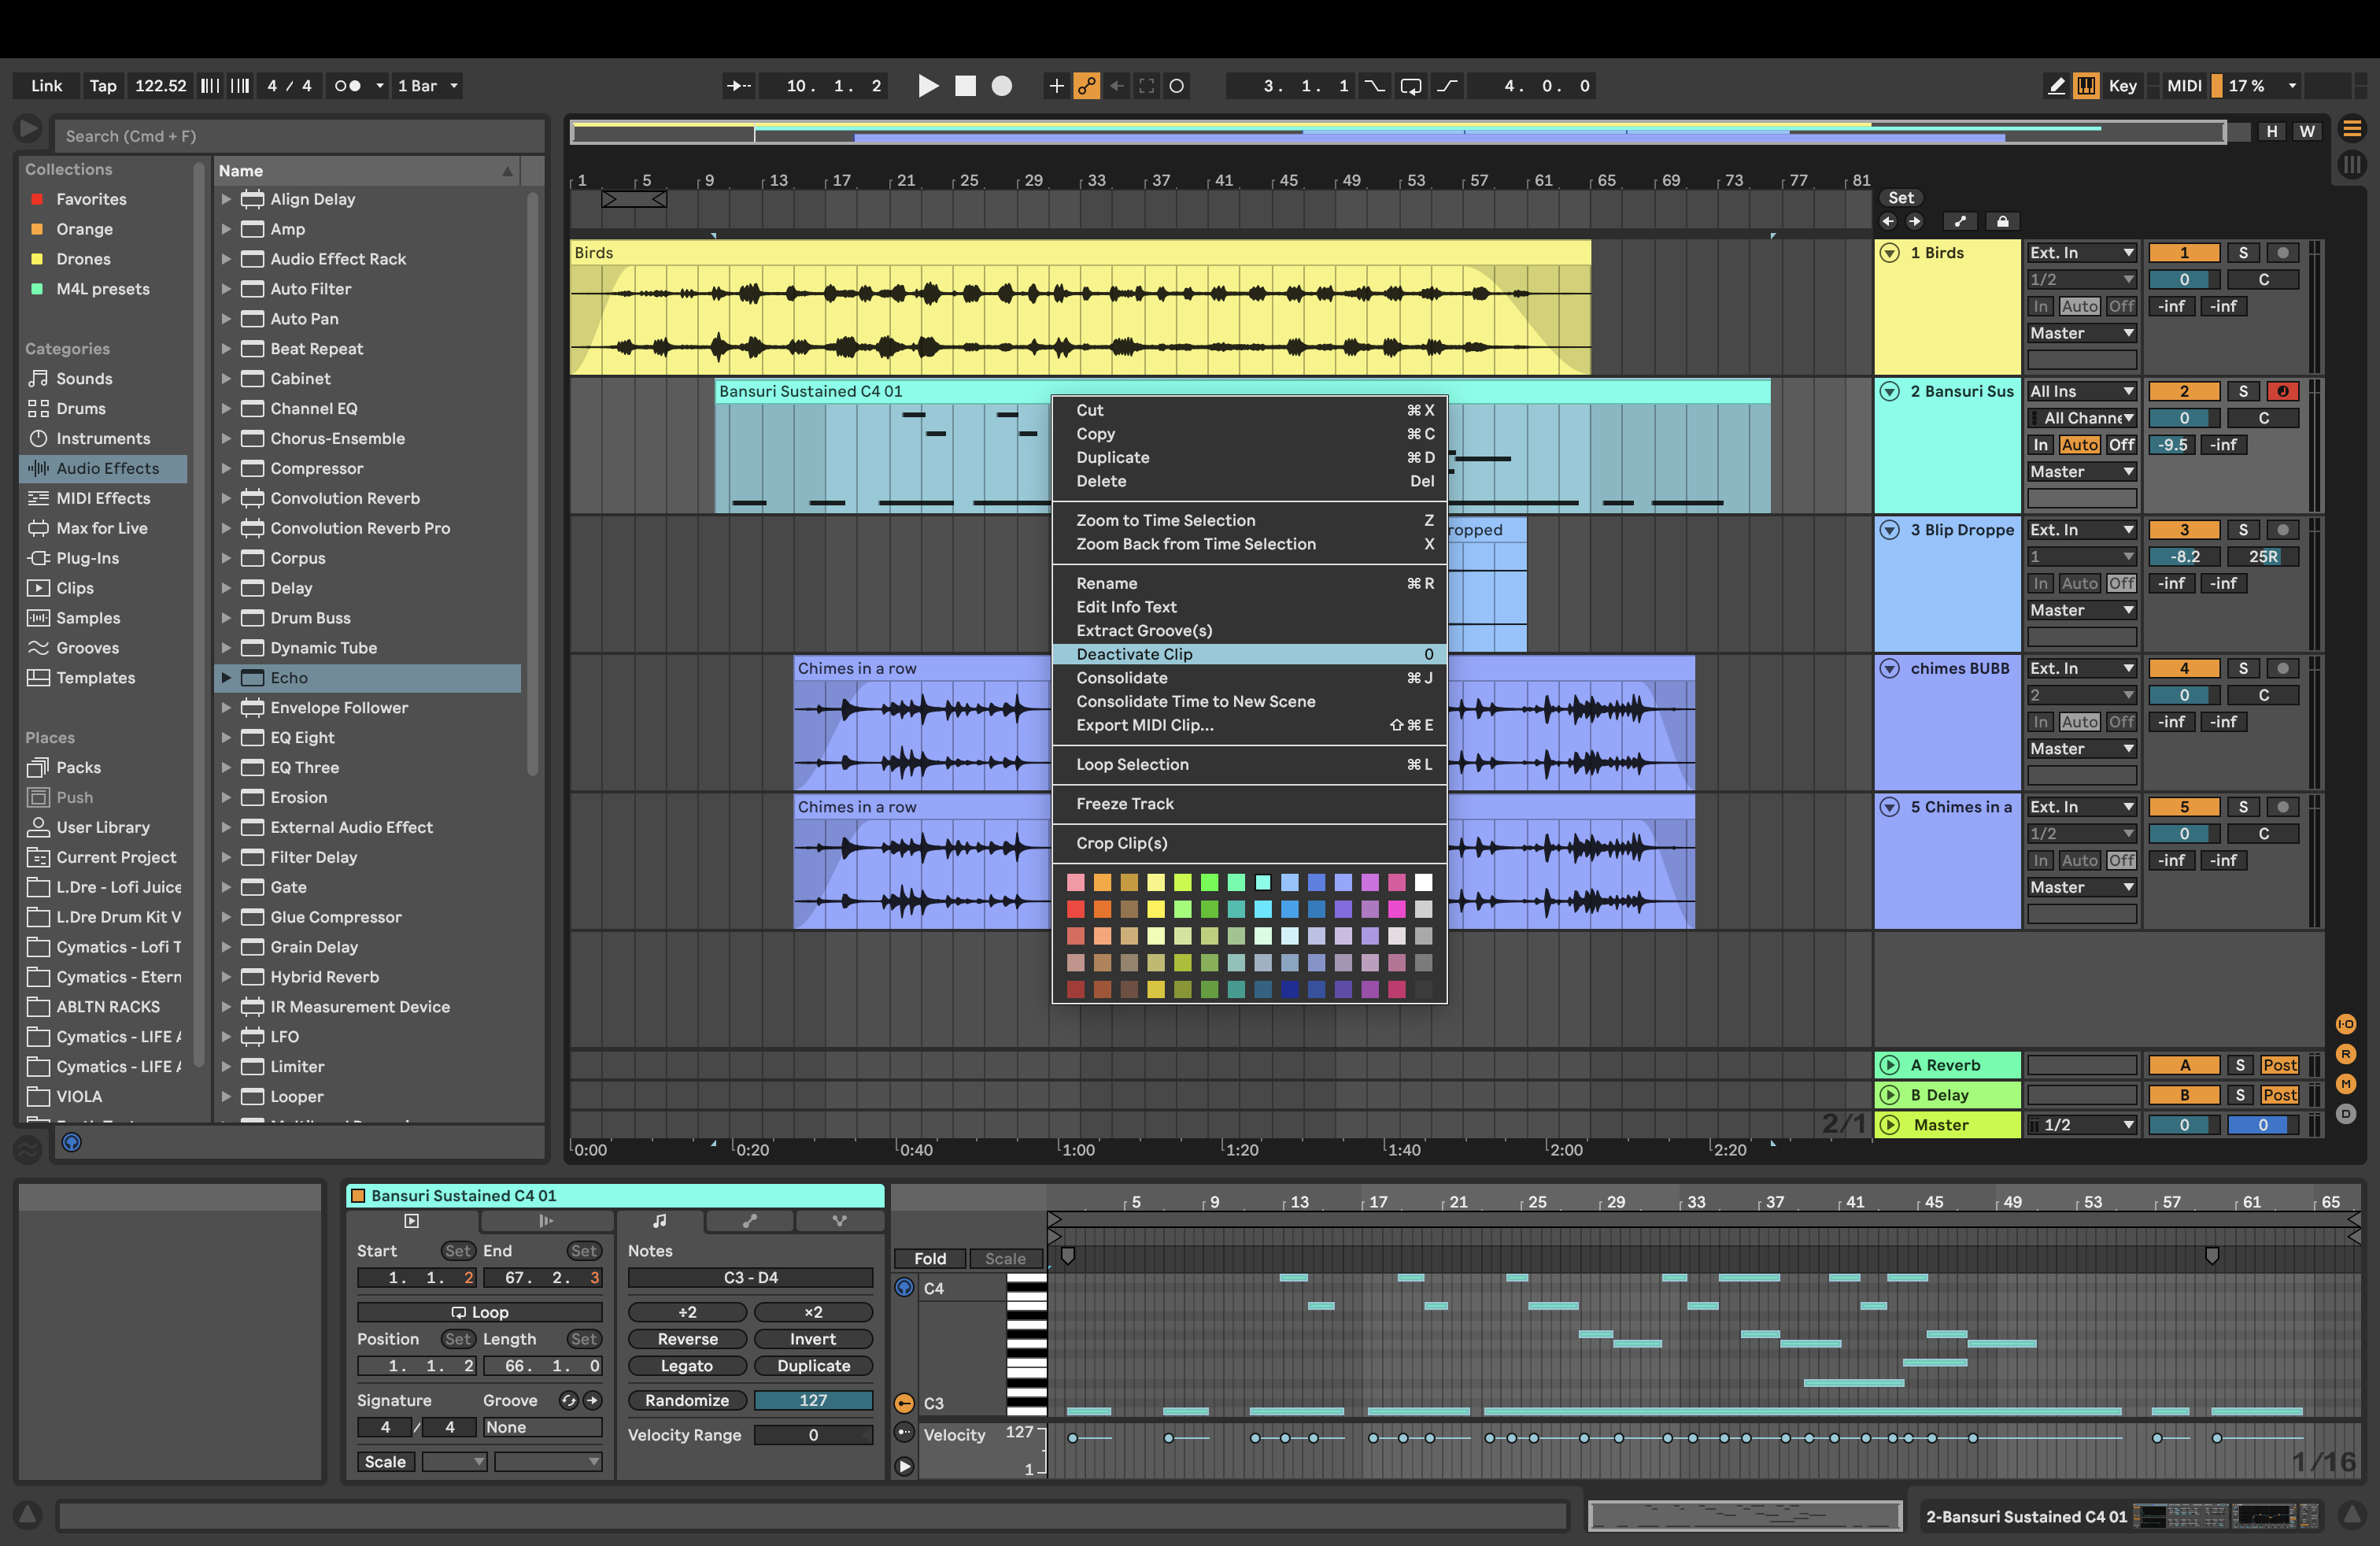
8. Deactivating Clips
One of Ableton Live’s standout features is its flexibility during the production process. A particularly useful tool is the option to deactivate clips. This lets users temporarily turn off a clip instead of deleting it. This proves valuable when you want to audition parts without removing any clip permanently.
To use this feature, right-click on the clip and select “Deactivate Clip” (or simply press 0).
9. MIDI Capture
Have you ever improvised on your MIDI device, only to struggle when recording those spontaneous moments?
MIDI capture functions as capturing your MIDI ideas before you even hit the record button, a little like the Live photo setting on your iPhone. Once you’ve played some musical ideas, press the MIDI capture button on the top panel, and the MIDI data will appear.
10. Organise your Sound Library
For producers and audiophiles that work with field recordings or samples, a useful tip to ease your workflow is to keep organised. Many of us have been there with audio recordings that are all over the place and hard to locate!
Ableton houses a sidebar that not only categorises audio effects, instruments, and favourites but also your own audio folders. Of course, you’ll first need to organise said samples into folders within your computer. Following this, you can click and drag your folders to Places. These select folders are easily accessible without having to exit Ableton.
For more on Ableton Live 11, check out these articles: