
Being able to capture good-quality sound is a crucial step in filmmaking. It’s essential to capture location sound and room tone with good levels, as they form the foundation of good-quality sound in your film project. Post-production editing will be more challenging if you pick up very low-quality sounds. There’s only so much fixing you can do! Using equalization in post-production editing and understanding how it works will aid the editing process and help you be aware when recording sounds during a shoot.
What is Equalization?
Equalization, or EQ, is adjusting the balance of frequencies in an audio signal. It corrects imbalances in the frequency spectrum and creates the desired tonal effect. Adjusting the equalization of a recorded sound is usually done using an equalizer on a Digital Audio Workstation. The equalizer tool allows you to cut or boost specific frequency bands, which can help shape any sound’s tonal character or make it more suitable for a particular scenario.
Reading an Equalizer
On your chosen DAW, there will be a tool called an Equalizer. This is used to edit the frequencies of any audio. The equalizer will be a graph, with the x-axis denoting the frequency range (Hz) and the y-axis denoting the decibels (dB). Certain frequency zones will be across the frequency range on the x-axis. These can be adjusted using EQ points (usually shown by a number). The lower the number, the lower the frequency zone.
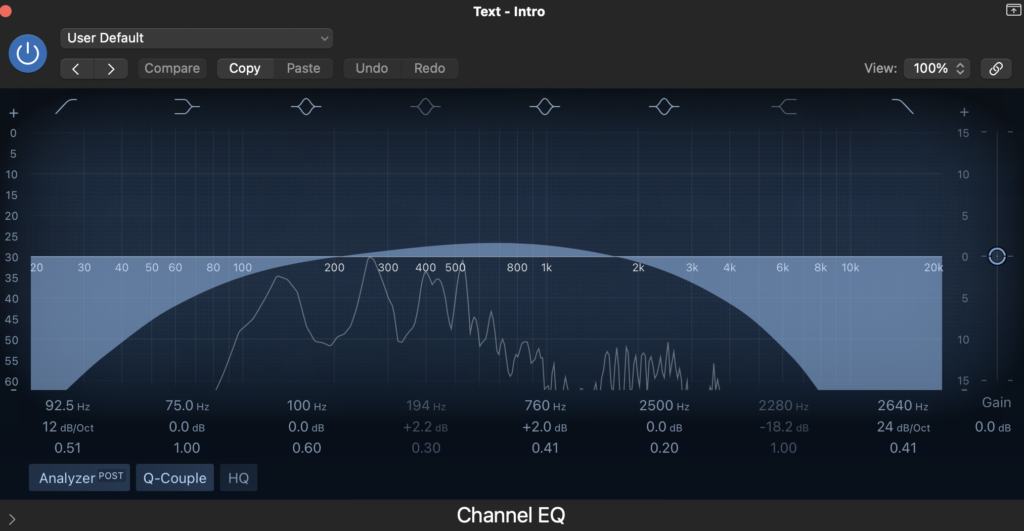
A graphical equaliser is what we call a Parametric EQ. This offers continuous control over every parameter. Due to their flexibility and versatility, parametric EQs are always a good option. Here’s an example picture of a parametric EQ.
EQ for removing unwanted sound
Noise can be found in an array of recording scenarios. If you’re a foley artist, eliminating noise is a must, as it can ruin the effect of the sound you want to create, such as footsteps. That noise sounds like a hissing sound and is present in the higher frequency spectrum. Alternatively, you can get a rumbling sound that falls on the frequency band’s lower end. We can use EQ to eliminate these certain noises.
All equalizers have settings called high-pass and low-pass filters. A high-pass filter allows only the higher frequencies to pass through, cutting off the low frequencies. This would be used to eliminate rumble. A low-pass filter does the opposite, letting only the low frequencies pass and cutting away the higher frequencies. This would be used to get rid of any hiss.
It’s also essential to note the different shapes you can get for the EQ points. When using a high- or low-pass filter, the shape will always be a shelf, allowing the user to cut away frequencies.
EQ for Shaping Sound
While an equalizer’s everyday use is to eliminate unwanted frequencies, we can also shape the sound by enhancing specific frequencies. As we mentioned in the shelf shape above, there is also a notch option. This is used when editing narrower frequency bands.
You can use notches to boost specific frequencies across the entire frequency spectrum. This can be done in the middle area of the frequency spectrum, where there are particular tones that you may want to bring forward. You can also use notches to dip at specific frequencies to reduce or even cut them out entirely. This can be an excellent tool for shaping sound and highlighting certain tones for better audio results.
Equalization and Dialogue
Using an equalizer will almost always be necessary when recording dialogue, whether for a podcast, voiceover, or ADR. Having high-quality sounding dialogue can elevate your projects, resulting in crystal clear dialogue. However, some issues can arise from recording dialogue. One is room resonance. Different rooms will build up specific frequencies when sound is produced more than others, which can, in turn, imbalance your dialogue recording. While you want only to capture the sound of someone’s voice, the sound of the room can be picked up.
Here’s a video from In The Mix with an in-depth tutorial on how to make your dialogue sound better. This video showcases audio editing in a precise manner. He breaks down each EQ zone and shows how to adjust certain frequency bands accordingly.
For more on audio, check out these articles: