It’s not uncommon to feel slightly overwhelmed by Resolve’s many interfaces. While Blackmagic has engineered the software to be as user-friendly as possible, it is, after all, a complex tool designed to address complex problems.
With its many node structures, the color page is no stranger to creating mystifying issues that can have you troubleshooting late into the night.
One issue, which is the focus of this article, is when a node only displays the individual corrections for that particular node, rather than the cumulative corrections applied across the entire node tree.
In the example below, I’ve selected the third node, and it’s only showing the adjustments for that particular node. Although these adjustments contribute to a larger correction, the node by itself, paints an ugly picture.
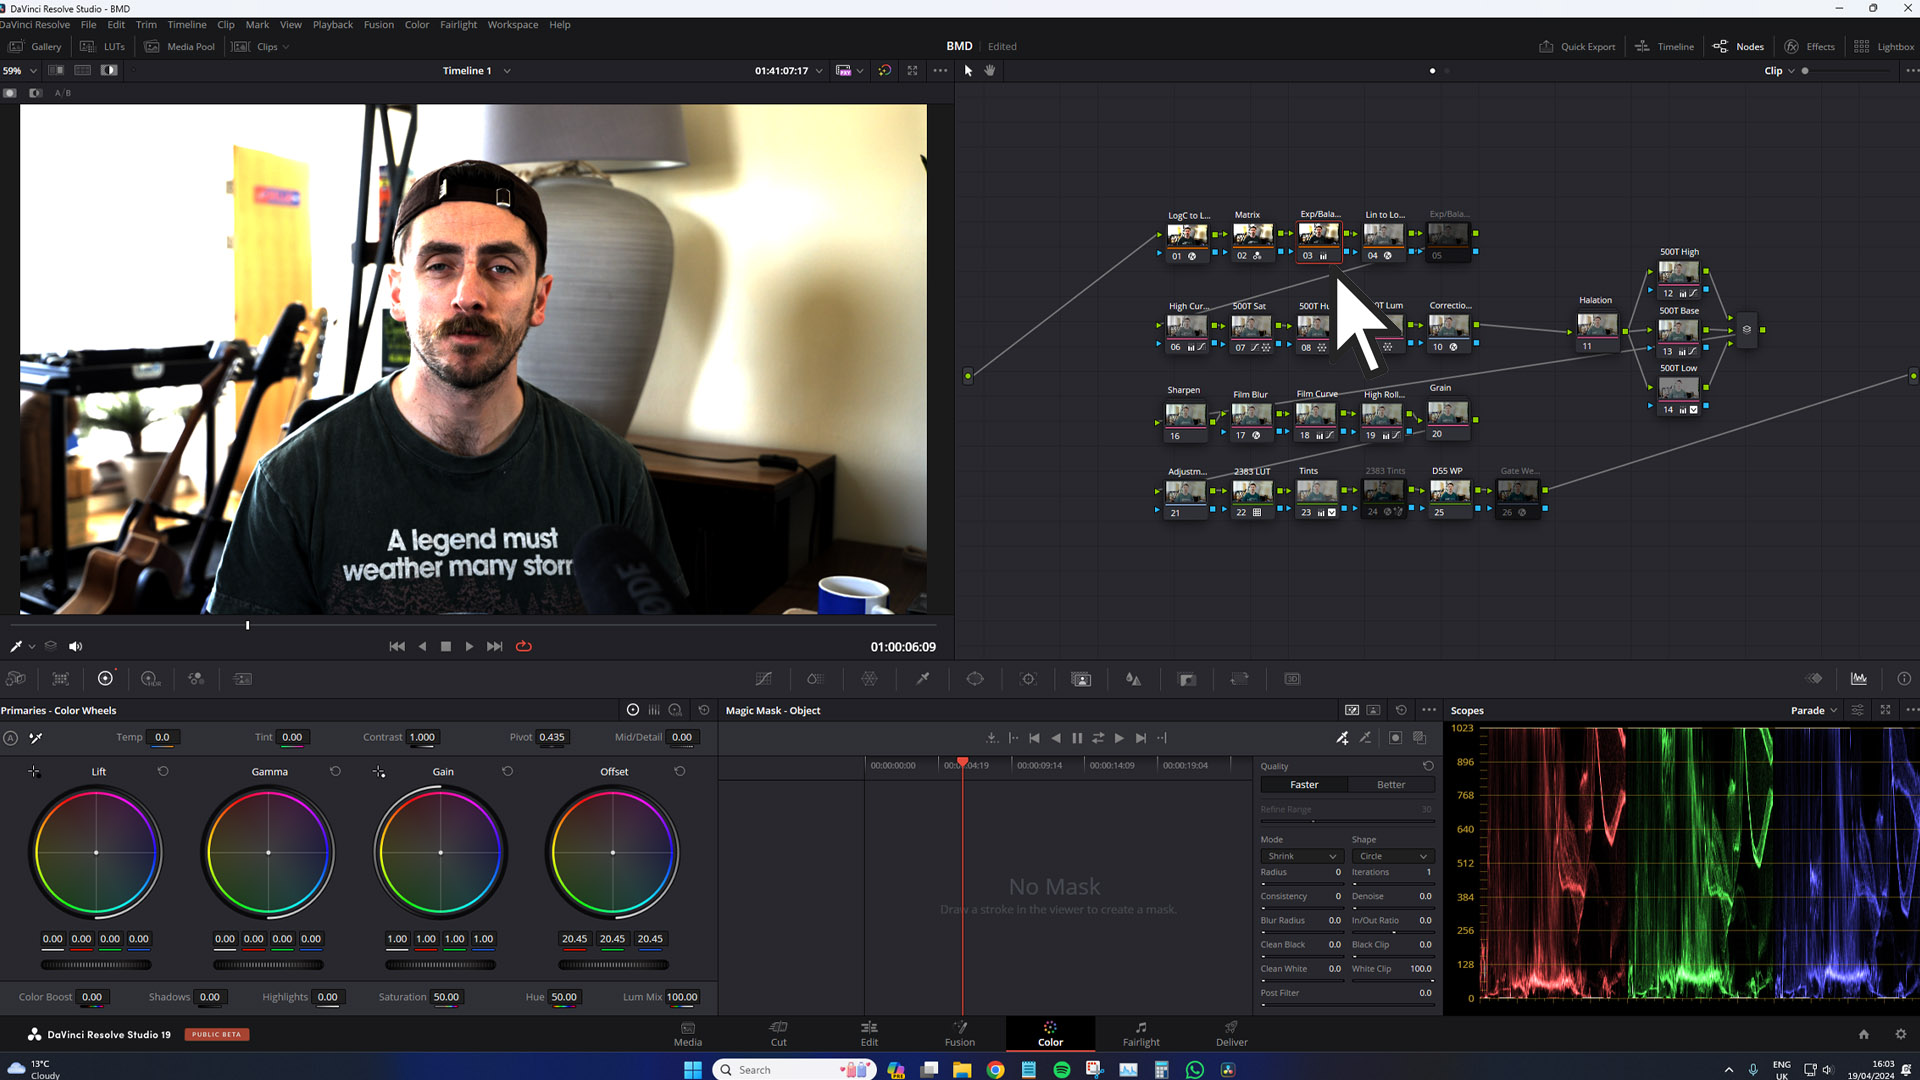
Likewise, when this issue occurs, your only way to view the entire grade is by selecting the final node. This process is highly impractical. So, what happens when this does not occur, and how can we address this issue?
There are two main reasons why this is happening, and here’s how you can turn it off:
Highlight Mode is Turned On
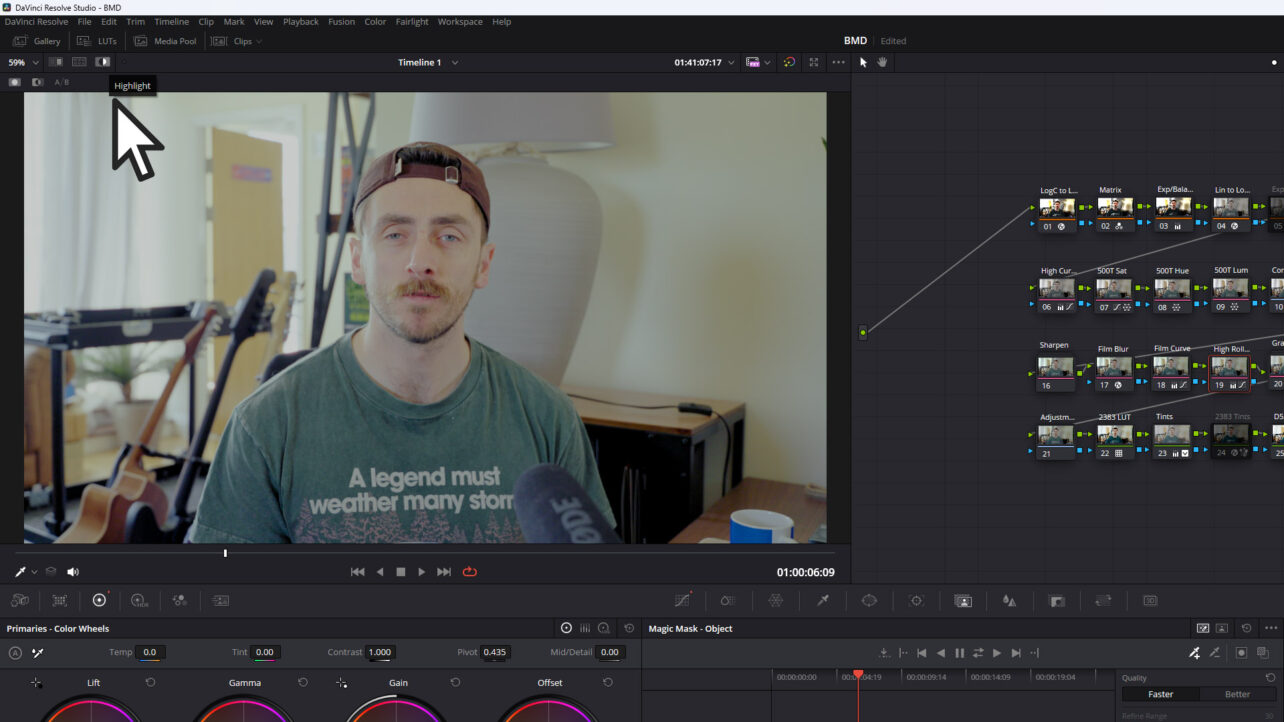
Our first root cause is if Highlight mode is turned on. In DaVinci Resolve, the “Highlight” function isolates and views specific color grading adjustments or effects applied to a clip. This function is particularly useful for focusing on changes without distractions from other elements of the image.
Initially, this was represented by a magic wand icon. In Resolve 19, it’s this icon.

It is also activated by pressing Shift+H. This is an easy mistake if you have just pressed Shift+J to rewind the clip at 2x speed.
To return Resolve to normal operation, you need to click the icon or once again press Shift+H.
Magic Mask is Still Active
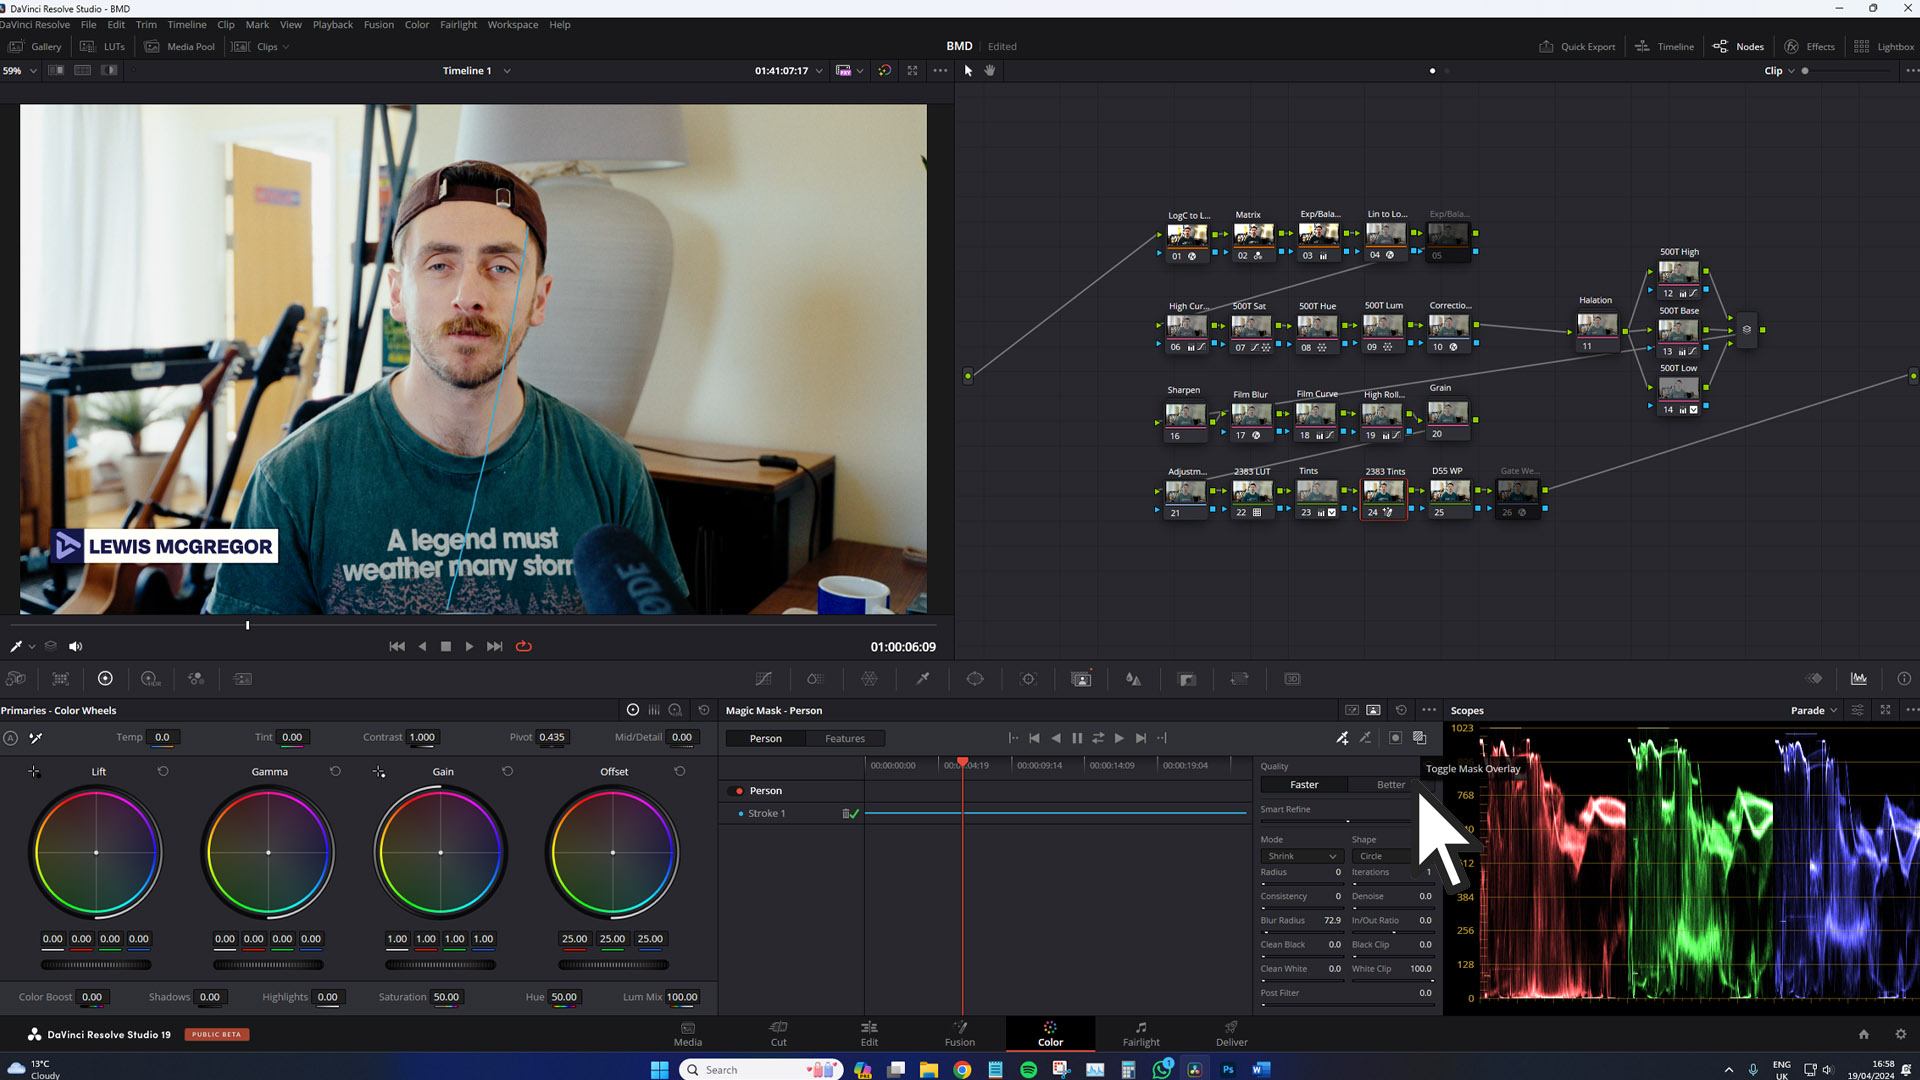
The second culprit could be if you have been using the Magic Mask and the toggle mask overlay is still active.
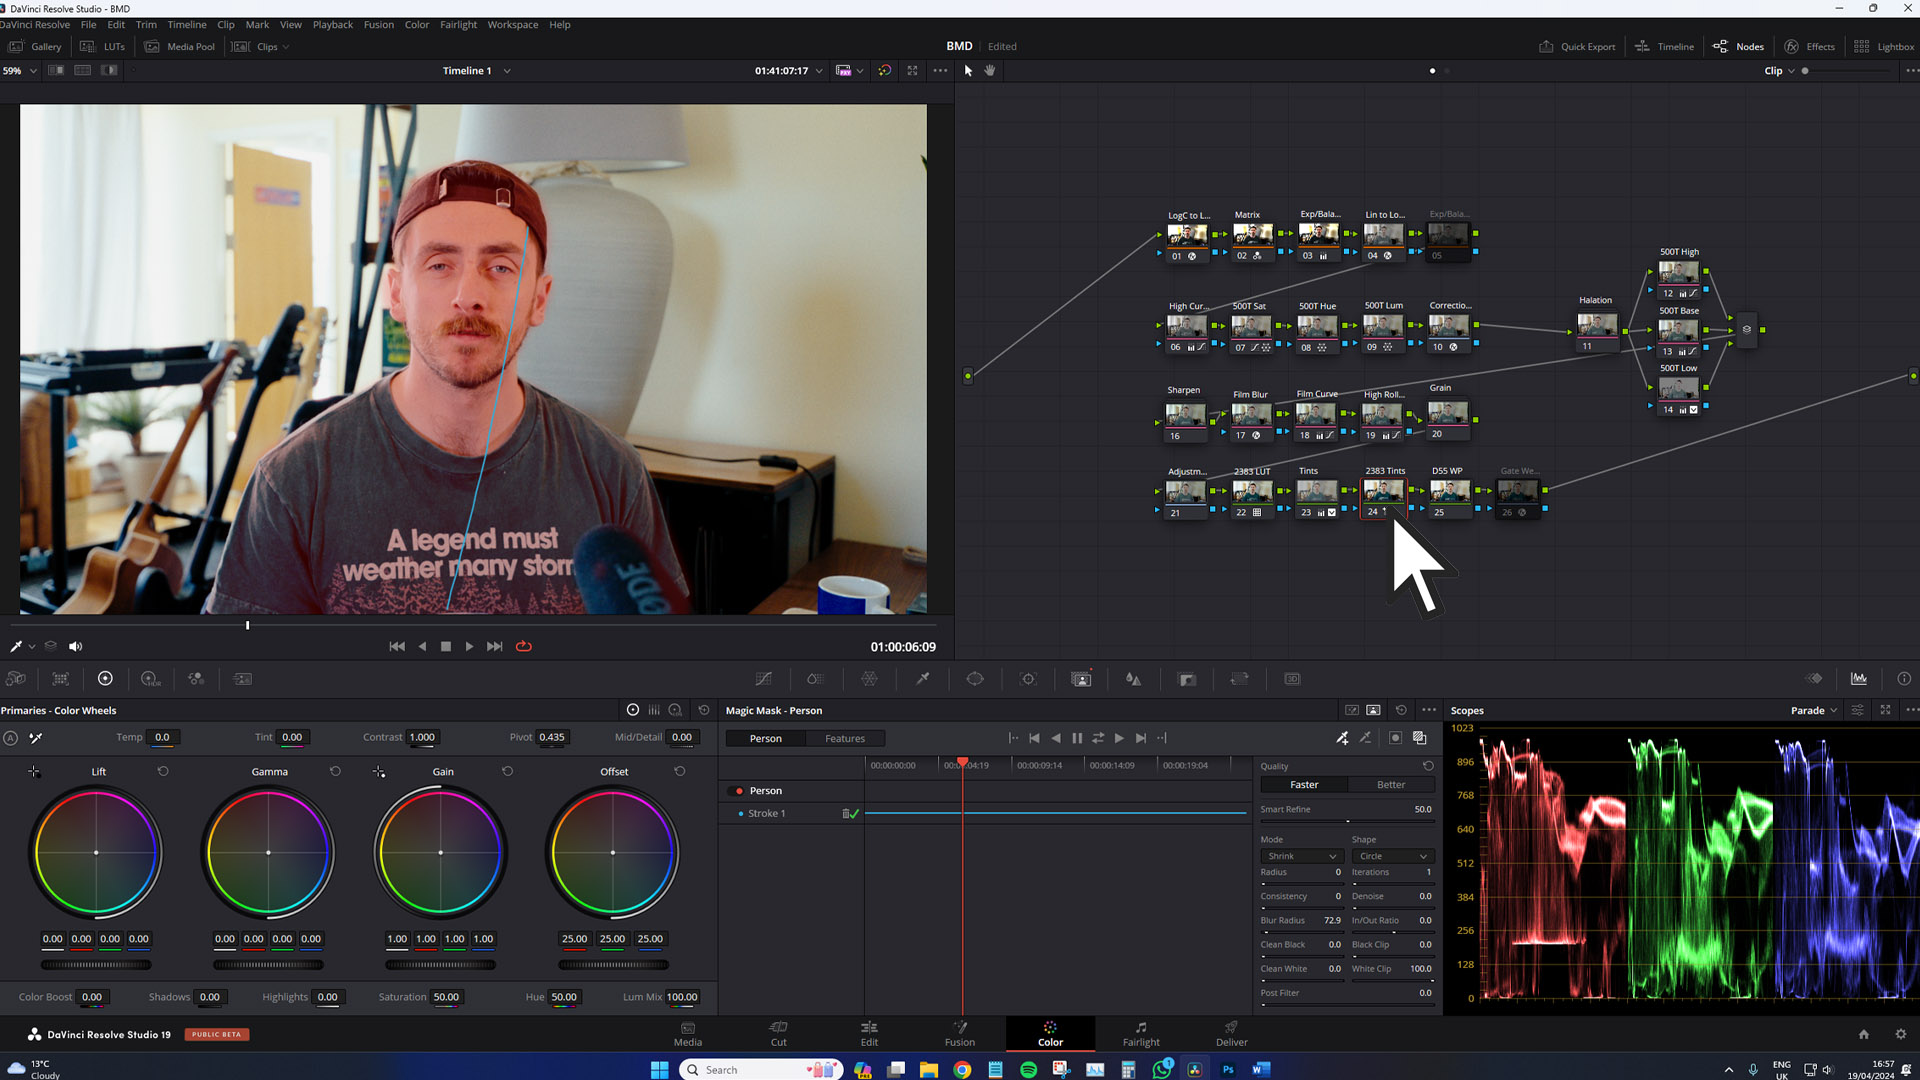
This function creates a red overlay over your masked subject, helping ensure the mask has been applied correctly. However, when active, in order for the overlay to be displayed correctly, it nullifies the corrections made in other nodes in the same way as the highlight function.
Here, I’ve selected node 4; however, because the Magic Mask overlay is active in node 24, we’re only seeing the Colour Space Transform adjustment in the preview window. A very similar problem to having the highlight function active, but not as obvious.
I would wager that this is likely the culprit if you’ve found yourself in this article.
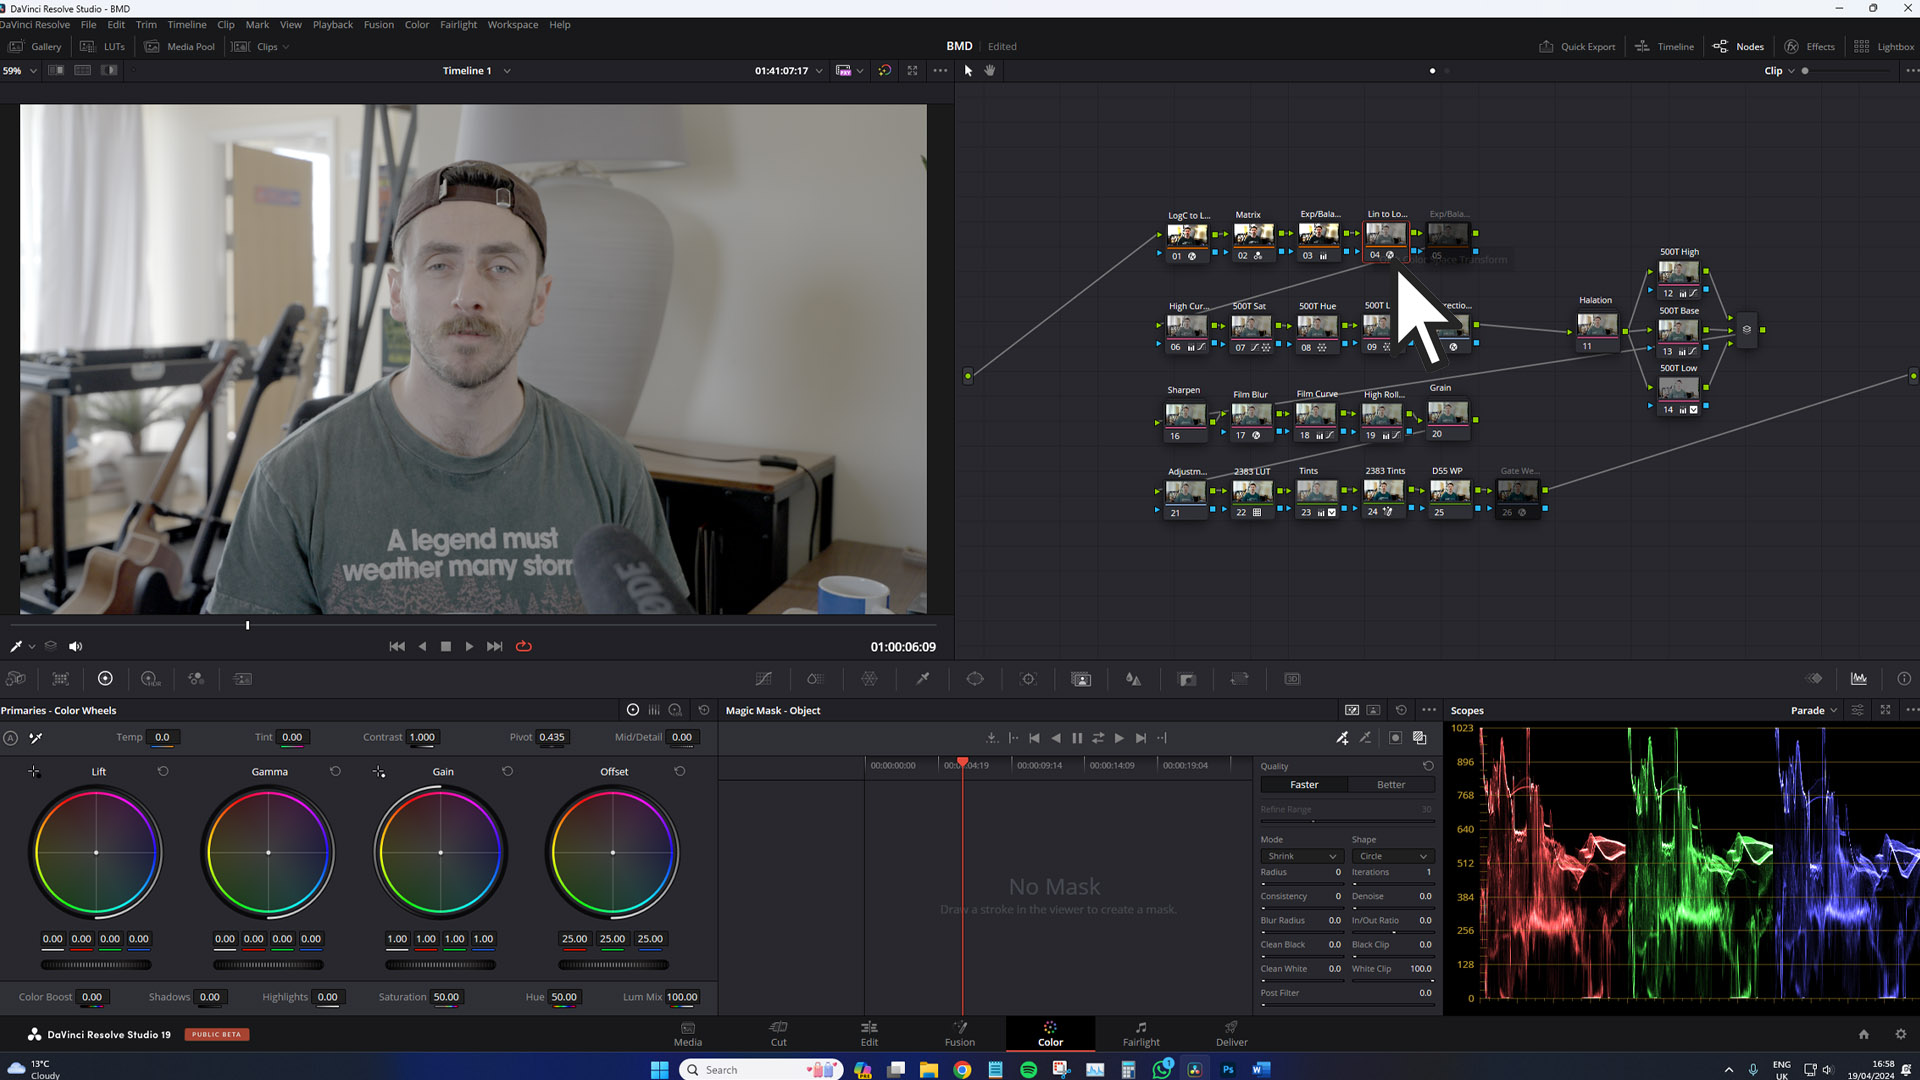
To fix this, you need to turn off the mask overlay on the Magic Mask node. Problem solved! However, do ensure that you are turning off this function from the node that has the Magic Mask active.
For more on DaVinci Resolve, check out these articles: