
I have recently been playing the newly released Ghost of Tsushima PS4 video game, and besides being a great game, there are several cool animations and UI effects, but one that caught my eye was the disintegration effect of the mission text when you had completed said mission.
It’s not as explosive or as dusty as other text disintegration examples, and given the art direction within the game, I might think that these are supposed to be leaves or petals. After seeing this just a few times, I made it my mission to replicate that effect. And in the video tutorial below, you can find out how to do just that.
Not got time for the video? You can find the full transcript beneath, however, some segments may refer to a specific part of the video, so make sure you later watch the video.
The Breakdown
If we refer back to the game and see how exactly the text breaks away, you can see that the text itself doesn’t actually disintegrate, but instead, particles are generated from the side of the text, and then the text is swept away with presumably a linear wipe. I want to take that foundation and make it more organic.
This is what I have.
Let’s go ahead and create this disintegration effect in Adobe After Effects.
To start, I’m going to create a new composition, and while you can use Kanji for symbols, you can also use text or shapes. However, to be in the style of the game, we will be placing the text vertically.
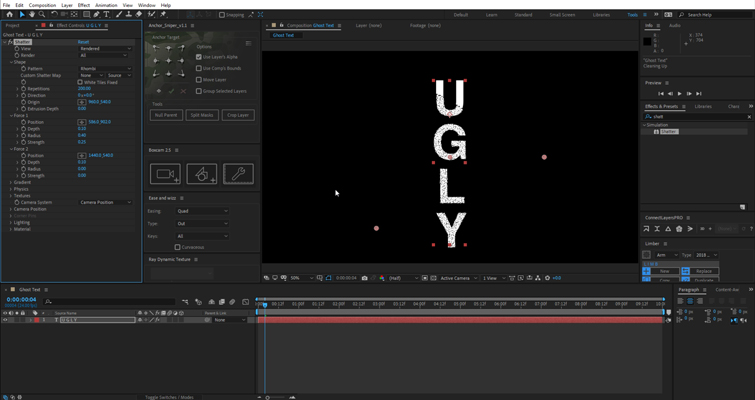
We are then going to add the Shatter effect to the text as opposed to using any type of particle generator.
Shatter Effect Settings – Shape
- Change View to Rendered
- Change Shape to Rhombi
- Increase Repetitions to 200
Direction refers to the direction of the shape, not the direction of the shatter, and we’re going to leave this as is, but we will come back to it later. We’re also going to reduce the extrusion depth to 0 as we don’t want any form of three-dimensional shapes.
Force 1 Settings
Now we come down to Force 1, and this is going to be one of two panels where we can give the text the Ghost of Tsushima look. However, before we do anything, let’s open force 2 and reduce the strength to 0, so which is going to turn off force 2 parameter.
- Reduce strength to 0.25
As noted in the game, the breakaway happens from the bottom of the Kanji text; therefore, we’re going to place the Position of the force at the bottom corner. In doing this, the shatter works its way up the text.
The radius defines the area that the force affects, but we don’t want it to happen all at once. As stated, I want to make sure it looks like naturally crumbles away like leaves caught in the wind. As such, we’re going to reduce this to 0.20 but also press the stopwatch to create a keyframe. Then incrementially move forward a few frames and increase the radius until it covers the entire text.
I can’t give you a specific number to use for each step because everyone’s text will be smaller or larger in shape, depending on what you have written. But looking at mine, I’ve gone from 0.20 to 0.38, to 0.60. and this was within 22 frames. So, at 24fps, it was nearly a second for the entire text to crumble.
Physics Settings
While the disintegration effect looks good, the physics simulation is entirely wrong. So, let’s open the physics property.
Rotation speed and tumble are intrinsically linked. The tumble sets which axis the pieces will rotate along, and the rotation speed dictates how fast those rotations are. We’re going to set this at free and bump up the rotation to 1. Likewise, we are also going to bump up the randomness to 1.
Viscosity Specifies how fast pieces decelerate after being blown apart. We don’t that to happen. We want our leaves to do their own thing. We’re going to turn this off completely. Mass variance Specifies the theoretical weight of the pieces as they explode. For example, a large part is heavier than a small piece and therefore does not fly as far or as fast when it encounters the blast. So we’re going to bump this up to 100 so some parts just operate independently, kind of how leaves would act.
Gravity Settings
Finally, the gravity settings. Going by the game direction, we’re going to have our direction at 90 degrees too, and we’re going to reduce the gravity to 0.40, so it’s a slow force opposed to being instantly dragged down. To conclude the Shatter effect, we’re going to go back up to the direction, move the playhead to the start of the animation and select the stopwatch, move to the end of the animation and bump up the direction a considerable amount. This will give the shattered pieces better variance when they float away.
I think that could be rendered as-is. It looks very natural; the pieces move reasonably independently. However, we’re going to give it that extra bit of finesse with a Mesh Warp.
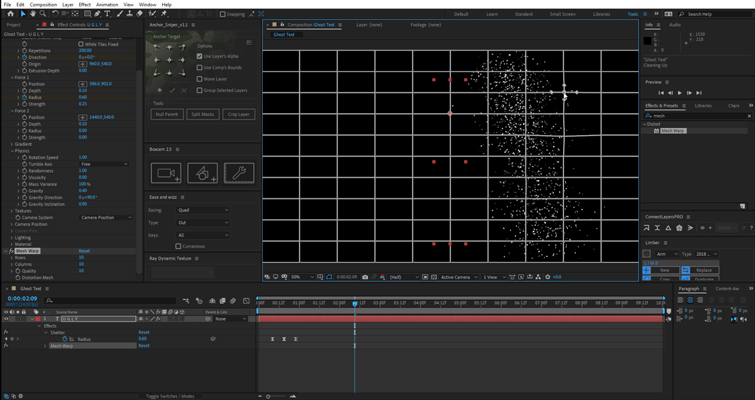
Jump back to the effects panel, add mesh warp to the text, and increase the rows and columns to 10 each. Now, these adjustments are to be minimal, and we only want to add 5-6 warp points. These points are to be very small to give the flow the slightest bend. If you make the warp too large, it will be very apparent and look like all these particles have been sucked into a vacuum within this one area.
To finish the effect, like Ghost of Tshumia, there’s a subtle glow to the text.
Glow Settings
So we’re going to add a glow.
- Glow Based On: Alpha Channel
- Radius: 75
- Color Looping: Sawtooth A>B.
Then change color A to a very light yellow.
Free Download
With the settings followed above, you should have an excellent looking disintegration effect. However, if you’re new to After Effects and still get lost with the guide, you can download this preset to auto-complete the process. You can download the preset here. Note, when using the preset, you will need to adjust the position within the Force 1 panel.
For more video game-inspired effects, check out the links below.