I’ve been a gamer for as far back as my memory will go. Outside of video games being a source of entertainment and leisure, they also serve as a deep reservoir of inspiration. I’ve recently been playing Call of Duty: Modern Warfare, an acclaimed reboot of the franchise, and before some missions, there’s a map overview of the location where you will be dispatched.
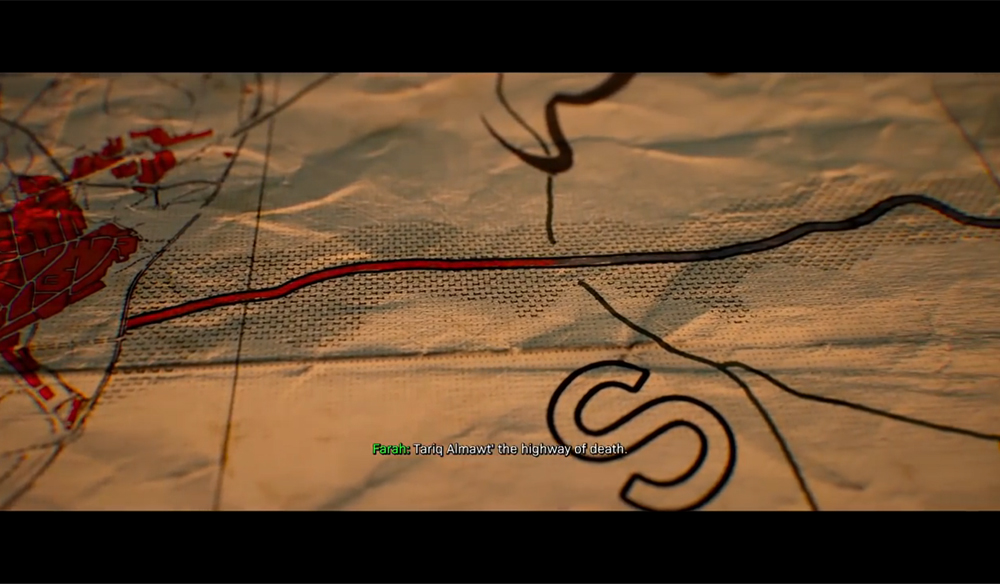
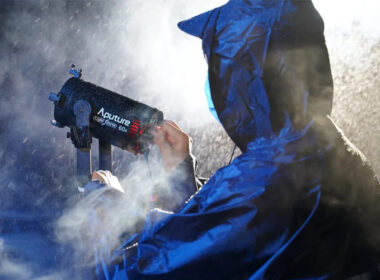
Typically in these games, the overview usually a digital map or a 3d render of the environment. In this game, the map is presented in 3d space, but it’s been produced in a manner where it’s as if we have a camera with a macro lens tracking above it, and we have visual abnormalities such as chromatic aberration, areas out of focus, and on some missions, cuts of light from an outside source. In the tutorial below, I’ll take you through the steps on how you can achieve a similar result in Adobe After Effects.
Although I would recommend watching the video tutorial above, there is a written transcript below.
The Process
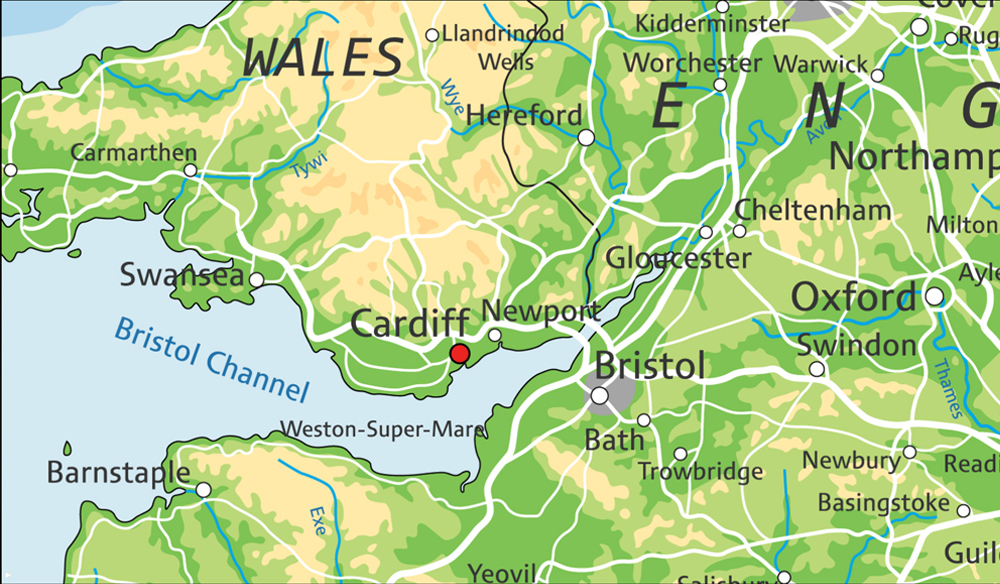
We’ll be turning this image
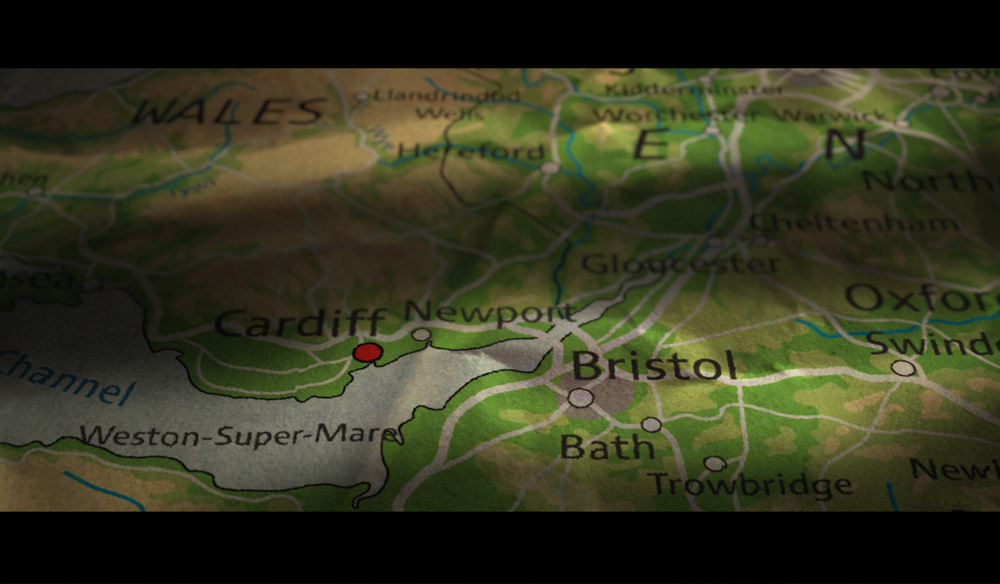
Into this:
No plug-ins needed. You just a paper texture that has some creases, and a map image that is at least four times as large as your composition size.
Step 1
We’re going to go ahead and create a new composition and bring in your map image and place your paper texture underneath. Next, we’re going to add a displacement map to the map layer.
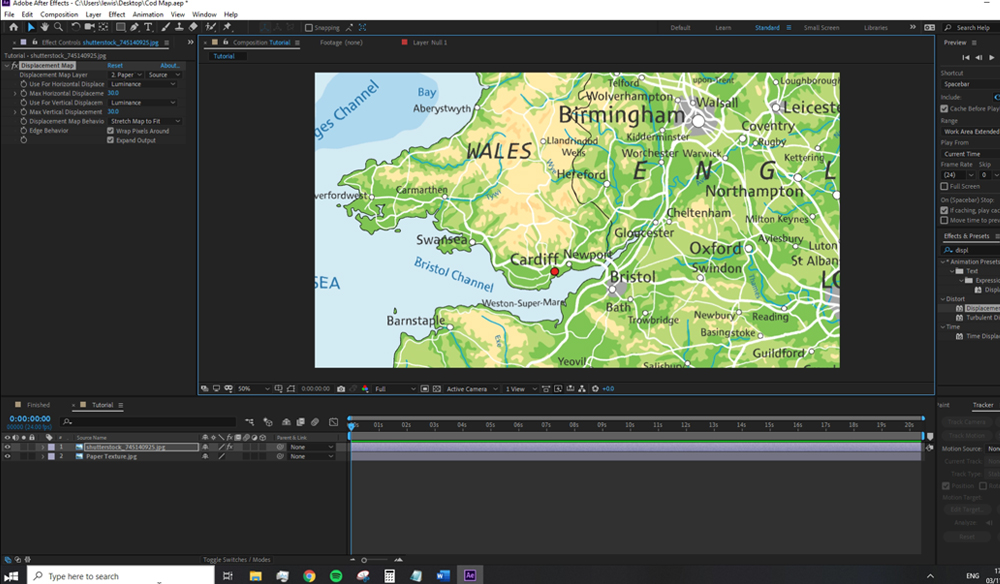
We’ll set the source to the paper texture, and change both the displacement method to luminance and give it a hefty bump up to 30. Change the displacement map behavior to Stretch Map to Fit and select Wrap Pixels Around the edge. If you’re unfamiliar with displacement maps, this is mostly going to cause the details of the map image to conform to the elements of the paper texture; for example, we can see the B within Bristol channel has folded in on itself. However, this doesn’t look that map-like, so we’re going to change the blend mode to multiply.
It looks more genuine, but also very friendly, and this is Call of Duty, it needs to be gritty. So, we’re going to add Levels to the paper texture and bring the midtones right the way up so it brings out the depth of the paper.

Step 2
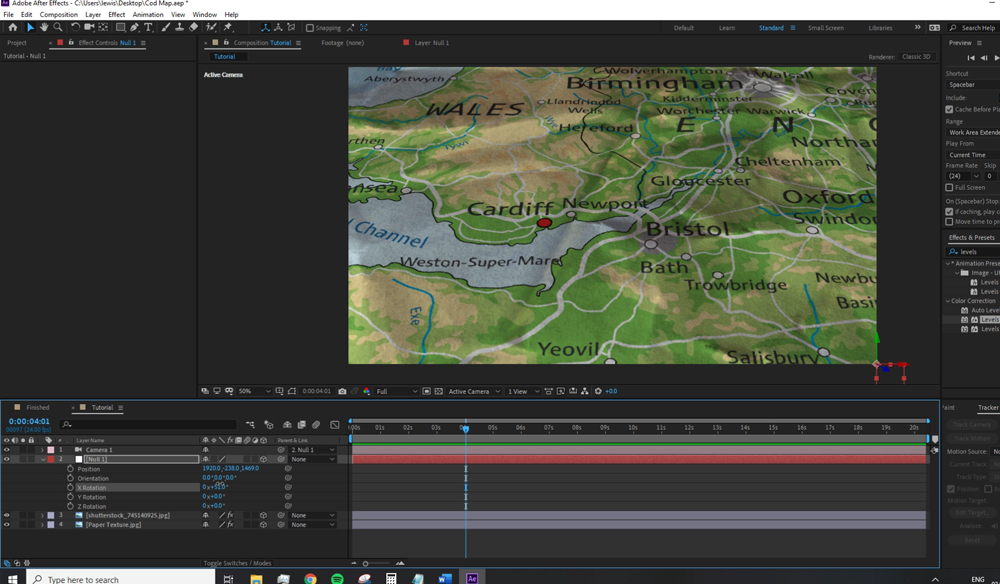
We’re going to make both files 3d layers, then create a new camera and null object (remember to parent the camera to the null object and make it a 3d object). Find a good starting point for your camera position. If you want to replicate the Call of Duty element straight on, then you’re going to want to position and rotate the camera, so it hovers directly above the map.
Step 3
Now we’re going to create our lighting effects. We don’t want the map to project shadows from the texture bumps, as these shadows exist outside of the shot; rafters, holes in the building, an open door.
Nothing laborious, we’re just going to create a new black solid, make it into a 3d layer, and position it directly over the map layer, making sure that to it extends past the edges of the composition as we’ll be animated the camera a little later. Take your pen, and create a mask in an obscure fashion.
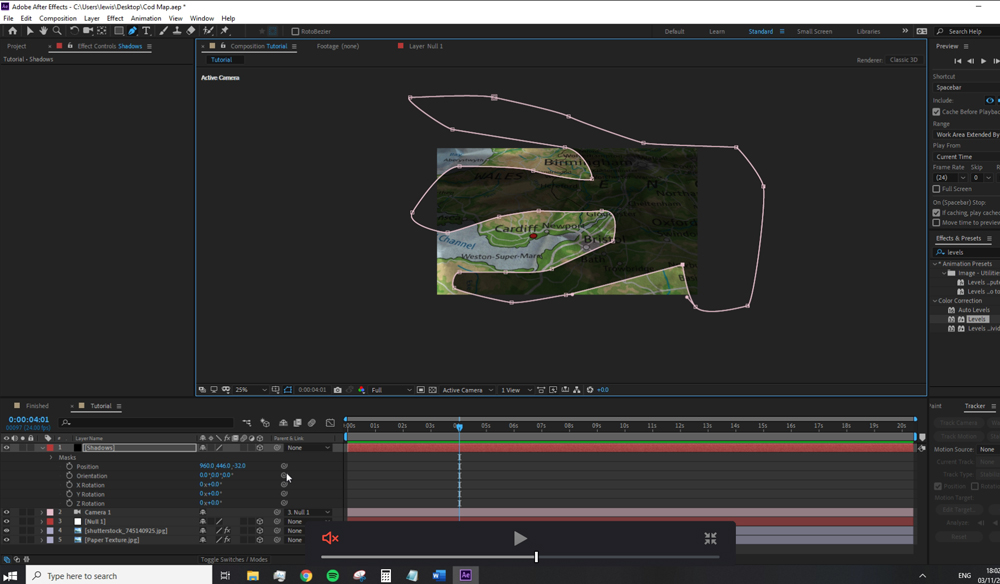
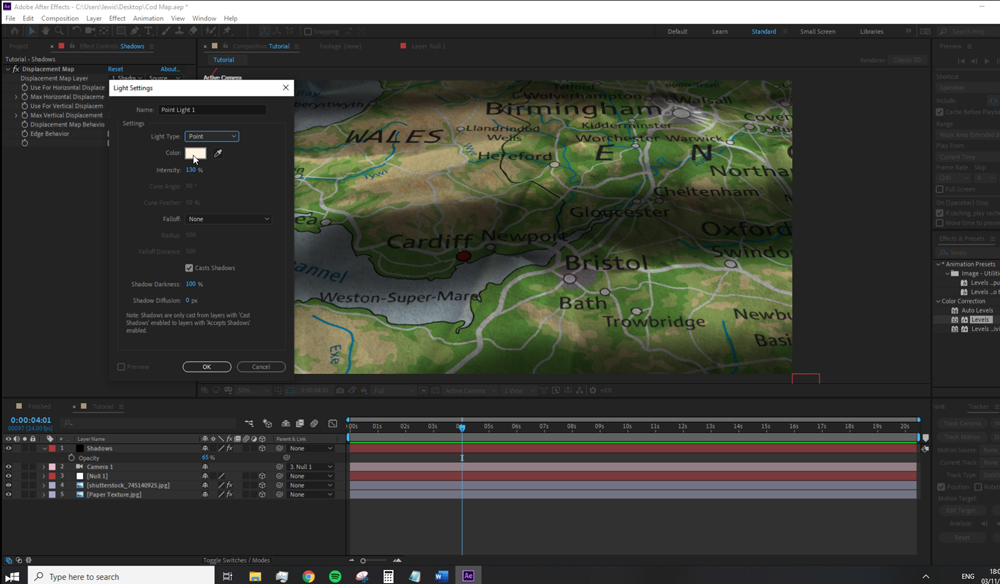
Open the mask properties and extend the feather for 50. And then hit T to bring up the opacity and lower it to 50 to 65. Ok, looking good, it definitely looks like this map is being studied in a grungy shed, but the trademark of all grungy sheds is the rusted light.
To replicate this, we’re going to add a new point light, and we’re going to color the light so it’s slightly warm—as if a tungsten bulb—and increase the intensity to 130. We want to position the light off the to the side in the way that the shadows have been cast, so in my example, I’ll push it slightly above and to the right.
Step 4
Truthfully, the last few years have been spent away from After Effects and more color grading based in Resolve, so I was quite surprised to see that the two effects I wanted, a tilt-shift and chromatic aberration, aren’t directly available effects and often require 3rd party plug-ins. However, there’s a cheeky way we can get around this. We’re going to turn off the light and shadow layer for the sake of being able to see what we’re doing, and we’re going to create a new adjustment layer, and add VR Chromatic Aberration.
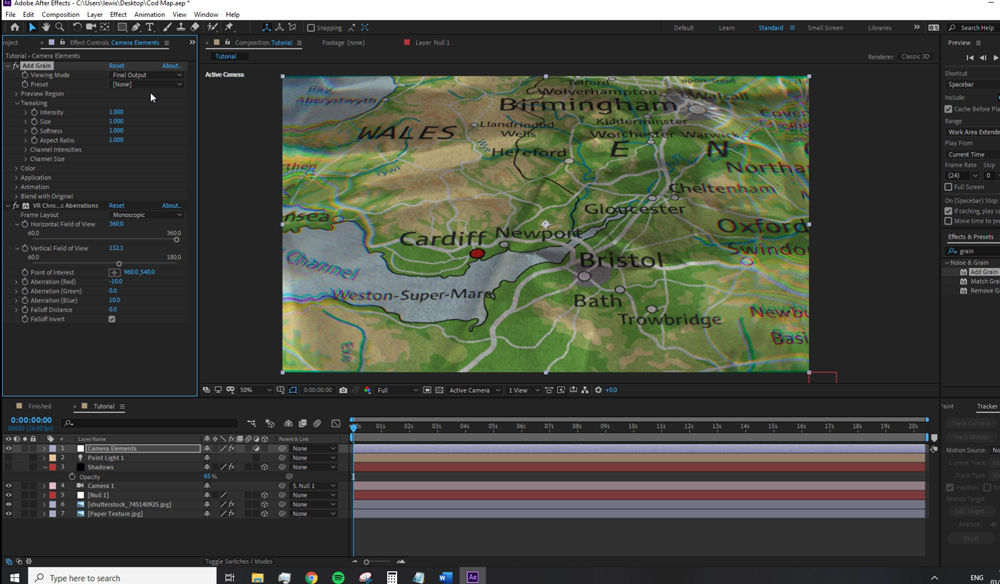
This is actually an effect for virtual reality footage, but we’re going to use it anyway as it’s quicker than using the channel mixer. First, change the vertical field of view to 130, reduce the falloff distance to 0, and invert the falloff. This now has created an effect where the chromatic aberration is only applied to the edges of the image, quite like an old anamorphic lens. We’re then going to add grain to give the map a little life when we move the camera; not everyone has grain folders, so we’re going to use the built-in AE too. To be honest, due to the nature of this effect you can use whatever you want; just make sure the intensity is set to half and that you tick monochromatic.
Step 5
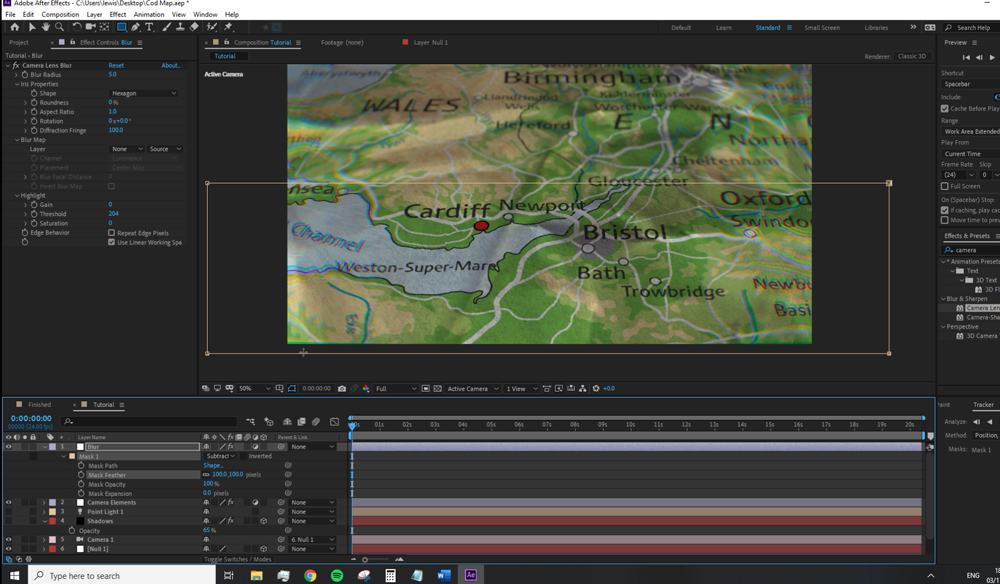
Finally, we’re going to create a final adjustment layer, add a camera lens blur; the default value is fine. We’re going to mask the lower third of the image, then invert the mask, and add a feather of 100. This gives us the perspective that we’re super close everything ahead is out of focus.
If your project calls for it, you can then animate the camera position, but this is the final result.

See you on the battlefield!