

In 2020 FilmConvert is no longer a new tool on the market; it’s now part of many filmmaker’s digital toolboxes, and unlike a LUT or color preset, FilmConvert is more scientific in how it approaches the color transformation of your image. First, it will use the exact color science behind the listed film stocks, and it will apply them based on your camera’s base data. I implore you to watch the video tutorial, however, if you would prefer to read the written review, you can do so underneath. However, there may be a few areas that specifically relate to the onscreen action.
Using The Legacy Plug-in
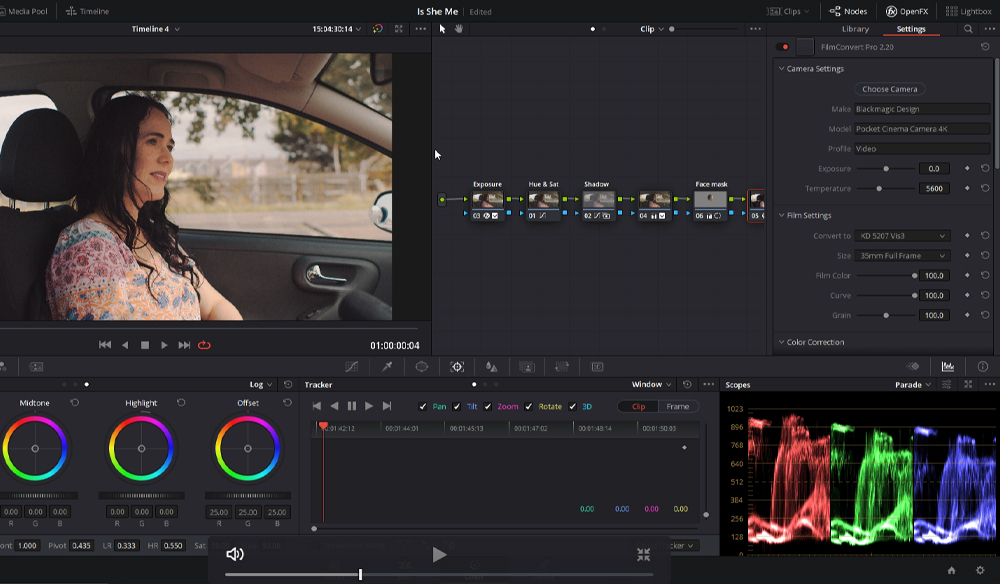
Before Nitrate was introduced, I would primarily use FilmConvert as the icing on the cake. I wouldn’t use it as a standalone tool; it was to finesse my footage and add that filmlike texture. For example, if I open up my gallery and bring in this before grade, you can see here that with my other nodes, I’ve made my initial corrections to the color and exposure, stabilized the shadows, and so forth, then I’ve added filmconvert on end.
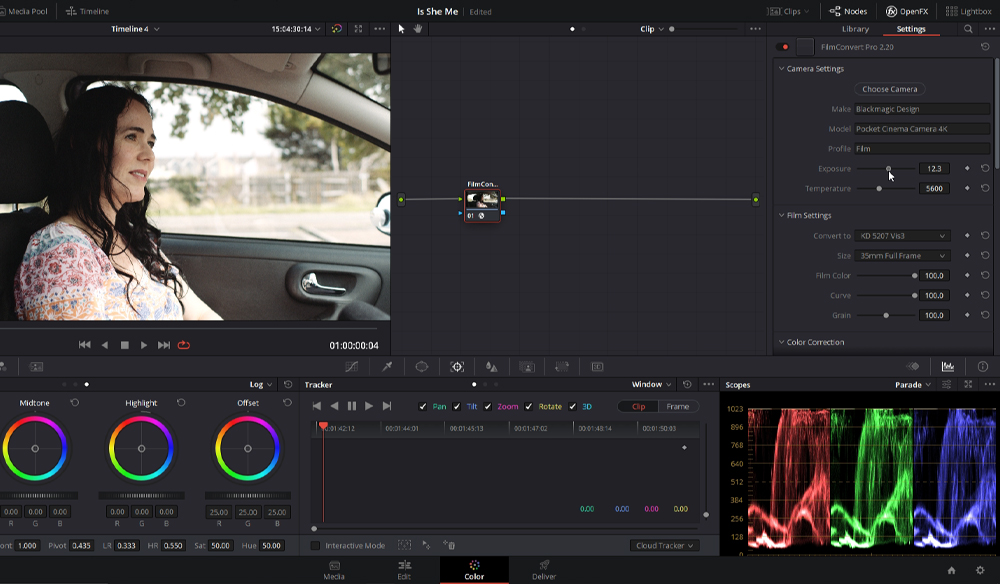
However, not everyone is proficient in Resolve’s workflow, and perhaps you would prefer using the one node. To do that, you would simply add the OFX plug-in to an empty node, and then select the camera model so you can correctly apply the film profile. At first, you’re going to need to download the profile if it’s not installed. But after that, select the make and model and hit apply. Before you would apply the film stock, the camera profile may have thrown the exposure and temperature off balance, and there are two primary sliders that will quickly adjust these settings.
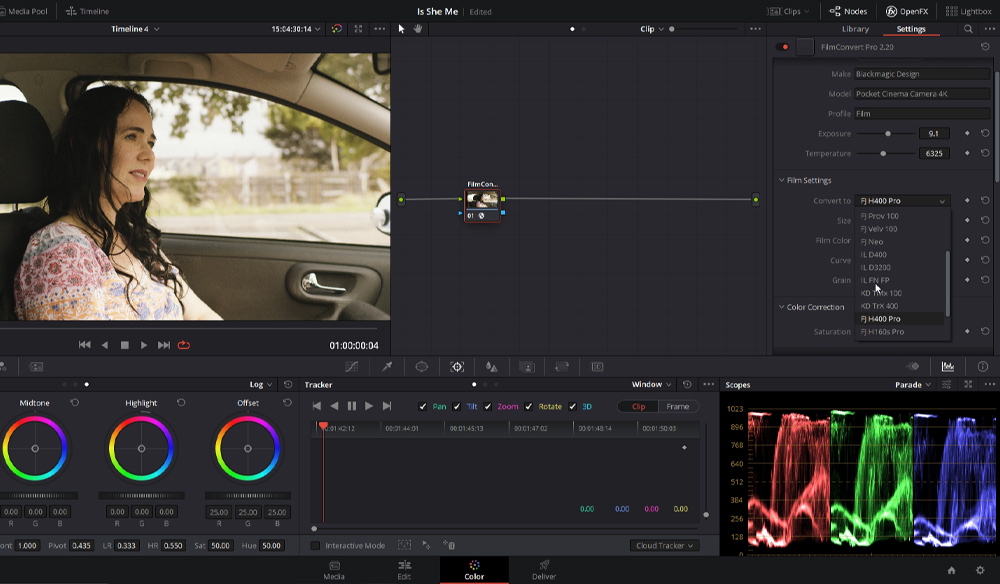
Then, of course, the main draw of the plug-in, the film profiles, and we have a healthy dose of cinema film stocks, and still film profiles. You would select the stock, and it is applied to the image.
The size is the size of the hypothetical film. So, of course, the larger the celluloid film, the more clarity the image has, it’s why many directors seek to shoot blockbusters on Imax. So at 35mm full-frame, we’re going to have a crisp image with lots of detail and clarity. Meanwhile, 8mm, which is a lot smaller, is going to have less clarity and will also have more grain. We can see that’s been incorporated when I switch size (see video). And beneath that, we have three adjustable parameters for the film profile: the color, the curve, and the grain. The color will control the amount of the color from the film profile that is applied. However, the color slider will also determine how much of the curve is used, whereas the curve will only control the intensity of the curve. The curve is essentially a contrast curve that is unique to the film profile you’ve chosen. Some film stocks will have more contrast than others.
Next, the grain slider will dictate how much of the generated grain is included in the image.
Now I don’t use FilmConvert for every project, but when I do, I’m only using these tools within the plug-in — basic, concise. Underneath the preliminary film settings, we have color correction and honestly; in Resolve, if I’m going to color correct, it’s going to be here over on the primary wheels as it’s not only more proficient, but I don’t enjoy using sliders to dictate color changes.
Is this simply because I find better results using filmconvert in this manner, or is it because I feel like filmconvert doesn’t allow me to control my image in the way I’d like to?
Nitrate
Jumping over to Nitrate, we can instantly see the UI has changed. On our viewing monitor, we have an overlay, (this is turned off and on by selecting or deselecting the OFX overlay), and in the OpenFX panel, we can also see a few adjustments to the layout here as well. It’s more condensed and organized. The saturation has been brought up to the camera settings area, and we also have a tint parameter too.

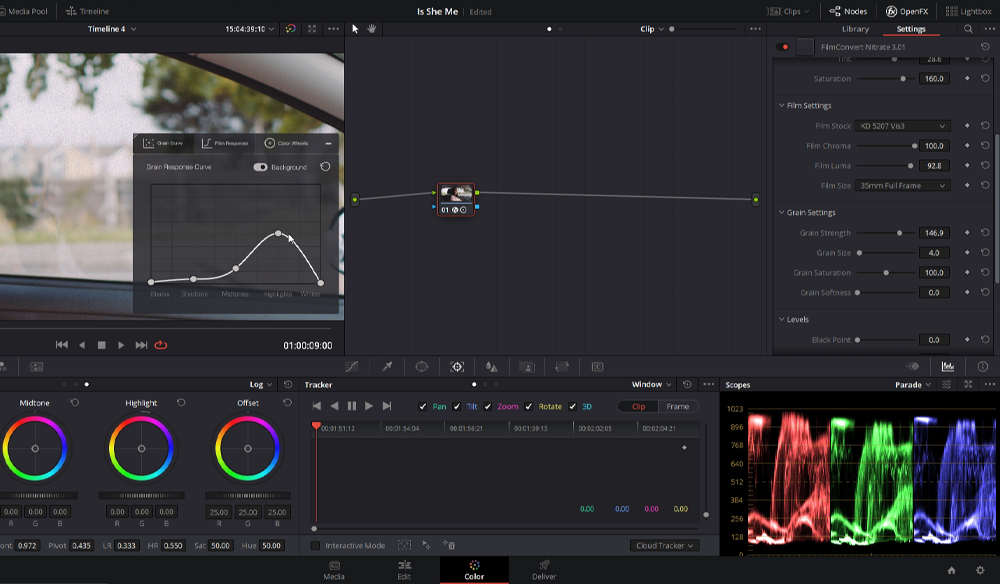
If I quickly hop over the film settings; we have an entirely new adjustment area for the grain. You can still adjust the film size, but you now have individual settings to tweak the grain as you see fit. Personally, I would probably leave this as is; however, if you need to increase the softness of the grain for the desired effect but keep the size of the 35mm film profile. Now you can do so.
So let’s jump to film settings and primarily talk about what is different with Nitrate, and that is it supports a Cineon Log workflow. Now, this does two things, first meaning that Nitrate will process the changes in Log without clipping or crushing the information. For example, if I were to adjust the shadows, as it’s being processed as a log correction, only the shadows are being manipulated (see video). Whereas if we jump to the previous clip and raise the lift, we can see we’re not raising the shadows, so to speak, but just the dark region of the image, and make sure you pay attention to the scopes as you can see that we’re only decreasing the contrast ratio, so to speak and to make the image milky.
Whereas with Nitrate, while we are decreasing the contrast ratio too, it’s correctly adjusting the density of the shadows. And this is the same with highlights and midtones. With the legacy version of the plug-in, it was destructive, not in a sense it would ruin your footage, but the data would be clipped, that’s why I would use it on the final node of my grade structure. And make my exposure adjustments beforehand because FilmConvert couldn’t correctly digest the info. Likewise, with the Cineon Log process, it means we can also reduce the contrast or saturation of film stock, while still keeping the authentic colors.
On the Legacy plug-in, I mentioned I wasn’t that much of a fan of using the sliders to dictate color manipulations so that I would use Resolve the color wheels. Well, in the OpenFX overlay, you can see we now have a FilmConvert interface which has a color wheel menu. This will you to allow you solely remain within the FilmConvert node to adjust the colors, which is helpful if you’re not ready to move on to the Resolve’s color grading interface.
Interestingly they also have a grain curve which is separate from these controls here, and this curve will change how much grain applied to the given region. If you think ‘hmm, I was shooting with a high ISO, my shadows are already quite noisy, I don’t want to make it look worse by applying grain by I need that filmconvert color’. Then you can bring down the shadows, and it will reduce the grain only within that region.
Alternatively, perhaps for a creative effect, you need the grain to appear more predominantly within the highlights, you can bump up the highlight curve. I’m not overly fond of having the overlay within the viewing monitor, but I imagine there might have been some resistance to having the color wheels appear within the settings panel.
Overall Thoughts?
Well, I was never against FilmConvert to start with, I’ve used the software for several years and delivered paying projects while using it, but as initially stated, I would tend to use it as an icing on the cake kind of layer, and sometime I might even turn the node key down to 50% so the plug-in wouldn’t completely overpower my footage. And I think this was mostly down to the fact that 90% of the footage I work with is either RAW or LOG footage, so I would never use this plug-in by itself.
However, I think overall, the update or upgrade for better words has allowed more creative control within the single application. I don’t know if I would solely use the plug-in without any other form of correction and grading on different nodes. Still, it certainly is possible now, I think for those who are unfamiliar with color grading it certainly allows you to obtain excellent results without the need to fully understanding Resolves interface and workflow.