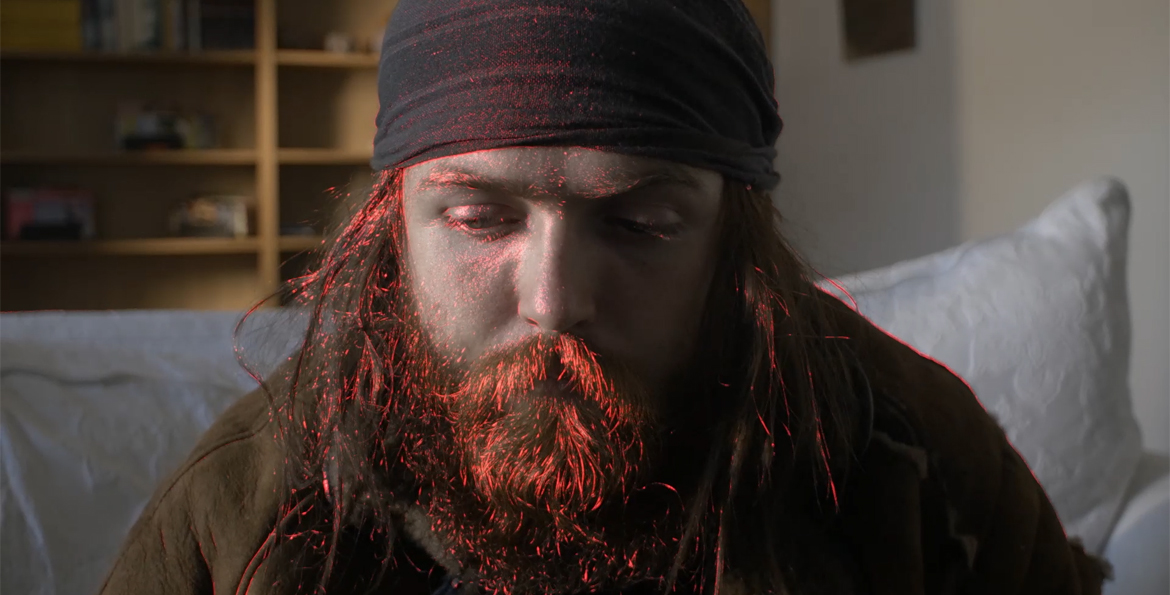
Focus peaking is a tool found in digital cameras that will aid the filmmaker or photographer when using manual focus. Quite simply, the tool will detect the edges of a scene that have the highest contrast, meaning these areas are primarily in focus, and the camera will highlight them in a bright color. In this tutorial, I will show you how to replicate that effect in After Effects.
You can use this effect to emulate the POV of someone looking through a viewfinder, or… well, I don’t know many other ways you could use this, but having the information will allow you to explore with the idea.
Follow These Steps
In After Effects, with your footage placed into a composition and trimmed, I want you to duplicate the clip and pre-compose it to a new composition, which we will call it peaking.
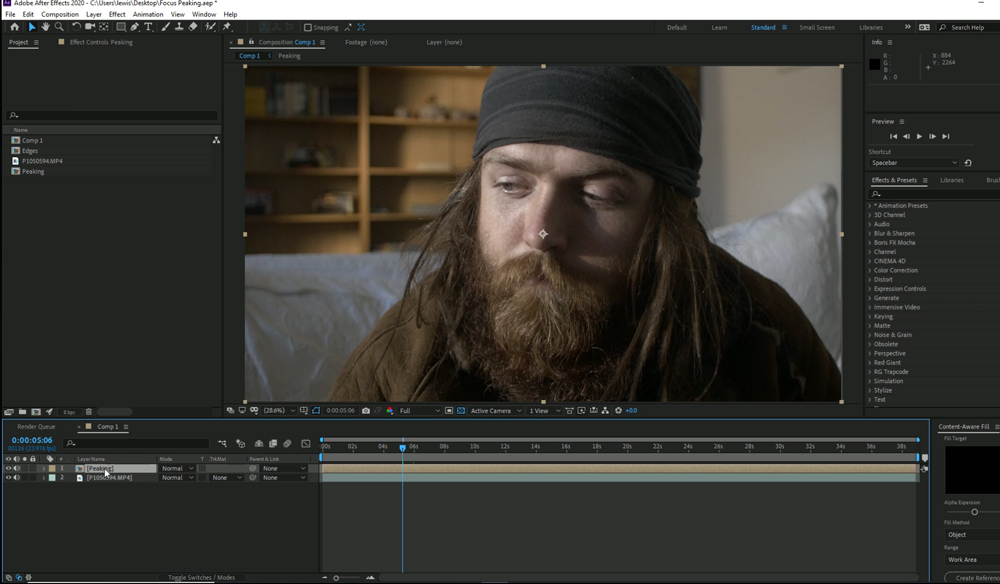
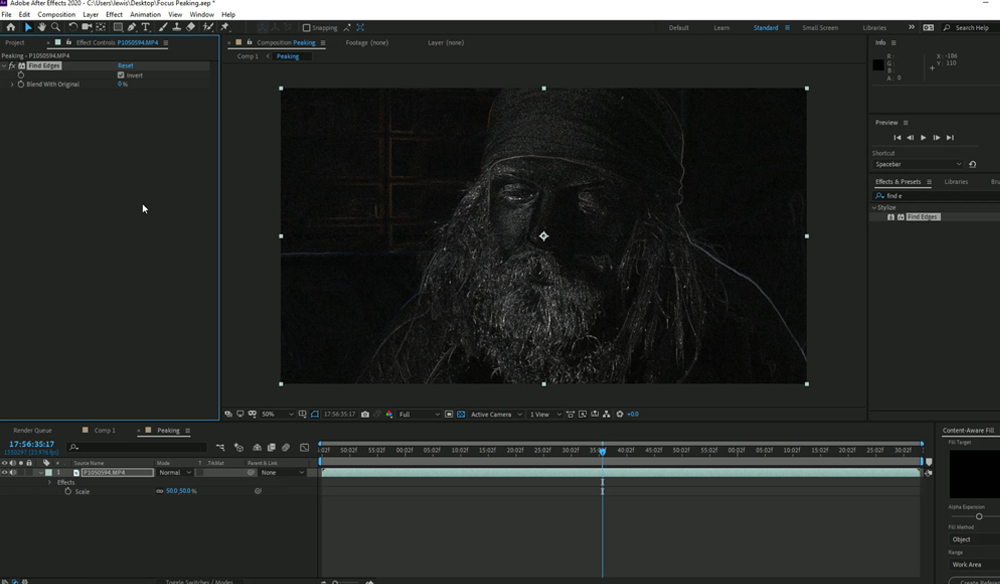
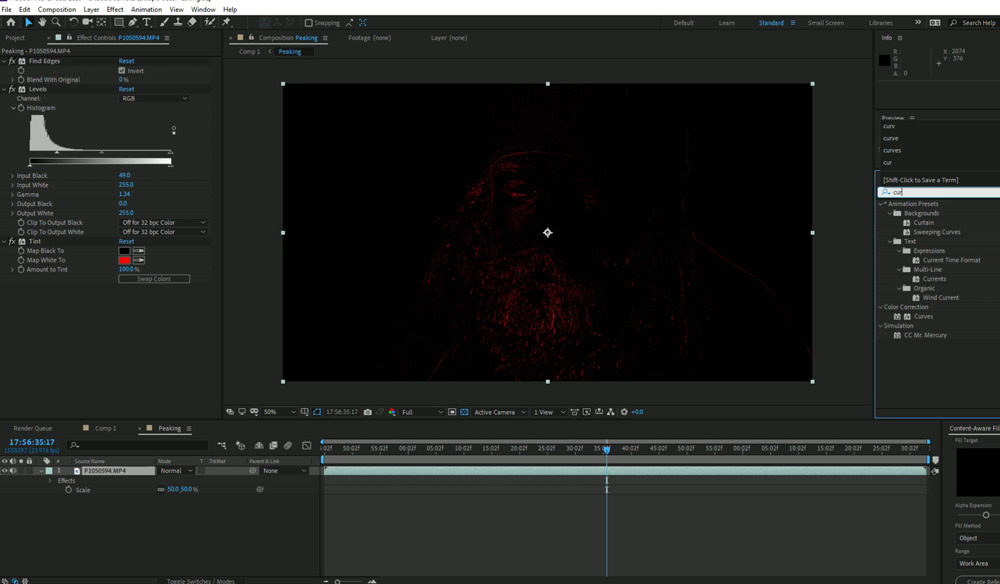
Double click to enter that composition, and first, we want to lower the resolution. If your base clip is 4k, lower it to 1080p. If it’s 1080p, lower it to 480p. As you have altered the size of the composition, you will need to decrease the scale of the footage, so it fits the size of the composition. Now we’re going to add a series of effects to create the focus peaking. First, add Find Edges and select the invert box, so the edges of your scene appear white.
I initially thought I might have to mask and track the area that I wanted the peaking to appear, but quite like how a camera will find the edges with the highest contrast, we can do the same with our clip in After Effects, and this is done with Levels.
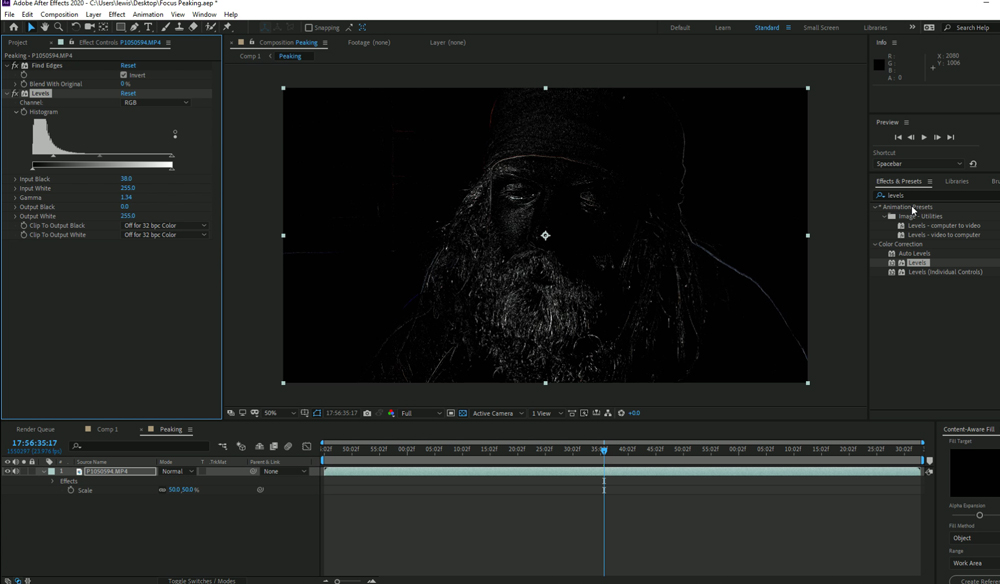
The idea here is to bring the blacks down, so the only edges being highlighted are the features predominantly in focus. Alternatively, if you’ve shot your scene with a narrow aperture and everything is neatly in focus, then you may not need to do this.
Next, add a tint. Most focus peaking settings allow you to customize the color of the peaking, but by default, it’s usually a red or bright green.
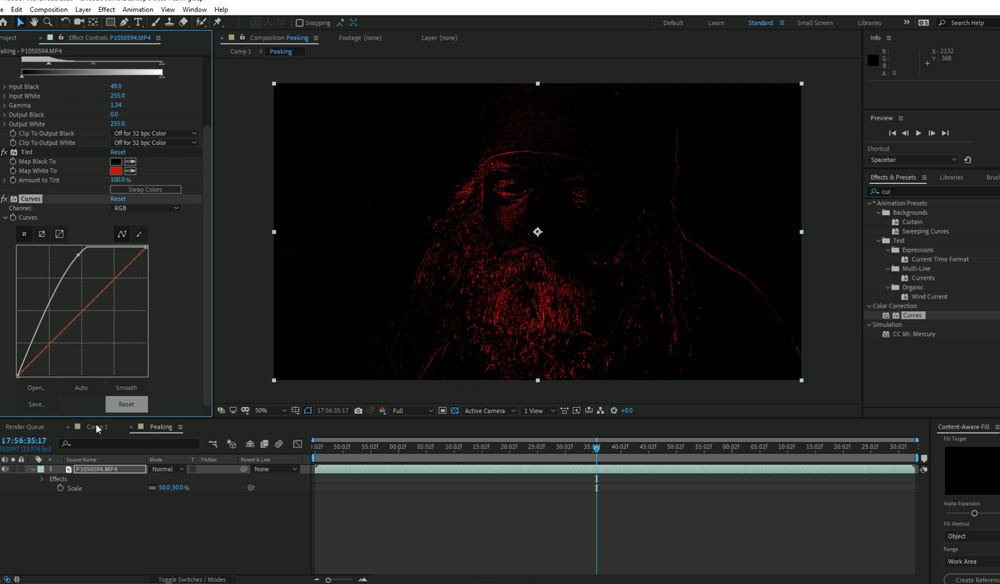
Then add curves, and we need to increase up the highlights to make the edges more predominant.
Finally, jump back into your original composition, and we need to increase the scale of our peaking comp. The reason why we lowered the resolution in the first place is so when we upscale the footage after decreasing the scale in a separate comp; the quality is not as fine; somewhat more pixelated.
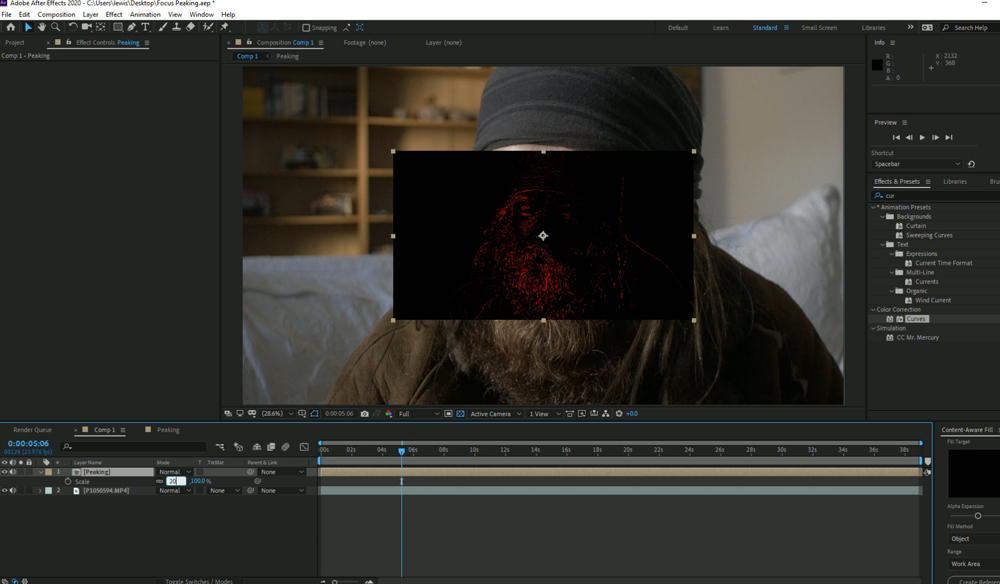
Then, switch the blending mode to add, and we are done.

This pretty much looks like the focus peaking found within my camera. As I said, I thought I was going to have to mask some areas to make the peaking work in the same manner. However, as seen within the tutorial video, there’s an area where I have sloppy focus pulling and the actor falls out of focus, and the effect drops from his face as the edges cannot be highlighted in the pre-comp because we lowered the blacks.
I would be interested to see how you have put this to use, please leave a comment below with your examples.