Today, I want to show you how to create real-world 3D terrain inside of Adobe After Effects, and this is going to work with native AE cameras and all of the depth of field parameters. We’re using two premium tools in this video: GeoLayers and Helium. These tools will enable us to create the maps and activate all the 3D features respectively.
I will say, due to the visual nature of the tutorial, watching the video below is recommended. However, a written transcript with visual steps is available underneath. You may need to refer back to the video for more complex parameters.
Setting Up and Enhancing Your 3D Map with GeoLayers and Helium
With GeoLayers 3 and Helium already installed, let’s turn our attention to the GeoLayers 3 panel. Before we even create a map composition, select this button that says “Create 3D Landscape.”
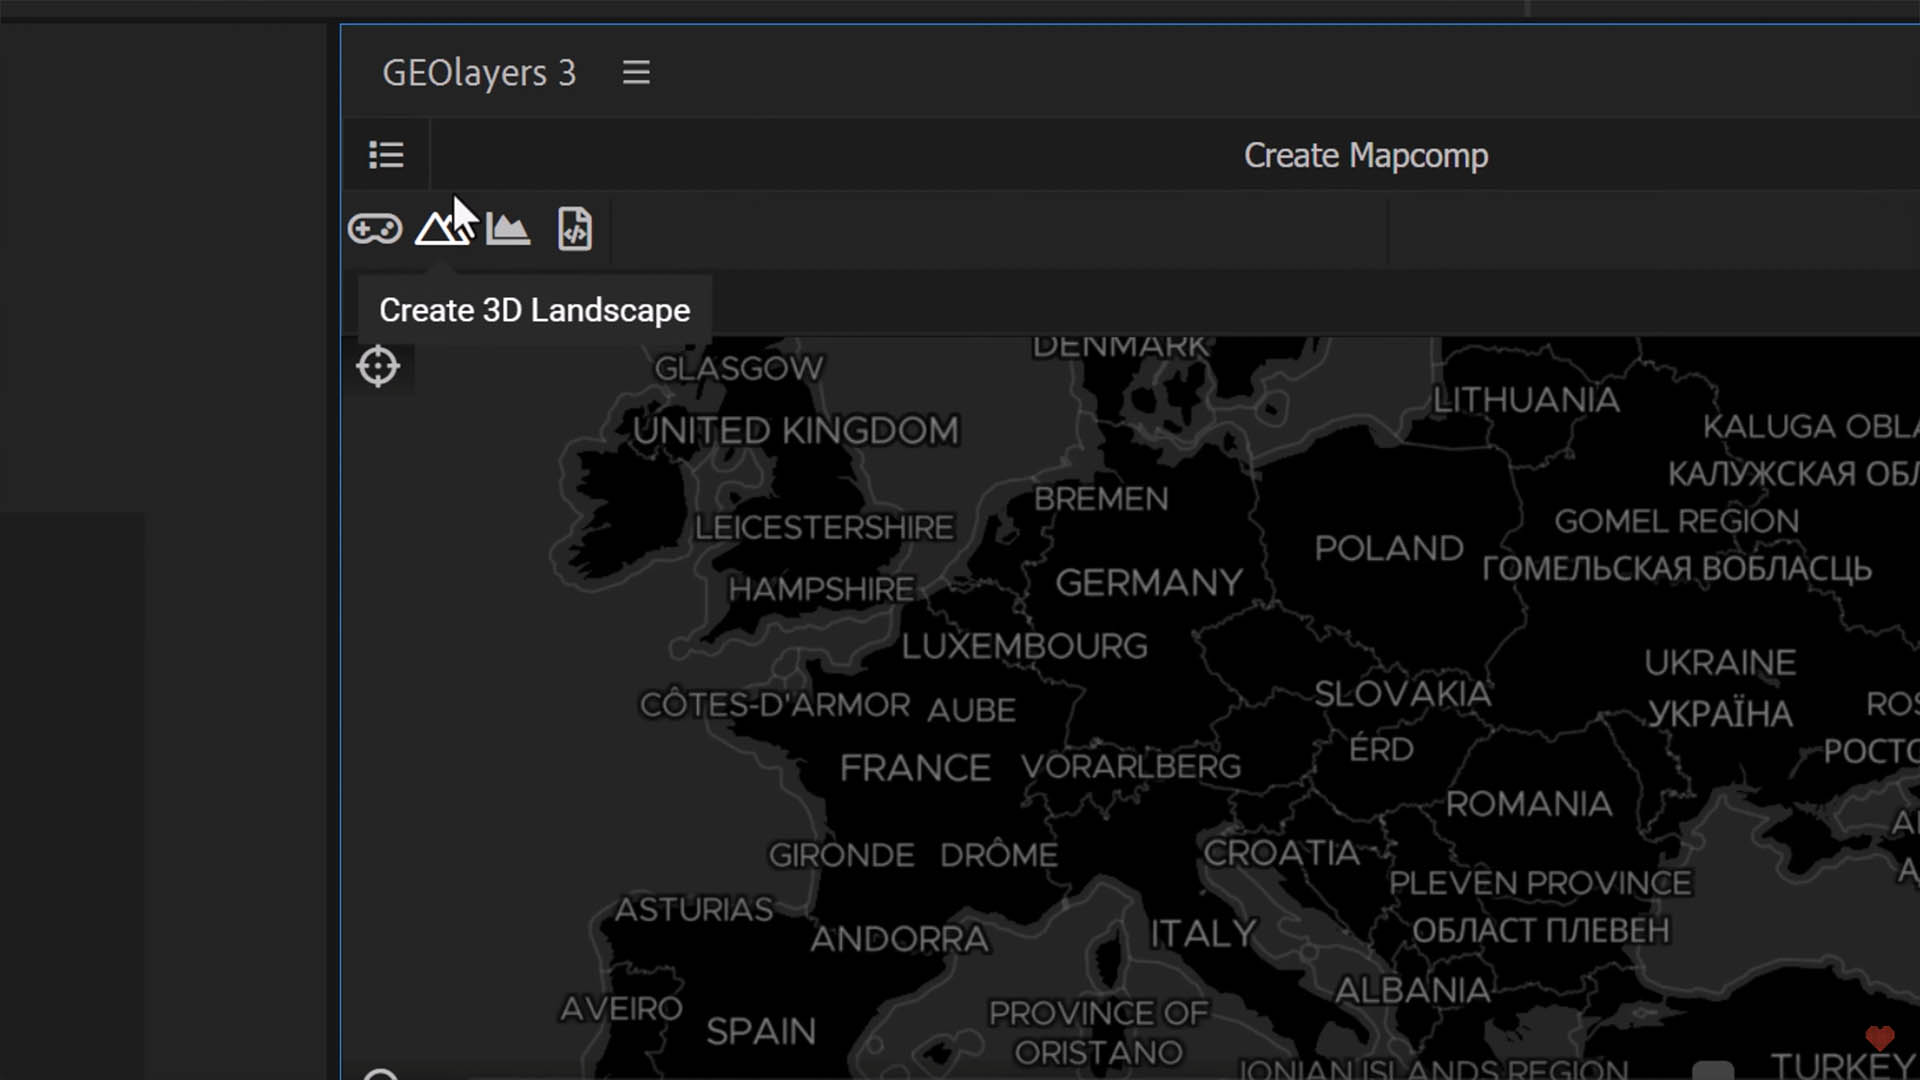
Starting with this step is a best practice because it sets up an entirely new composition, which is essential for a smooth workflow. Therefore, I will click on this button and set the resolution to Ultra HD 4K by manually typing in 3840×2160 at 24 frames per second, and I’ll create a 10-second map composition. The choice of Ultra HD 4K ensures our project will have stunning detail and clarity.
Within GeoLayers, there are several 3D plugins available for generating 3D terrain. These plugins vary in price points, with Helium being among the more affordable options. However, it’s important to note that Helium requires an annual renewal. Despite this, its cost-effectiveness relative to its power is notable. For those interested in a deeper exploration of Helium, I’ve prepared a standalone tutorial, which you’ll find here.
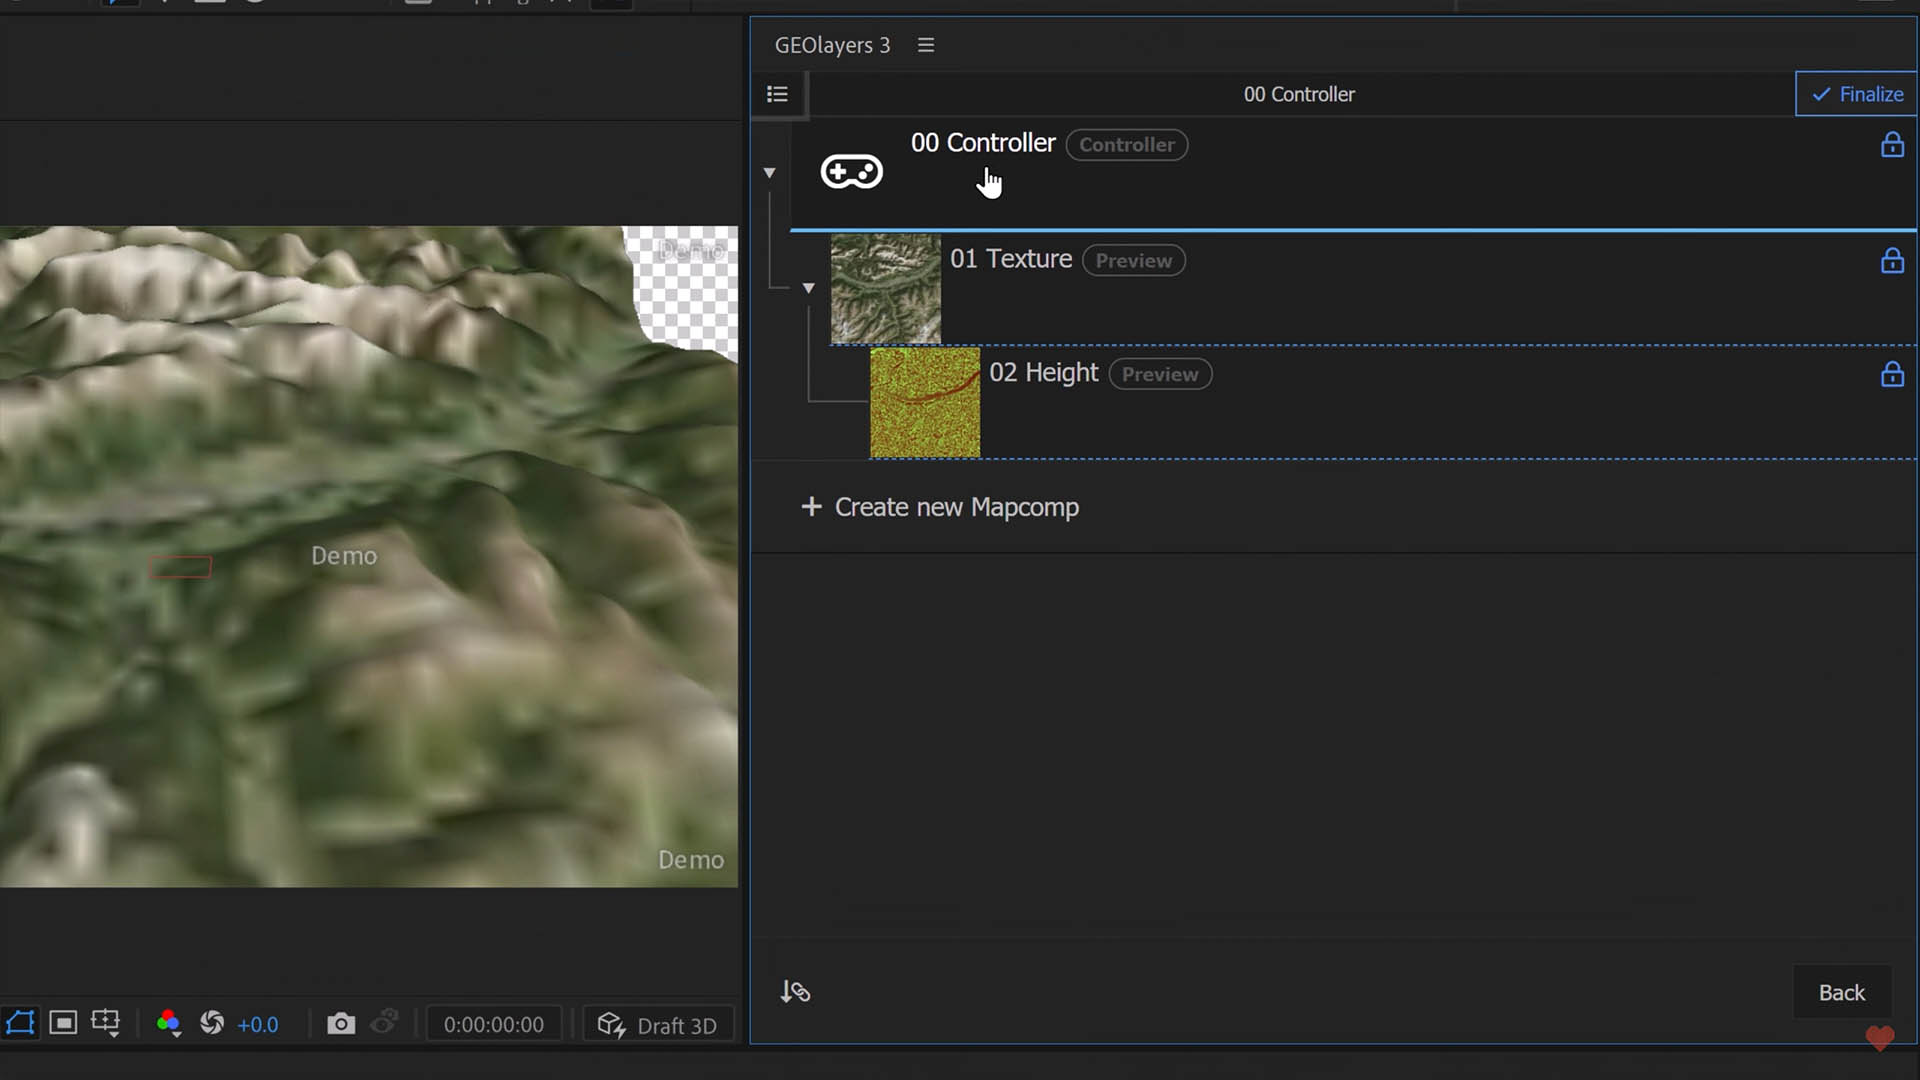
Upon selecting Helium, the project will begin to take shape. This specific 3D landscape project differs significantly from regular GeoLayers projects, especially in how you navigate and control the map view. Within the map compositions, you will find a controller composition alongside a texture and a height map. Adjusting the pitch, bearing, or elevation of the terrain requires manipulating these components in the controller composition.
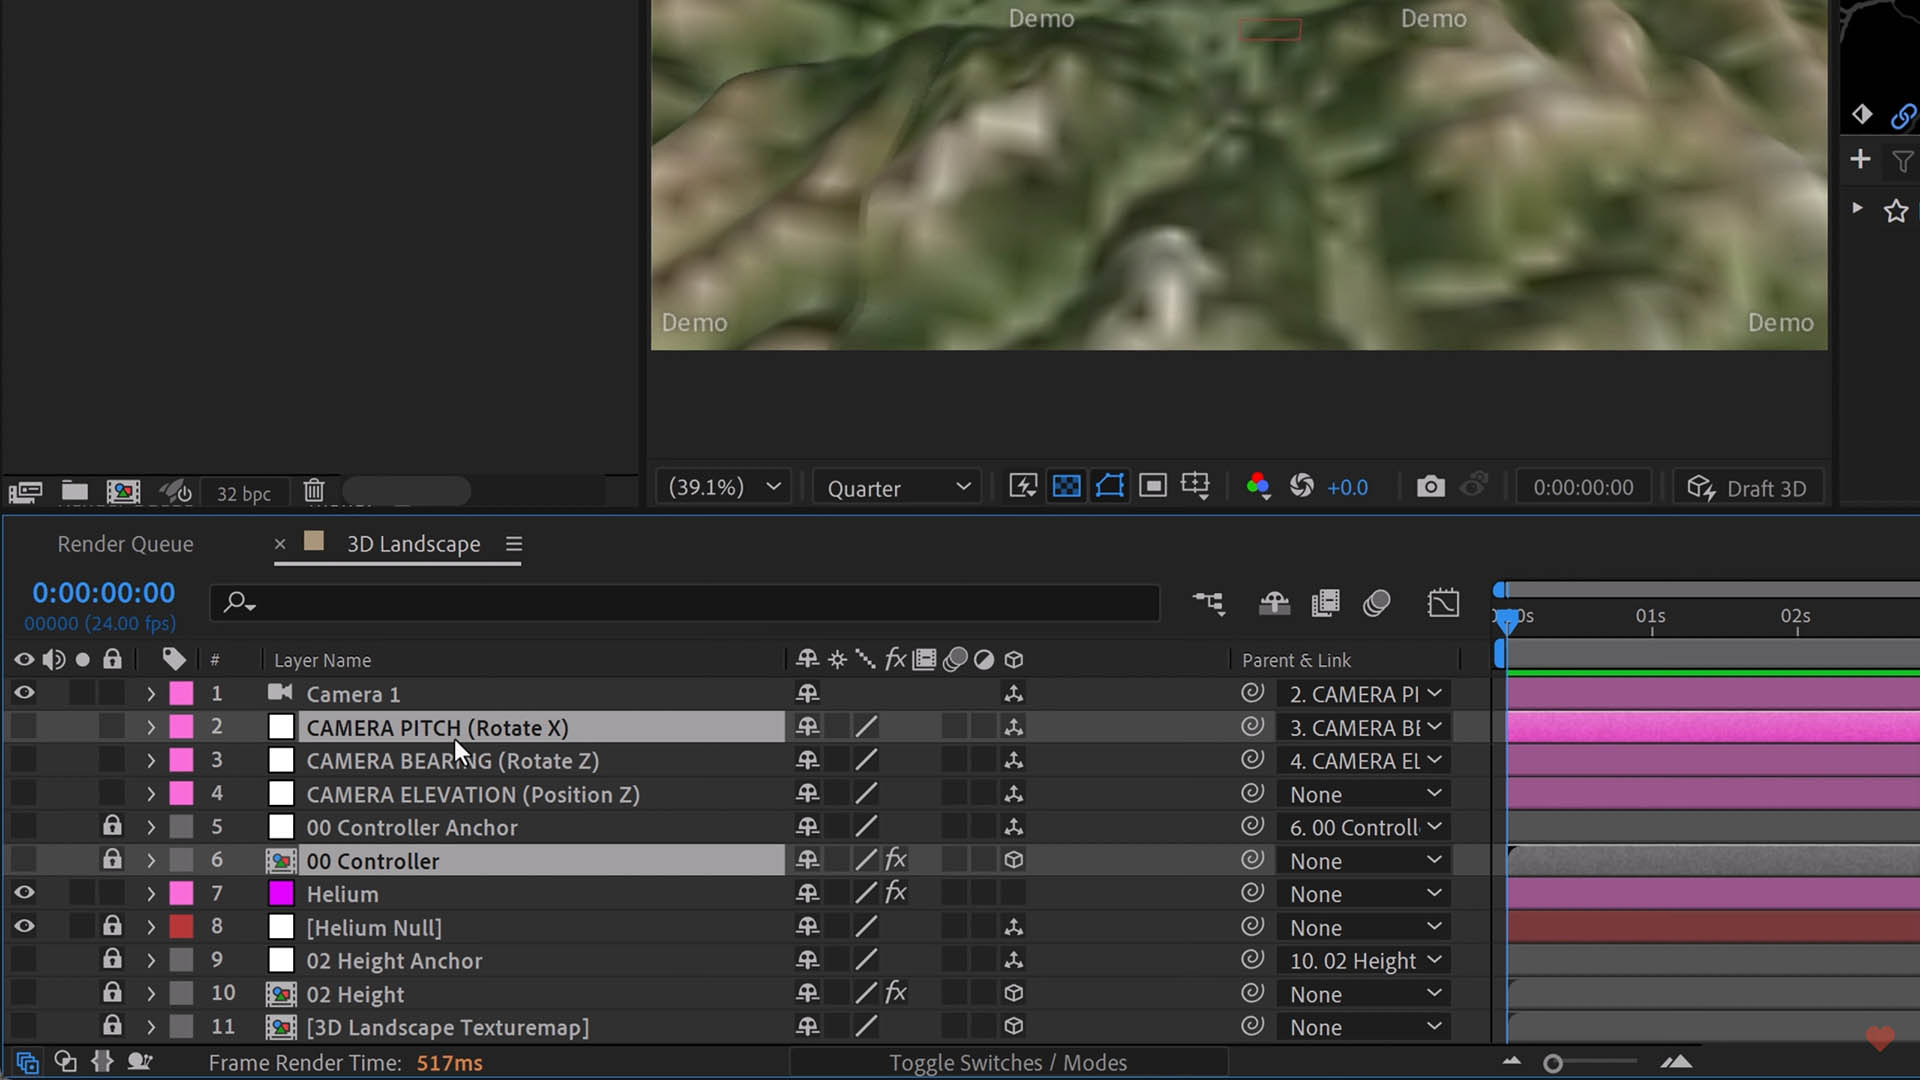
A practical tip for efficiency is to use keyboard shortcuts for these adjustments. For instance, to modify the camera pitch, simply select the relevant layer, press ‘R’ for rotation, and adjust as needed. Initially, this process may seem unconventional, but with practice, it becomes more intuitive.
For those looking to adjust the bearing, the process involves selecting ‘rotate Z’ and then modifying the Z rotation to achieve the desired orientation. Similarly, adjusting the elevation is straightforward by changing the position Z value, allowing for vertical movement of the terrain.

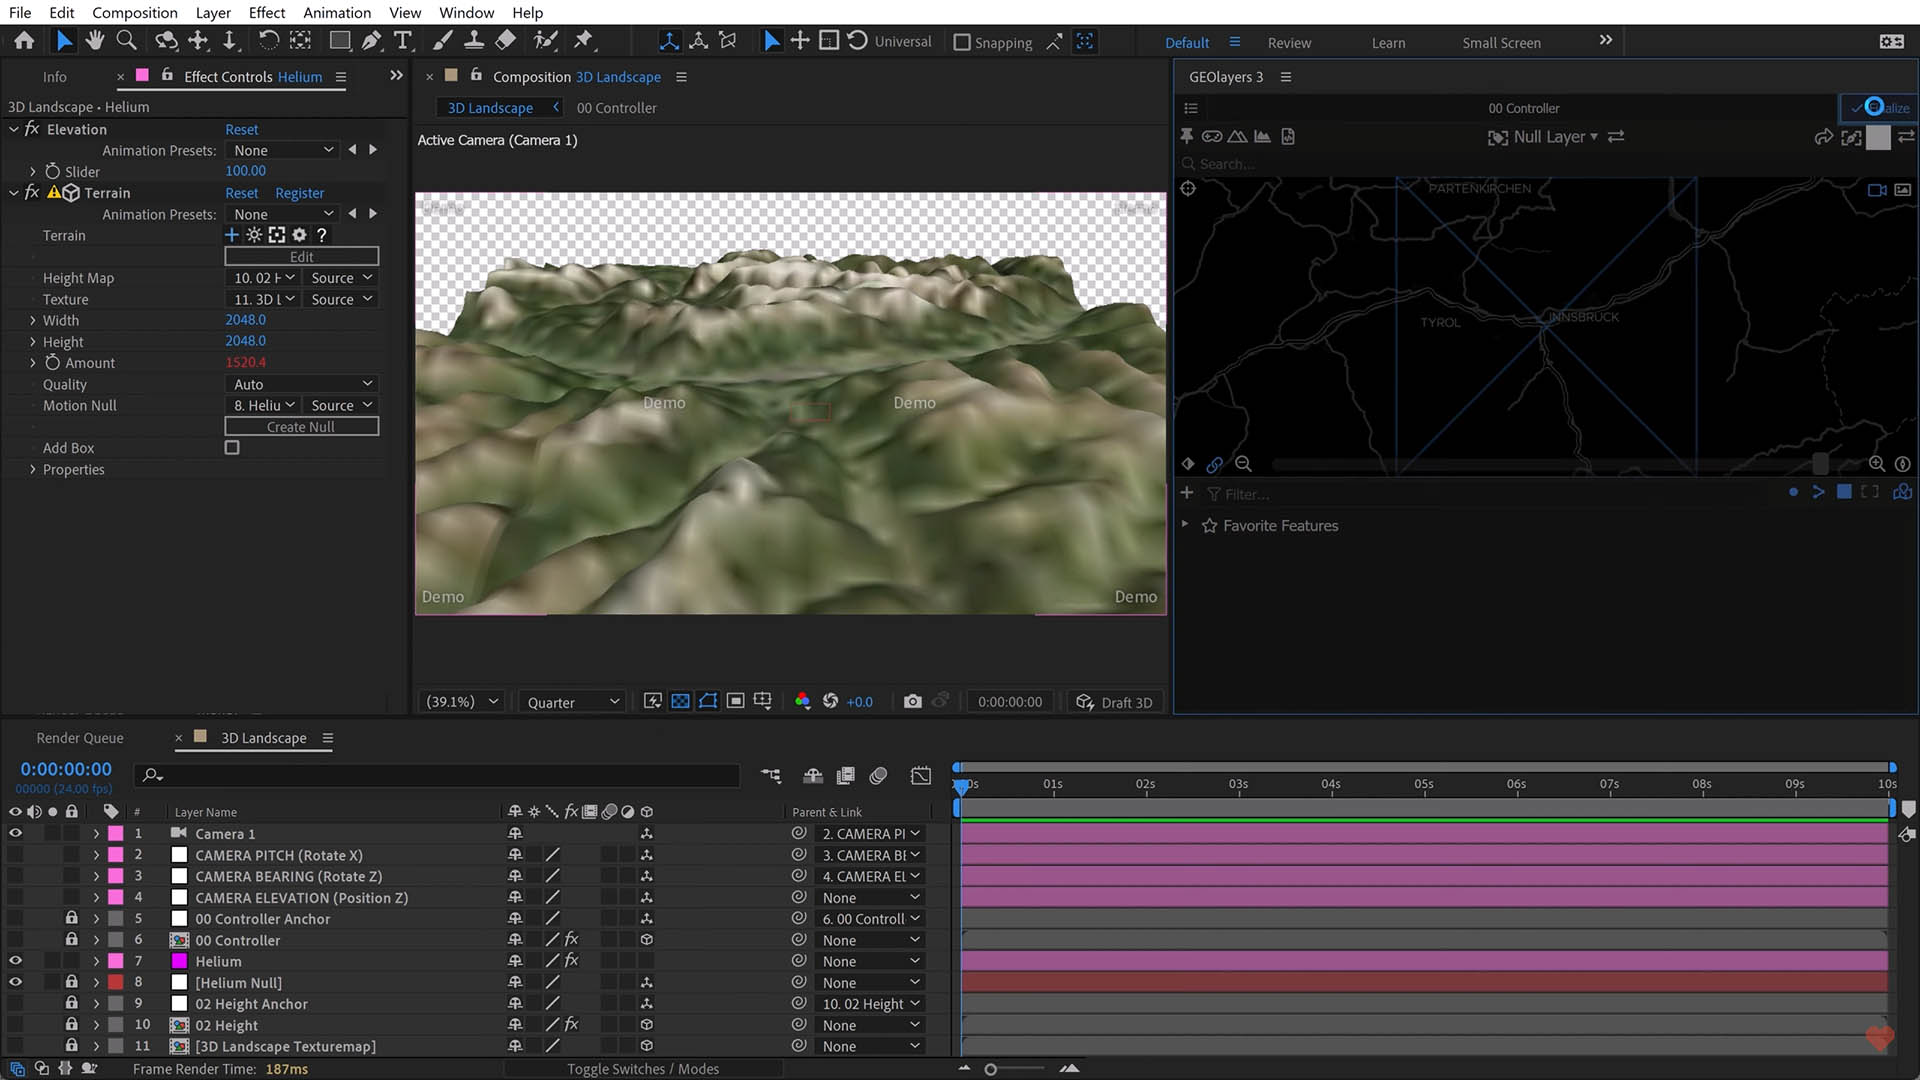
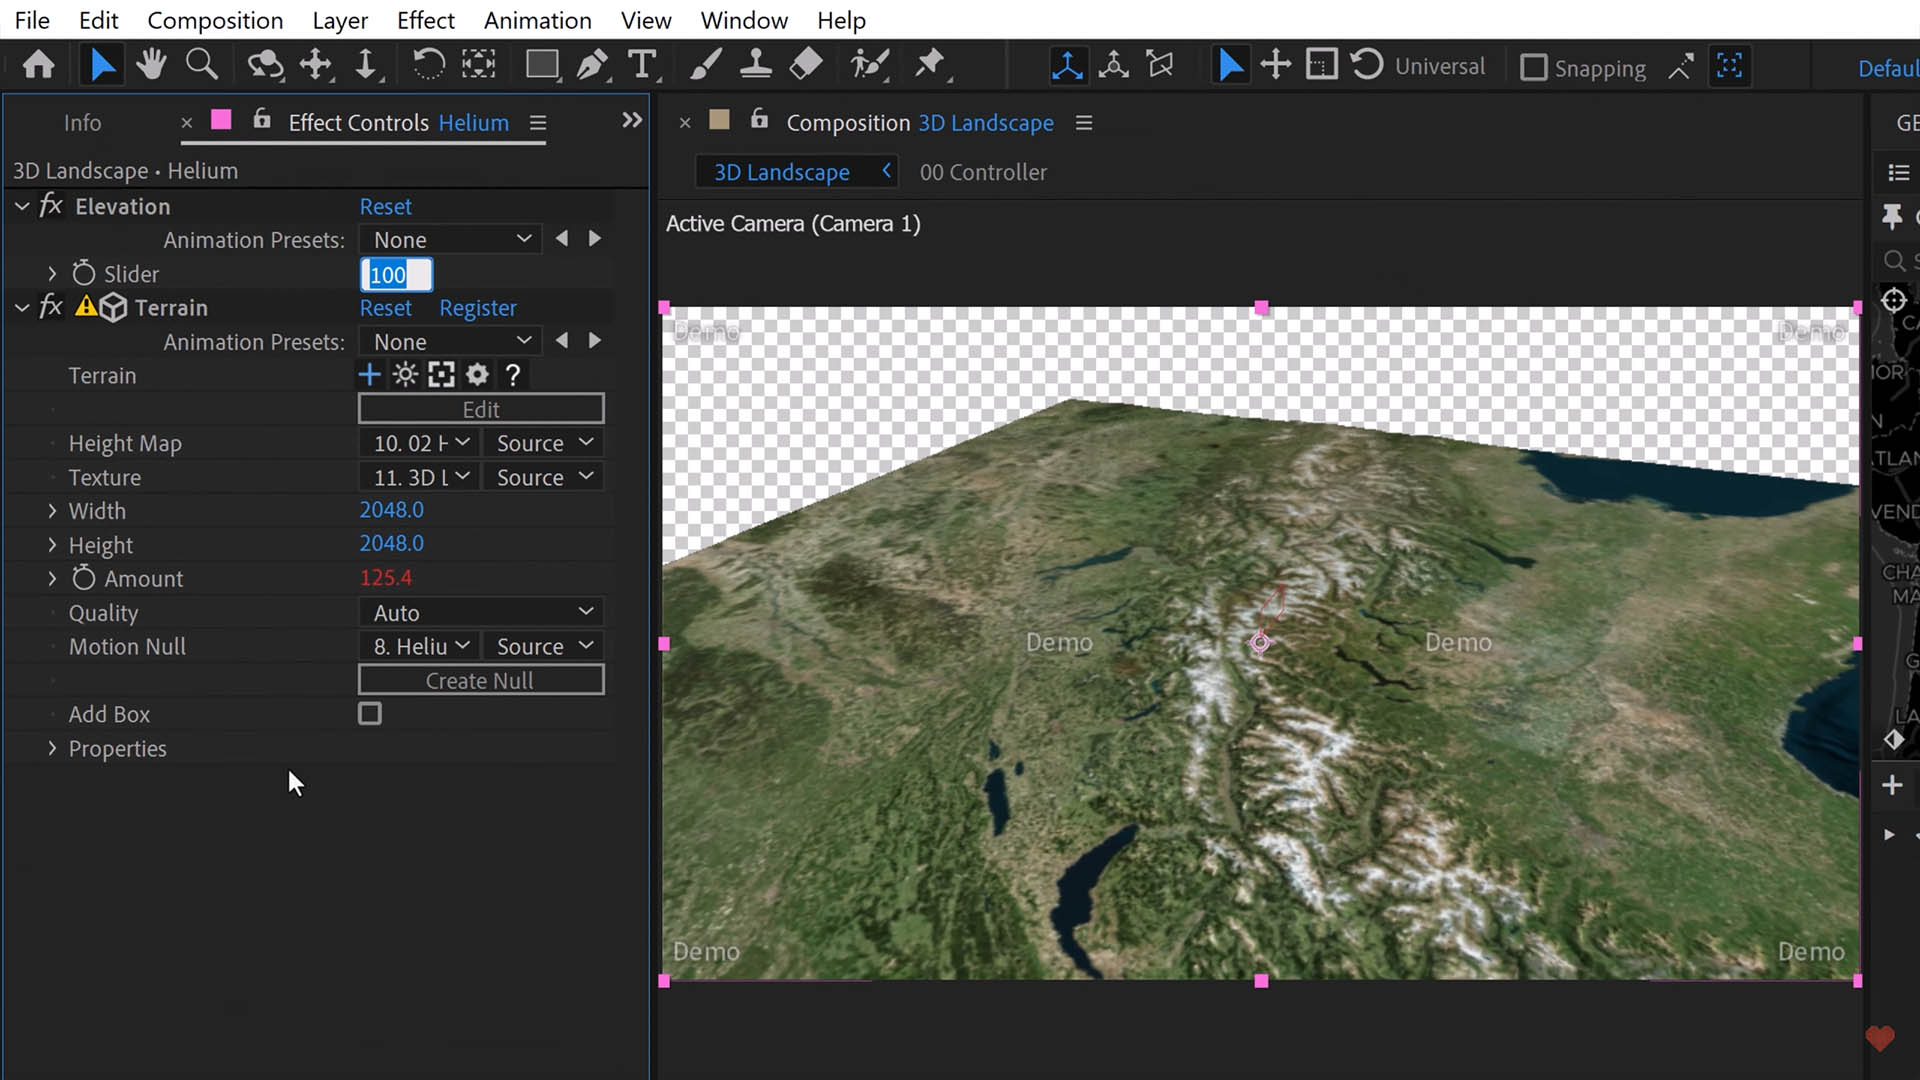
Lastly, Helium’s terrain effect can be found in the effect controls of the pink layer labeled “Helium.” Here, an elevation slider allows for easy adjustments to the terrain’s height. Utilizing this slider, you can visually enhance the 3D landscape with just a few clicks.
Advanced Terrain Visualization Techniques
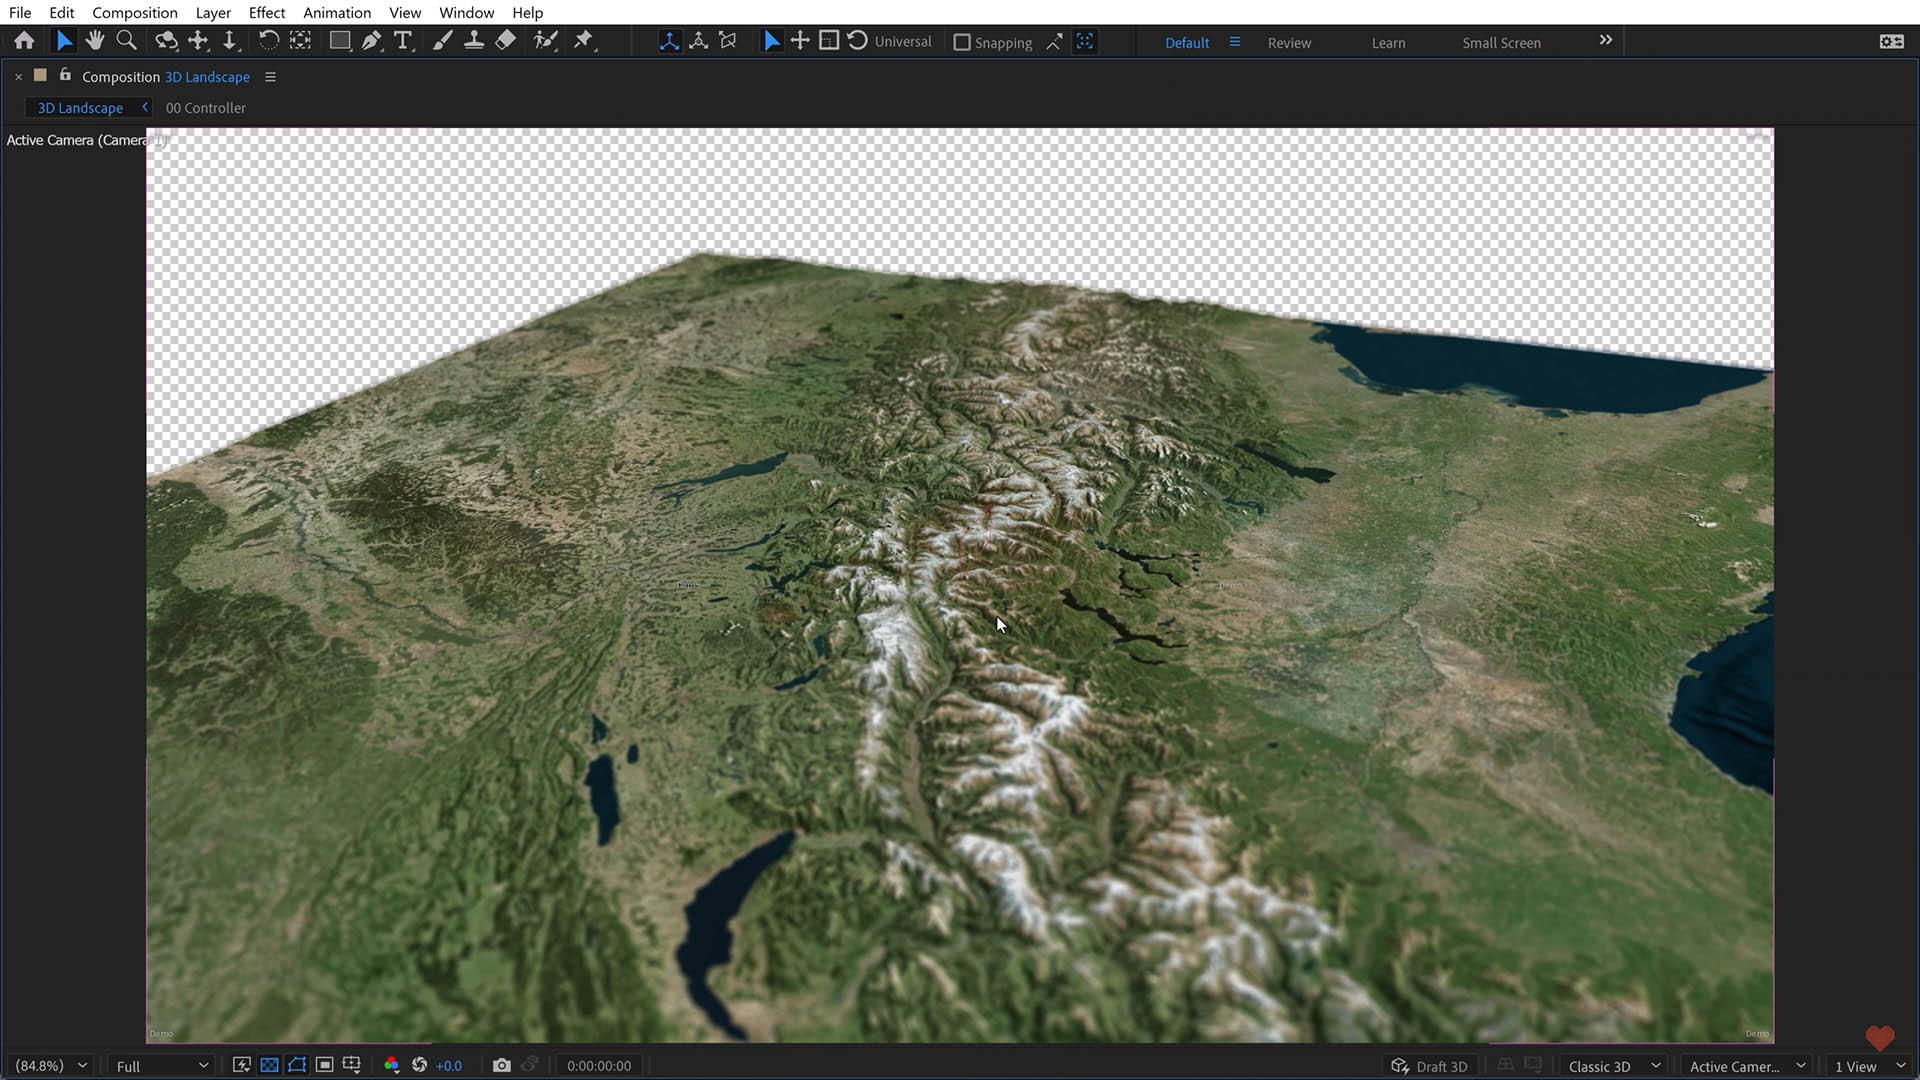
Now, it’s looking very low quality. This is for two reasons: it’s set to quarter resolution by default because this process is pretty intense, and if you want to view it in Full Resolution, you first need to finalize it. So, control-click to finalize (see the above picture, top-right corner). This action will finalize one frame of the texture and the height, after which you need to switch it over to full resolution. Then, you can view it fullscreen in all of its Ultra HD 4K glory.

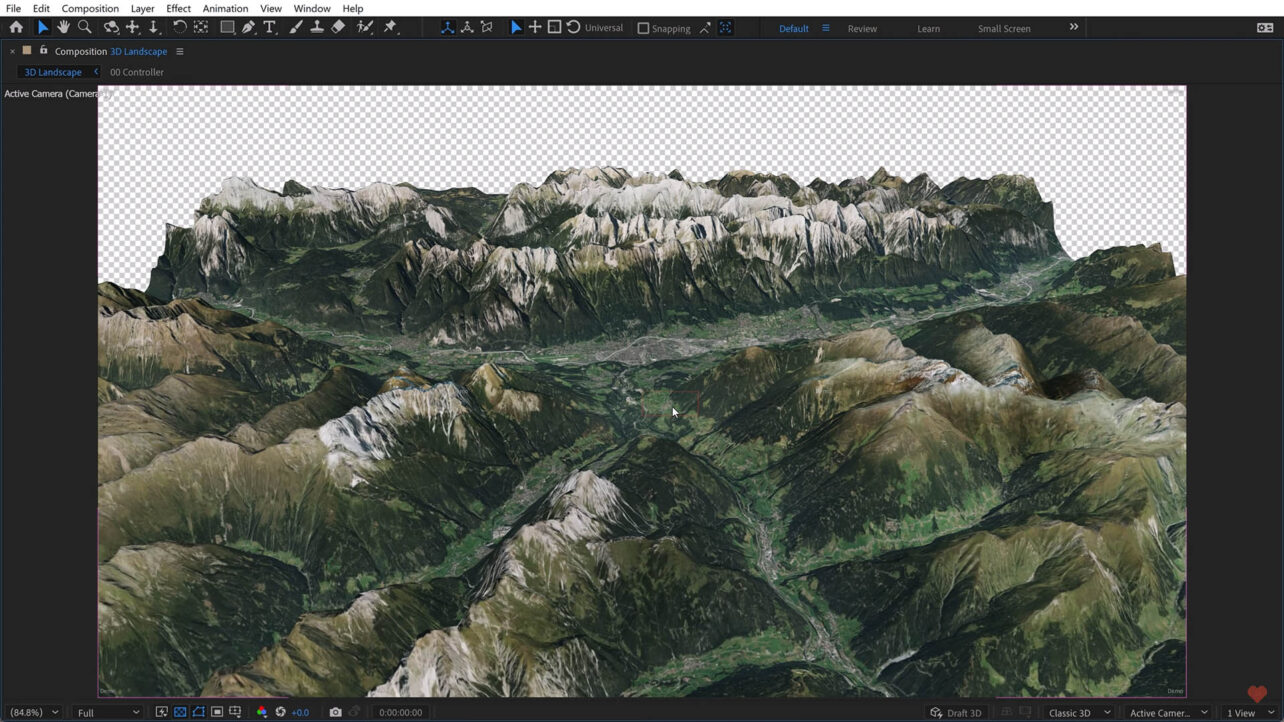
I’m going to zoom out from this default location and instead head to the Alps. I’m in the controller comp here and will move this over to the Alps. What I aim to do is look down along the mountain chain of the Alps. I’ll hit ‘R’ for rotate, and then I’ll rotate this around again. I’ll switch this to quarter resolution so it’s actually responsive, and now I can position it like this. I can then bump up the elevation, the Z position, something like this—if you got lost at this point, it’s best to quickly run back to the video for guidance.

Currently, it’s not really looking like terrain. I want to enhance the terrain’s appearance, so I’ll return to the Helium layer and start to increase the elevation. You’ll notice I’m starting to see a difference. We may take it to 150, switch it to full, and finalize it to see the outcome.
Lights, Camera, Elevation
Alright, it’s looking pretty cool, but the terrain isn’t as pronounced as I’d like. With Helium, I can do two things. I can utilize all the benefits of the camera here. If I double-click the camera, I can enable depth of field. I’m astonished by the capabilities of this Helium plugin, but if you reduce the f-stop to one and then significantly increase the blur level, say to around 600, it might be excessive, but I want to emphasize the effect so you can really appreciate the changes.

If we view it fullscreen, you’ll see the blur and the falloff here, and at 600%, it feels like it should completely blur out everything. I’m unsure what’s happening here. It might be a unique aspect of the setup. If you have insights, please share them in the comments section.
Another action you can take is to go to ‘Layer’ and then ‘New Light.’ You’ll notice that these settings also respond to lights. If I choose a spotlight to highlight the details and increase the intensity significantly, ensuring it casts shadows, and click ‘OK,’ it activates immediately. If it’s not clearly visible, I’ll adjust the widget here to bring the light closer to the terrain for a better view.
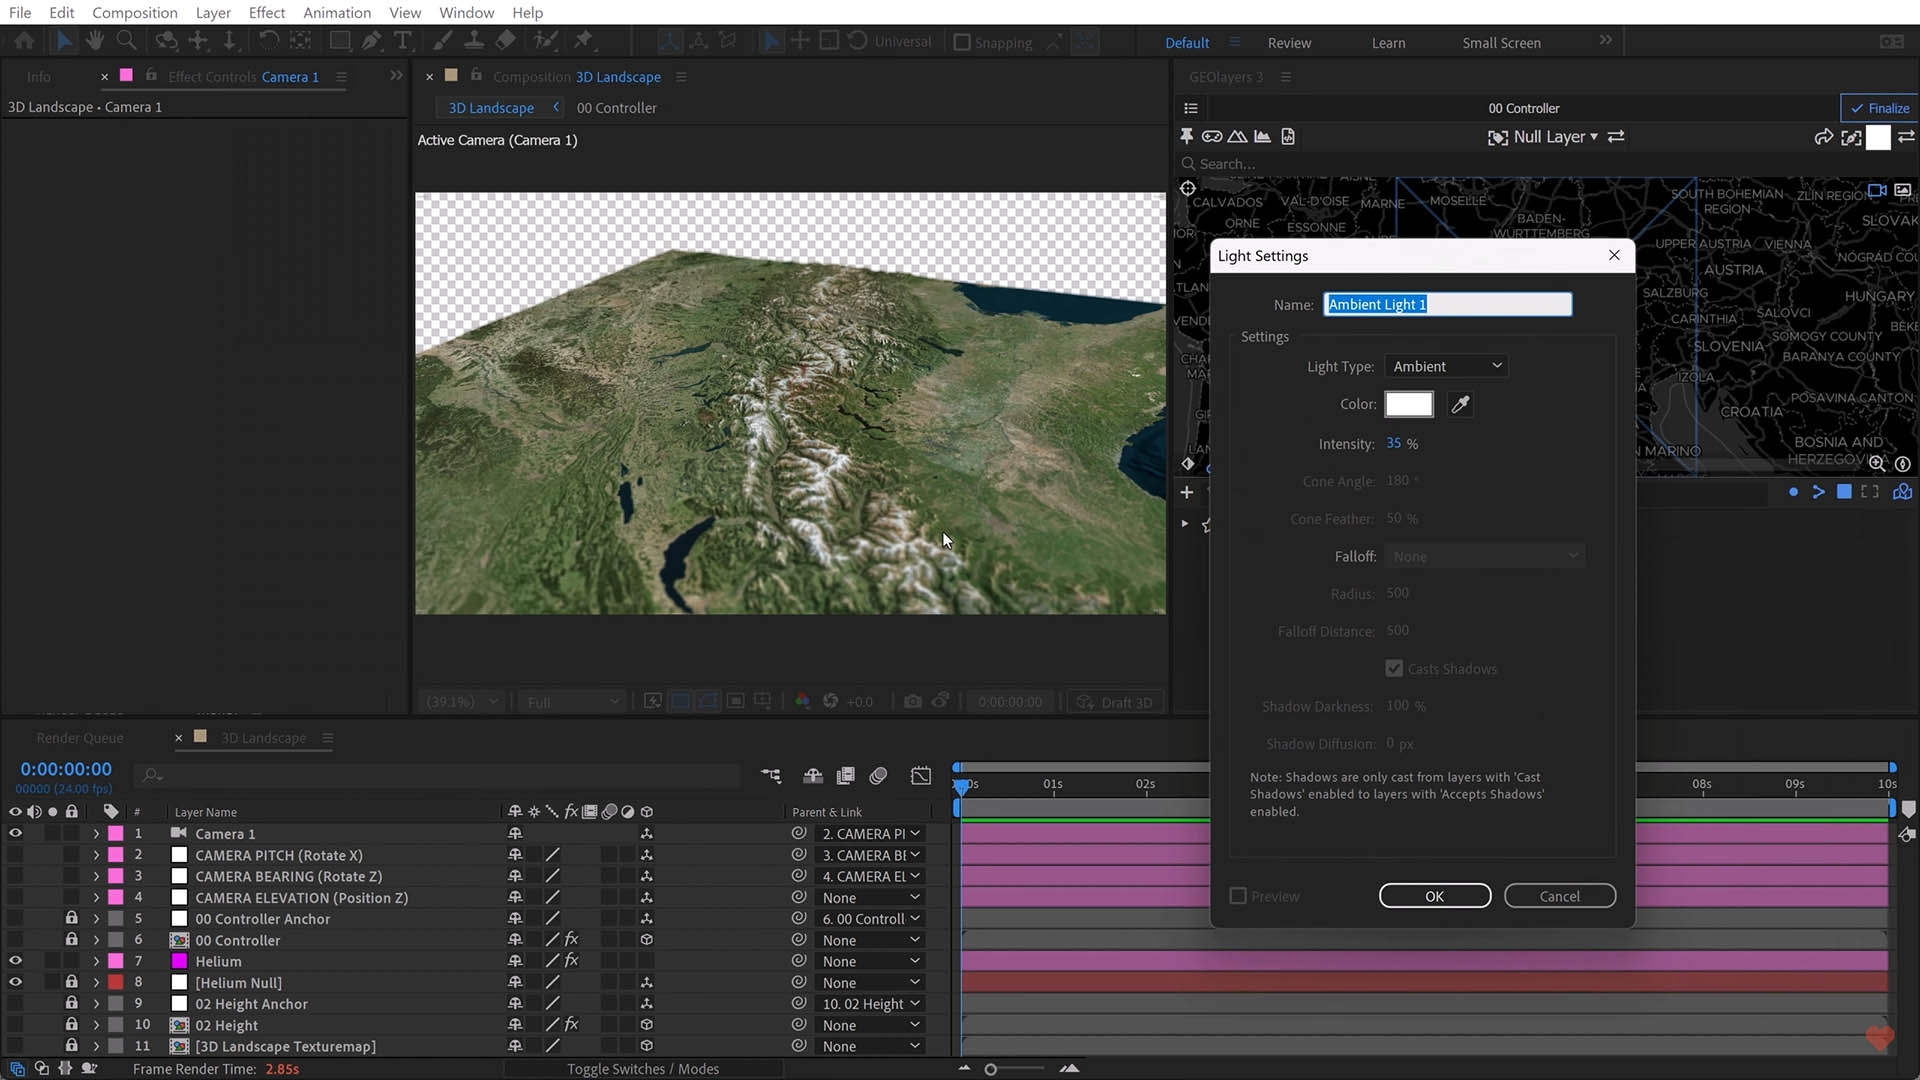
And now, if you look, you can start to see there are shadows here. So, I can right-click and add another light—and you know, maybe add an ambient light set to 35% to give it some more light and lighten up the scene. Then, we could also come back to the spotlight. Just double-click it, bring the intensity down, and you know, there’s a whole art to lighting.
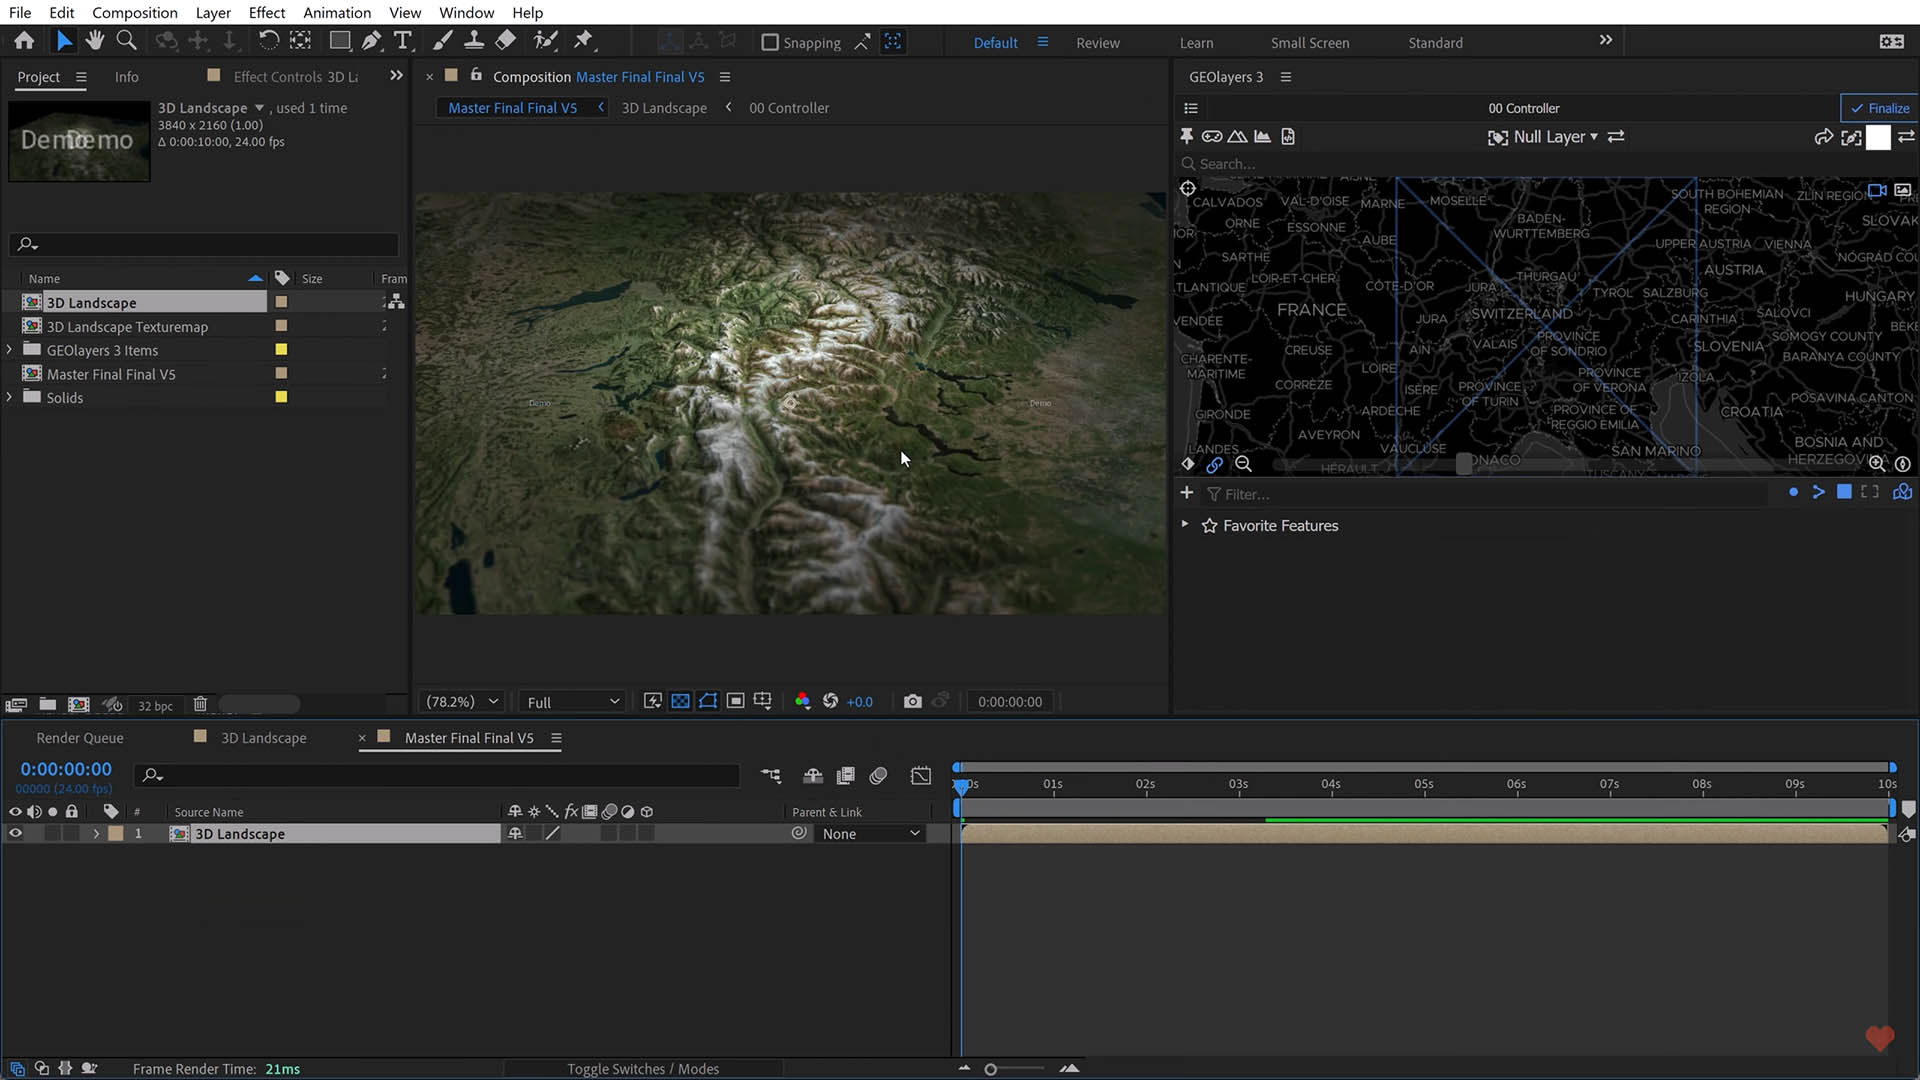
We could spend so much time playing with the cone angle and all these different things. And, of course, we’re seeing all of this space up here. What I suggest for this is the reason I created an Ultra HD 4K comp is so I have the option to go and just create a new composition. I can call this “master final final version 5,” or whatever you want to call it, but just make sure it’s set to a standard HD 1920 by 1080, which will be just fine and dandy for any kind of YouTube content you’re creating. And what that will allow us to do is bring in this map comp, the 3D landscape map comp, and now we have it fullscreen in all of its glory. It’s looking great. Now, we can go back and create a quick little animation.
So let’s go. Let’s say we want to animate the bearing. I’ll hit R for rotation and will just add a keyframe here. Can spin this around and bring it down to quarter resolution so we can actually work with it. You know, we could just go ahead and spin it all the way around to see if it’ll loop here. Now, all I need to do is finalize this and render it out.
If you would like to learn more about GeoLayers 3, I have a GeoLayers 3 Master Class that I released earlier this year. And if you want to go map god mode, check out my Patreon page.