It’s almost a rite of passage to, at one point, have aged paper in one of your short films. Can you even say you’ve made a short film without requiring a mysterious parchment or an ancient map? I think not (citation needed).
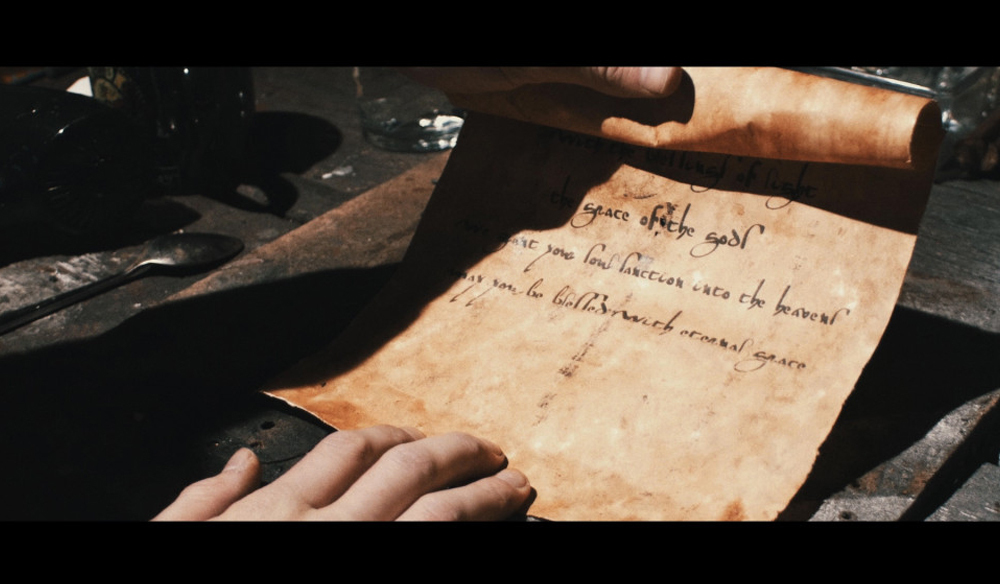
There seems to be a common misconception that old paper is always burnt. Perhaps this comes from our high school history class days, where we burned paper to make it appear aged. Yet, if you study paper from the ages before us, very little is burned (unless the paper was in an incident involving fire). Still, I see this notion being carried across into DIY short films. For the most part, aged pieces of paper will appear as a tanned yellow, and this is because of oxidation.
Paper is made from wood, which is made up mainly of white cellulose. Wood also has a lot of a dark substance in it called lignin, which ends up in the paper, too, along with the cellulose. The exposure of lignin to air and sunlight is what turns paper yellow.
In the video below, you can learn the quick, cheap, and easy method for creating aged parchment that looks great on camera. You can skip the video and follow the written text version underneath, but on this occasion, I recommend following the video.
The Process
To create an authentic aged paper, you will need the following.
- Wedding parchment paper.
- Instant coffee.
- Kitchen roll (paper towels).
- A teaspoon.
- Paper distresser.
- A glass of water.
Wedding parchment paper is more oatmeal white than your typical white A4 sheet of paper. This is great as it gives us an excellent foundation for making our paper look old.
Step 1
First, place two large teaspoons of instant coffee in the center of the kitchen roll.
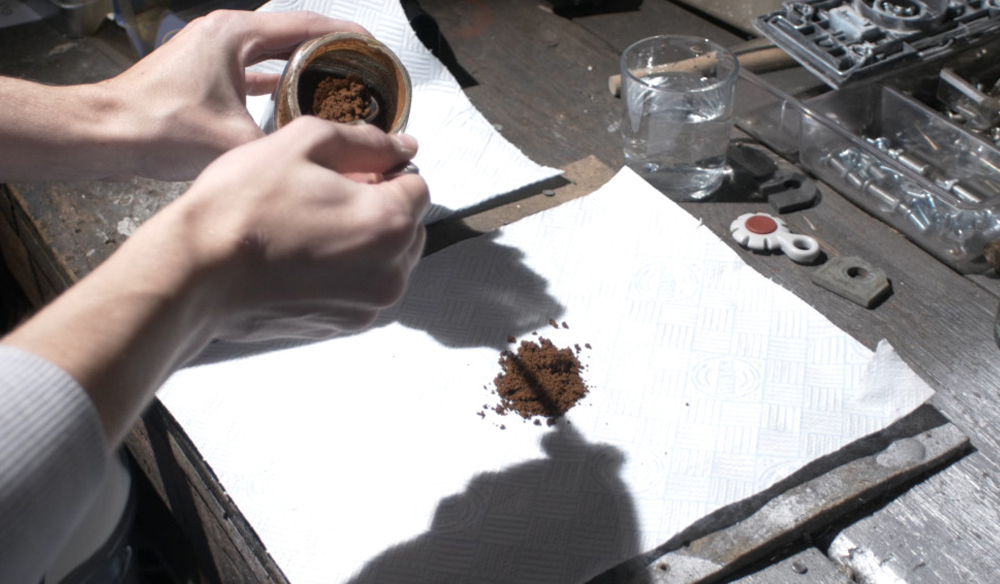
Scrunch up the kitchen roll nice and tight and completely submerge it into the glass of water until the coffee is soaked. With the coffee now slightly liquidizing, start brushing the coffee onto the parchment paper.
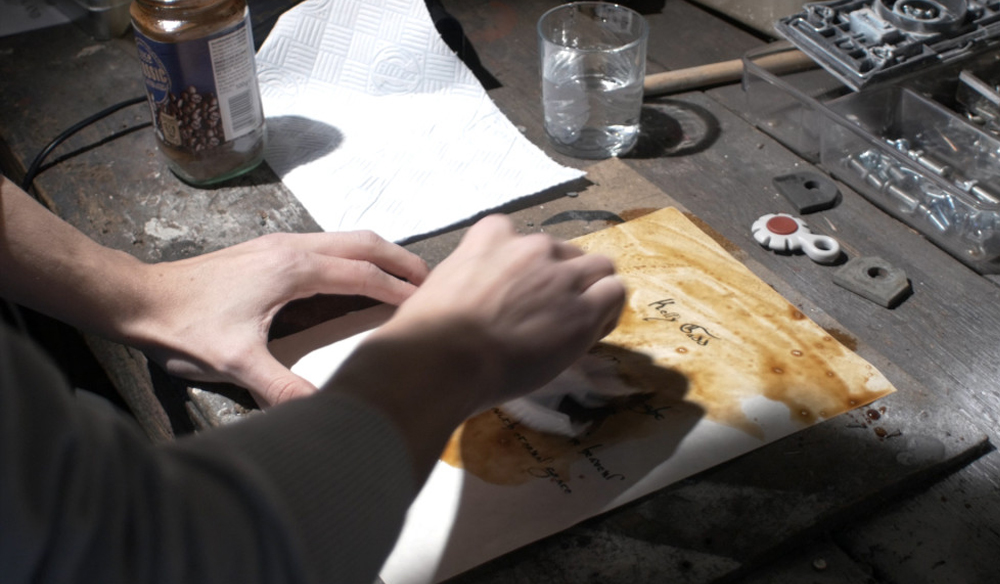
It’s essential to drench the paper in the coffee entirely and ensure it is evenly spread. However, if you make a bundle of aged paper, having some coffee built up in one area might look suitable for variation.
Step 2
With both sides completely soaked in coffee, it’s time to distress the paper further to add authenticity. First, use the hair dryer to make the paper crispy and dry.
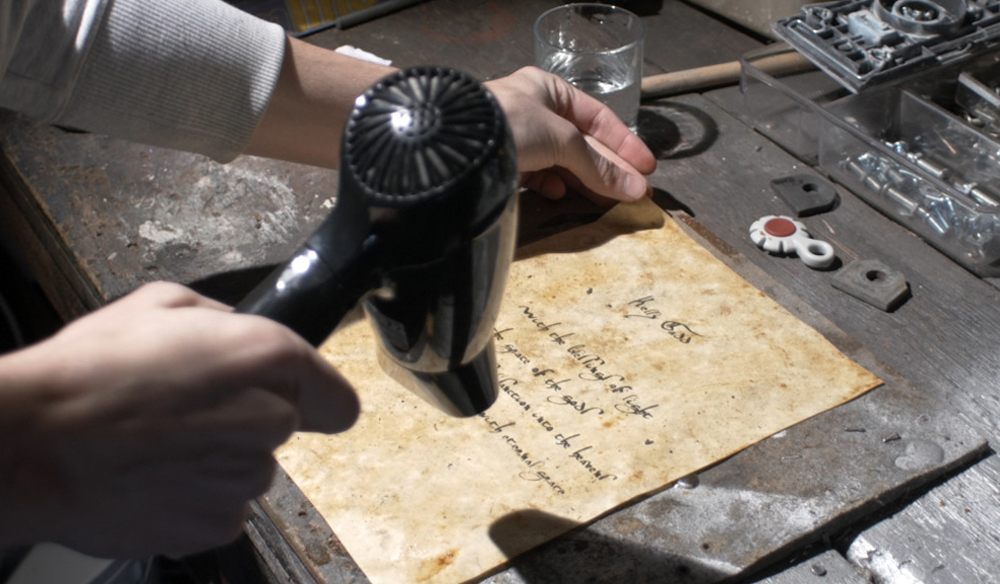
Step 3
Next, we will use the paper distresser to distress the edges of the paper. The distresser has razors in the ridges that tear and roughen paper. This is great as it gives an authentic look for aging a document. Without the hairdryer, the paper won’t dry as hard, and you will find it challenging to roughen the edges.
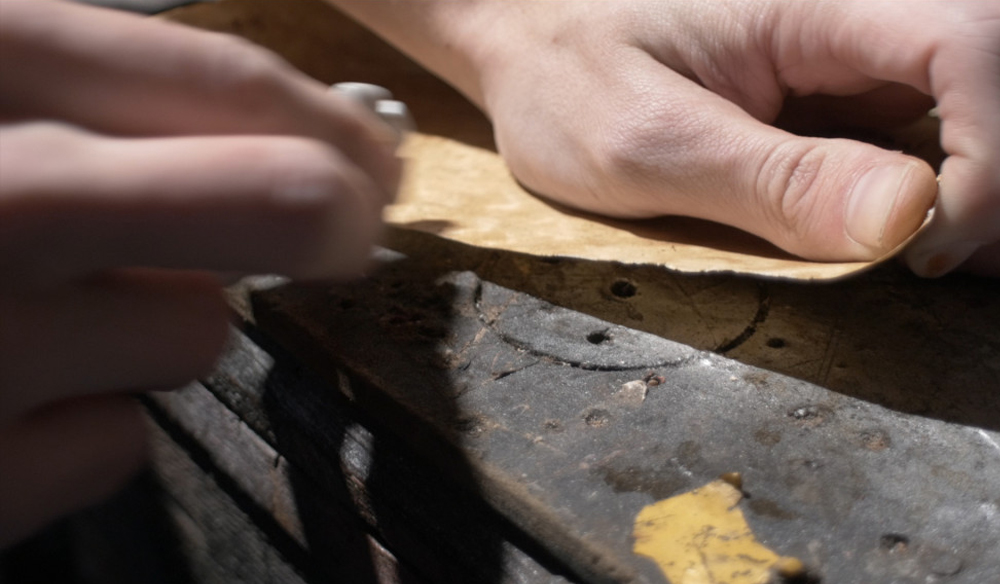
Step 4
Once that is complete—and how rough the edges are is of your creative input—you need to slightly fold the sides of the paper to make it appear warped. In the reference shot below from Lord of The Rings: The Fellowship of The Ring, you can see that the parchments and scrolls are pretty warped, possibly from age or because of how the paper was made back then. Either way, turned-up edges add excellent value to the look of the paper.
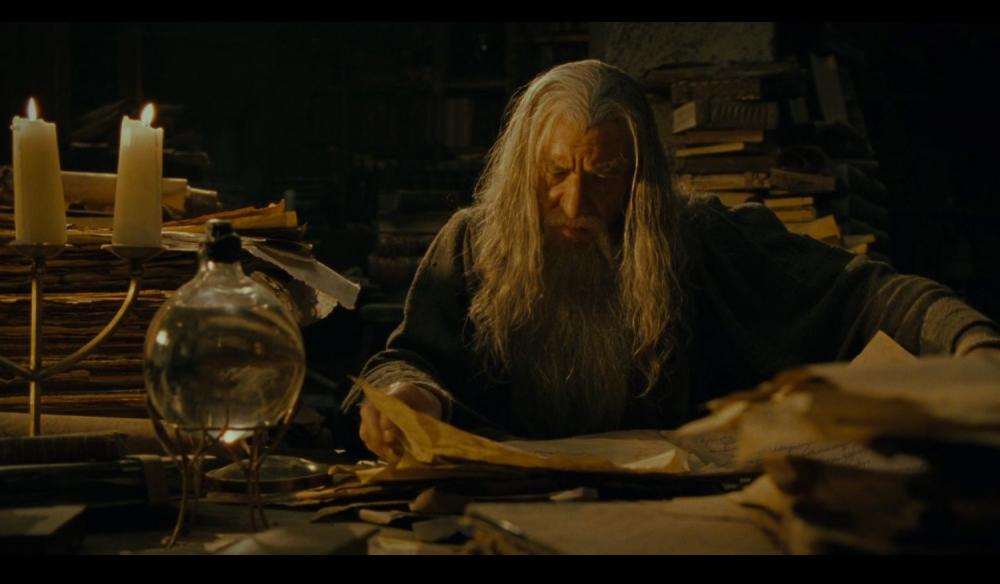
Image via New Line Cinema
There we have it; the paper looks like an aged document. Depending on which era the paper has come from, you can roughen the edges even more. With some color grading, you can further enhance the colors of the parchment and make it look like a relic from another time. You can find more tutorials like this on my YouTube channel, UglyMcGregor